All About Earth-Toned Photography
When it comes to social media, the more consistent your feed’s aesthetic, the more followers and likes you get. Followers are attracted to feeds that are consistent in their aesthetic because they know what to expect. One of the emerging trends we’ve noticed when it comes to photo editing is the use of warm earth tones. Think burnt oranges, browns, deep reds, forest greens, and dusky desert tones. This trend flows over into everything from print photography to family photos and more. Digital trends set the stage.
There’s no arguing that likes are on the rise for photos that include tones and textures found in nature – and there is some color psychology attached to this. Earth tones are calming and trustworthy. But it isn’t just brands we see using this aesthetic. Family photos have also adjusted over the years from heavily saturated images to a toned-down aesthetic.
As we head into the Autumn and Winter months, with all of the rich natural colors that come our way, it’s a great time to learn how to edit your photos with trending tones like these – especially since sending holiday cards is just around the corner. The best part is, BeFunky’s Photo Editor has everything you need to get the look!
Examples of Earth-Toned Photography
If you’re wondering what kind of editing style we are talking about, take a look at these examples. The rich honeyed yellows and oranges and dark browns are key to mastering this look. What you may not know is that the original, unedited photos look much different than the end result.
It is possible to achieve this look with almost any photo, as long as you make great use of BeFunky’s Effects and Color editing technology (we’ll get to that in a moment).
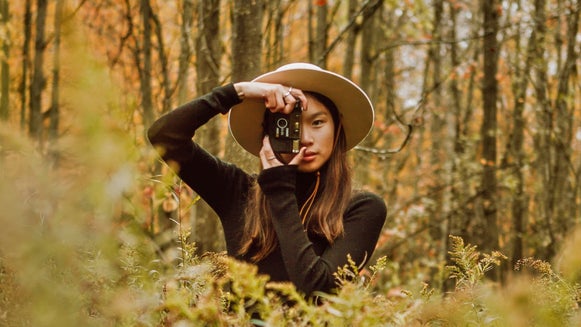
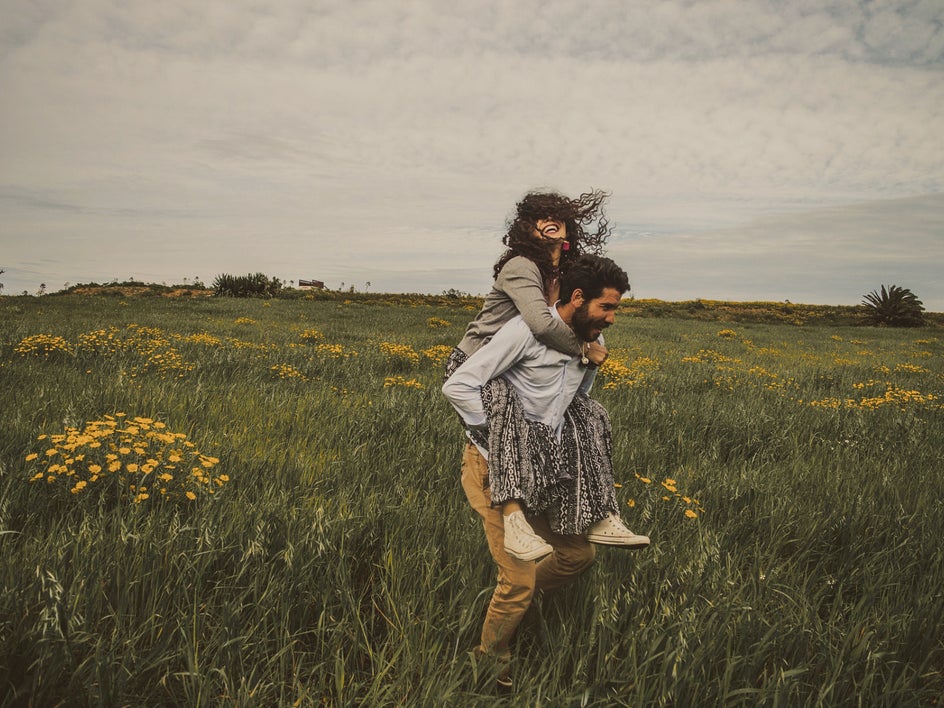
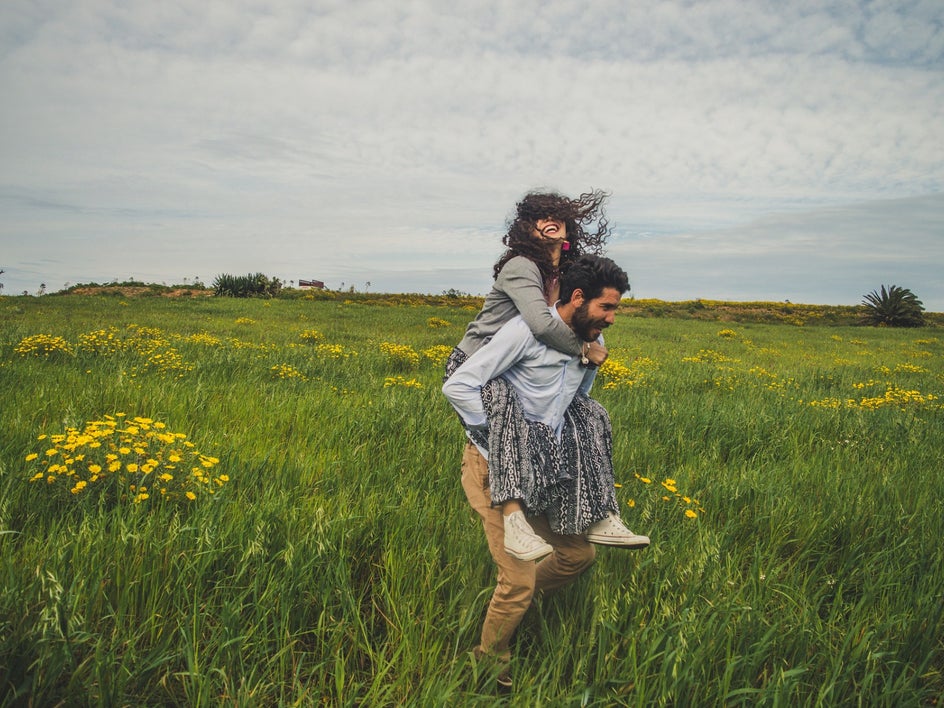
Earth Tones to Soften the Scene
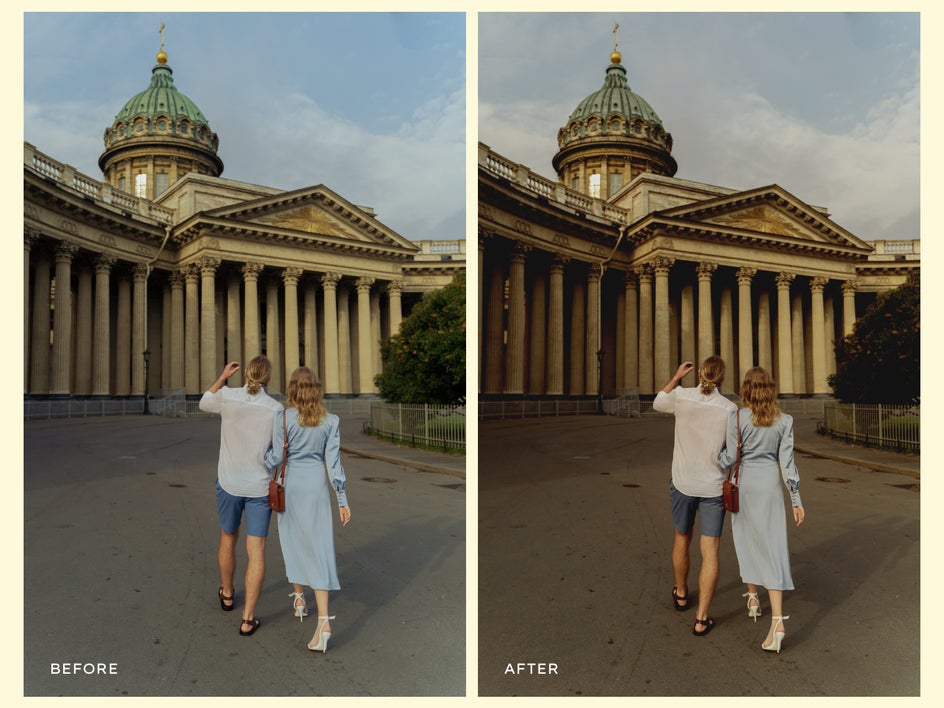
Take these photos, for example. We edited the original to bring out the neutral earth tones from the background, skin tones, and outfits. The use of brown from the landscape and skin tones and the dusty bluish-grey from the sky pull a romantic, warm tone into the background and foreground, while the whites and brights are neutralized and softened.
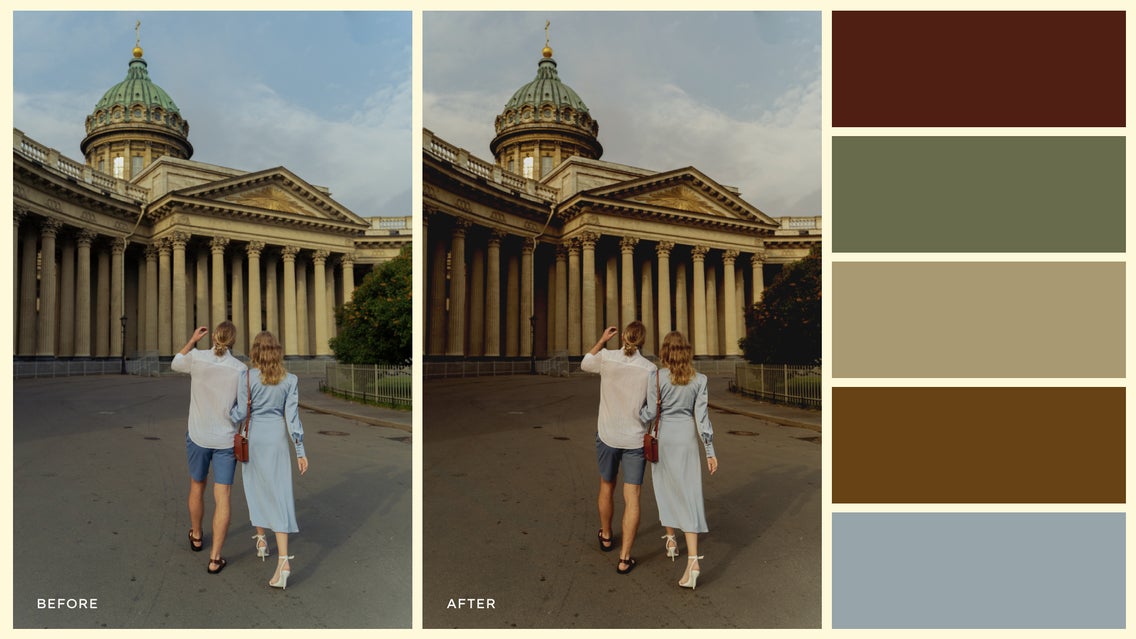
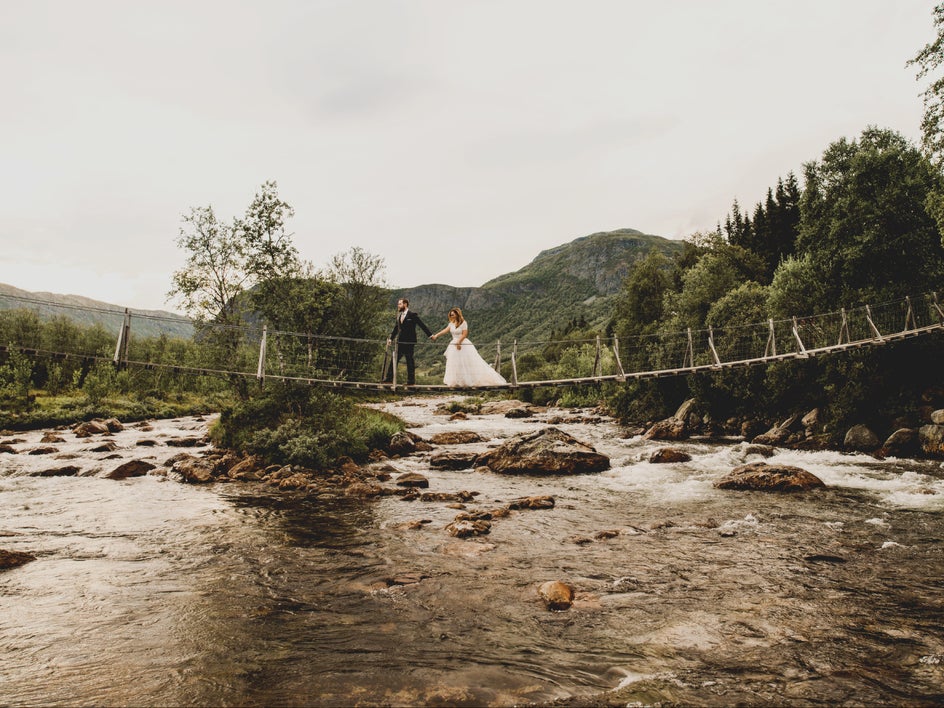
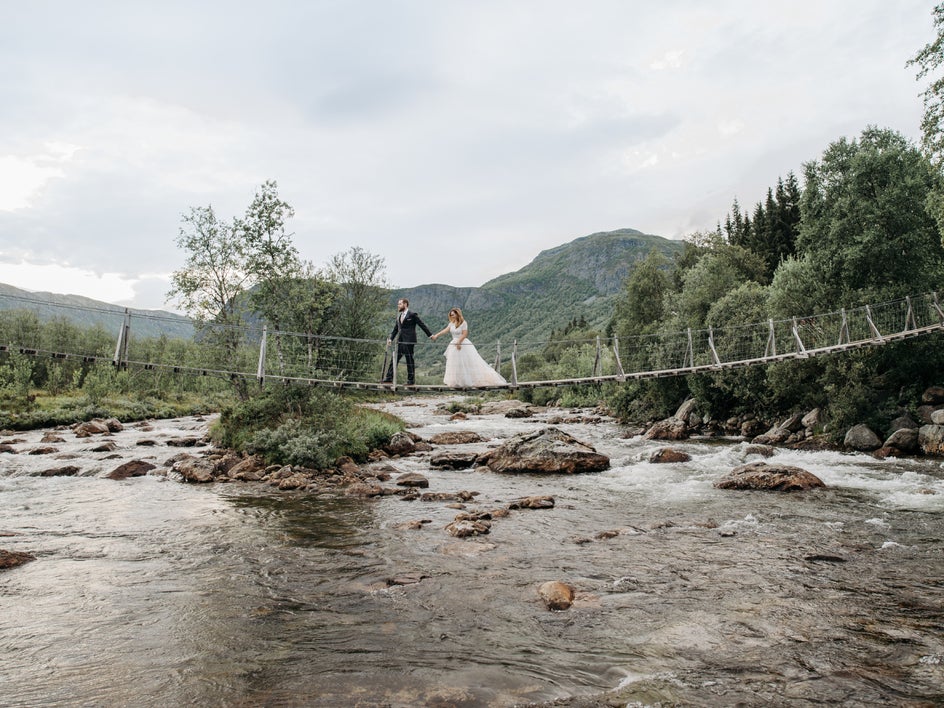
Earth Tones for Tonal Balance
Here’s a photo that serves as a great example of tonal balance. The before photo has an overall neutral to cool tone to it with greens and blues (which are naturally cooler in nature).
The edit works because the blues have been softened, the green has been edited to be more of a yellowed olive and the water looks more brown than blue. This example proves that even if you begin with a cooler-toned image, the photo can still fall into the warm-toned trend with a little editing magic.
Pro Tip: If you are the photographer, make sure that your subject is wearing earth tones. This will help you keep consistency with the aesthetic. Keep outfits neutral, earth-toned, or monotone.
Now that you know what kinds of tones are involved in this photo editing trend, we’re about to show you the tools you need to get the look yourself. Remember, consistency is key, so if you love the look and are looking for a way to refresh your photography style, get ready to learn how. If you want to achieve this look for an entire shoot you do, check out How to Batch Edit Photos With BeFunky.
How to Incorporate Earth Tones During the Photo Editing Process
When thinking about earth-toned editing, it’s a common thought that adjusting the temperature slider to the warmer side will help bring out more browns and honey-colored tones. The actual process of bringing out earth tones is a bit more time-consuming but the payoff is a natural, warm-toned filter rather than an unnatural, oversaturated photo.
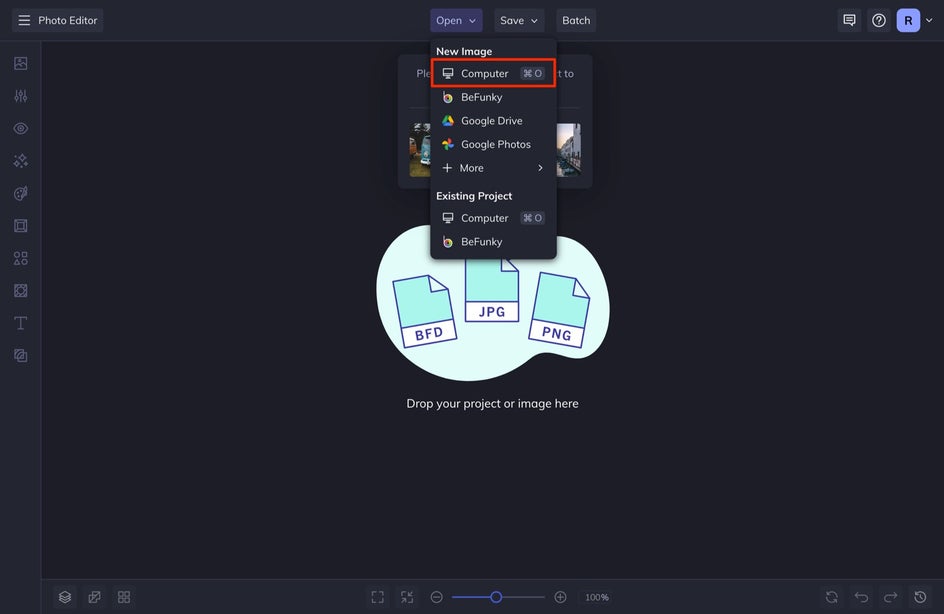
Step 1: Open Your Photo
To get the process started, head to BeFunky’s Photo Editor and upload the photo you want to edit by selecting the file from the Open tab or simply dragging and dropping the image directly into the interface.
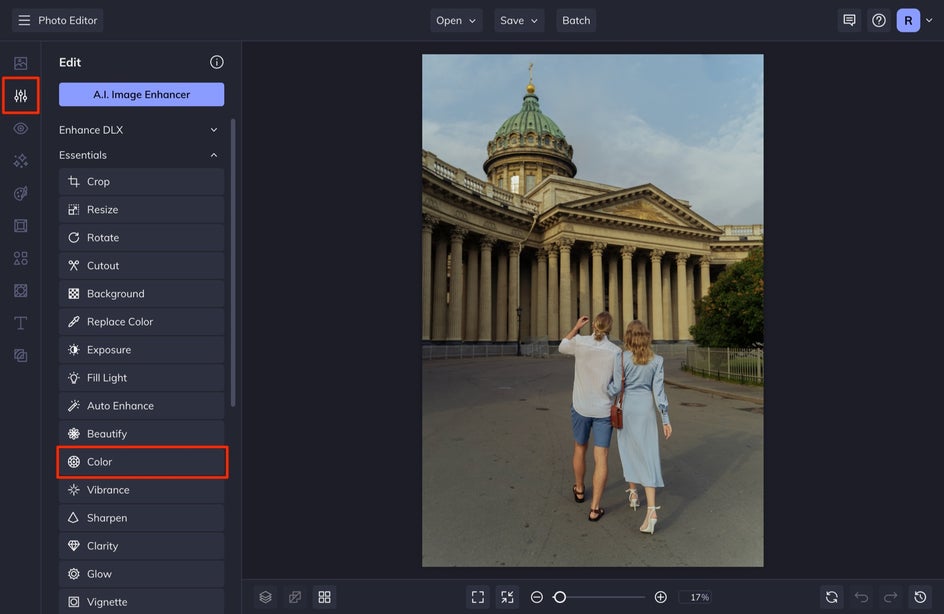
Step 2: Adjust Saturation and Color
The first thing you want to do is adjust the overall saturation and color of your photo. Select the Edit tab in the left-hand menu.
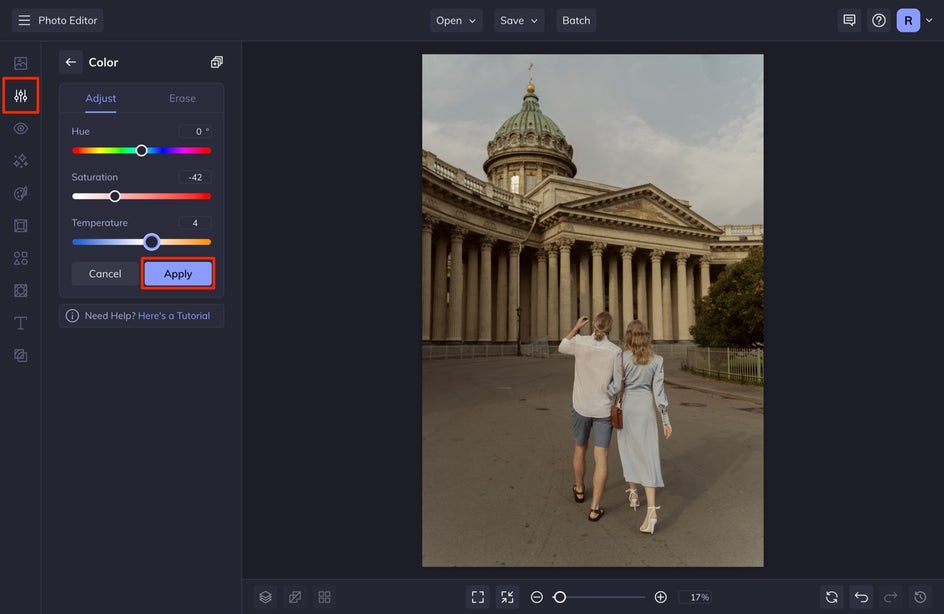
Once here, select Color. While the temptation to increase the Saturation and Temperature slider might be real, you'll want to decrease the Saturation slider by 10-20 and increase the Temperature slider by only about 5-10 to the warmer side. The temperature slider should not be heavily relied on here. When you’ve made the edits, click Apply.
Step 3: Adjust the Levels
The Levels tool is where one of the essential factors when warmth comes into play. It has the ability to change the shadows and highlights in your image in a single tool. The goal is to make your photo have a high, soft contrast.
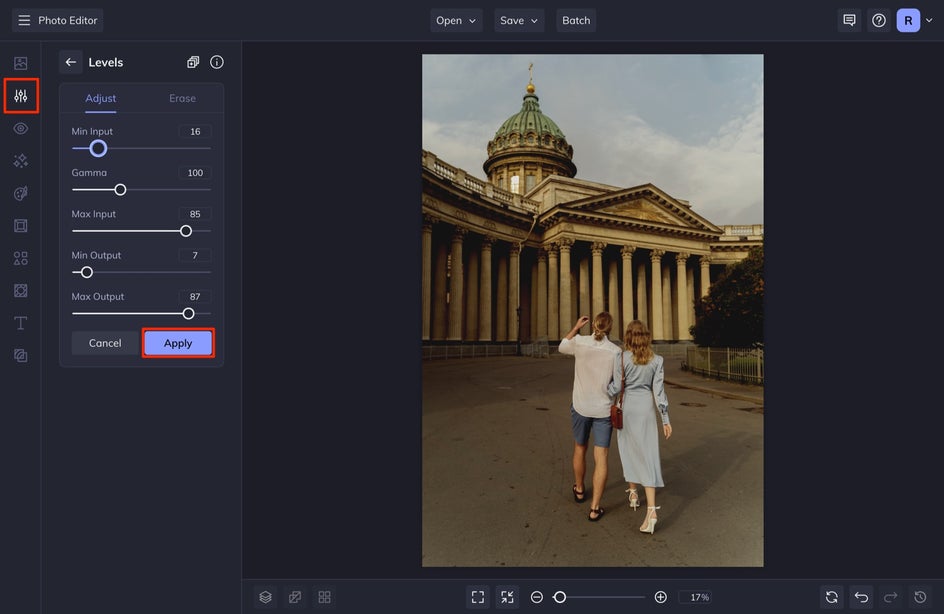
You want to adjust the shadows so they are deep but matte, while also adjusting the highlights to have a dim and soft highlight. You can achieve this look by adjusting the levels below:
- Min Input: A higher input will deepen and intensify your shadows. Increase this to about 10-20.
- Gamma: This will adjust your overall exposure. Bring this level to around the 80-100 range. We want to give the image a darker overall aesthetic.
- Max Input: This adjusts the highlights of your image. The lower you go, the brighter your highlights. Adjust this level to the 80-90 range. We want to bump the highlights slightly, without over-exposing them.
- Min Output: This level will adjust your shadows and give them a more matte look. Increase this level by no more than 10.
- Max Output: This will adjust your overall exposure by softening the highlights. If you are looking to make your highlights soft and dim, decrease this to the 80-90 range.
You will notice a significant change to your image once you make these above adjustments. You will notice the earth tones really come to life.
Step 4: Mute Overly-Saturated Colors
There are many ways to achieve this look, but I have found that this method is the most foolproof. From the Edit menu, select Replace Color. Any color that is showing up too saturated, you can adjust it here. Usually, these colors will be the greens and blues in your image. We are going to adjust the greens in this image.
First, select your Source Color. Use the Eye Dropper tool to select the color in your image that you want to desaturate. Once you have this selected, drag the Tolerance slider all the way down to the left and increase it slowly. You want to try to choose a tolerance that includes the most amount of your color, without affecting the rest of your image. You will notice that if you bump it up too high, you affect more of the photo. Adjust this to the left until you are just affecting the color you intend to change. Once you have done this, select Apply.
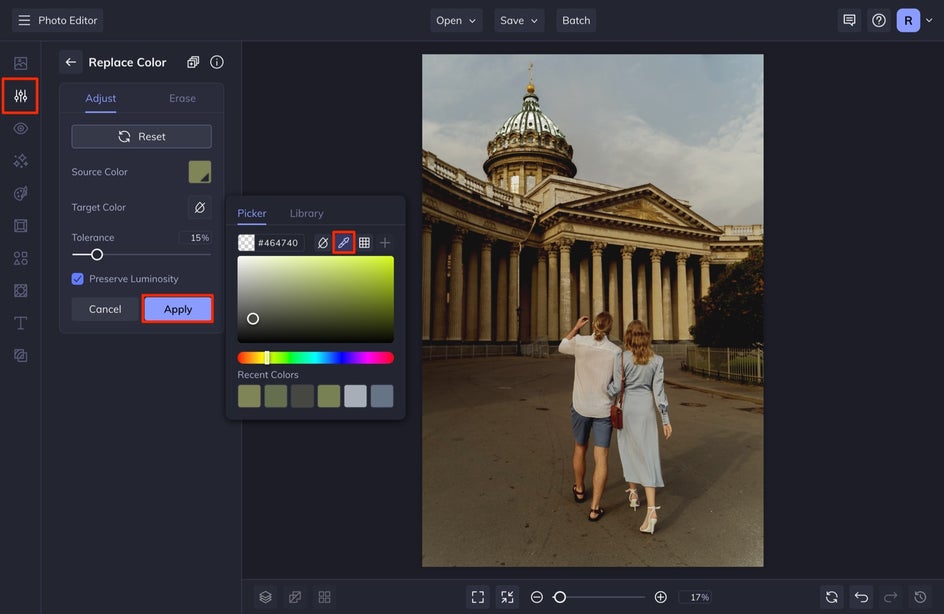
I repeat this step with each color I am wanting to tone down. Sometimes you need to adjust the shadows and highlights of a color to achieve this effect. Trust me, this step is worth the process. We ended up doing it to both the green and blue shadows, as well as the green and blue highlights.
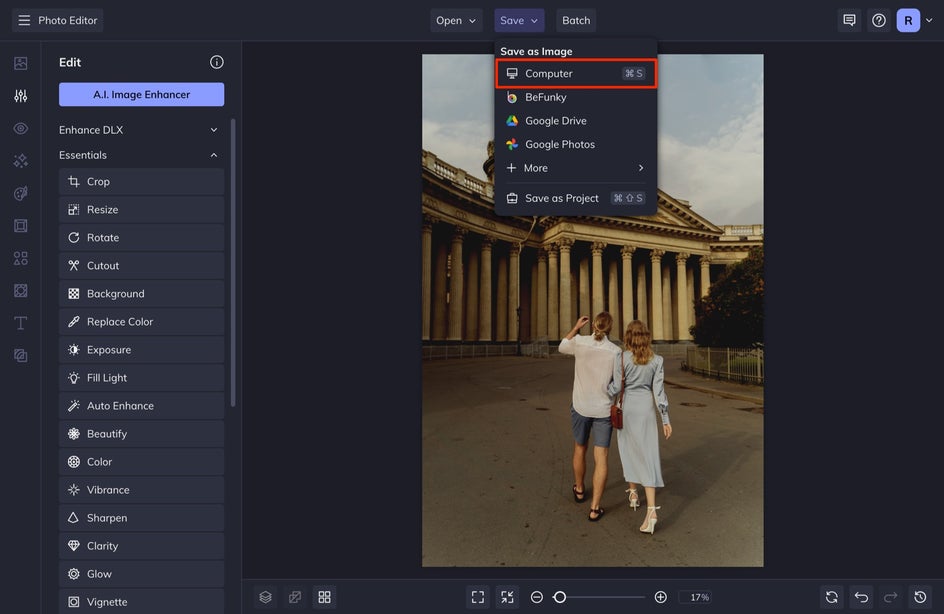
Step 5: Save Your Earth-Toned Image
When you are finished making edits, head up to the Save tab at the top of your screen and save your image to your Computer.
Add Earth Tones to Your Photos in Seconds
This selective technique is a bonafide way to get the results you want for an earth-toned image. You can see how the image above was lackluster and dull at the beginning, and ended up popping in color in all the right places while easing and desaturating colors in other areas. This technique is so amazing because it gives you more control over your images and is a brilliant way to achieve the look of so many famous photographers without expensive software.
If you are wanting a quick method to achieve this look, feel free to check out the Effects tab for pre-made filters that can give your images that earth-toned vibe in seconds. The Chromatic effects are especially helpful for this look!