2 Ways to Add Illustrations to Photos

If you’ve ever experimented with adding illustrated elements to your photos, you’ll know just how much intrigue they can create. After all, illustrations turn something we’re all so familiar with – a simple photograph – into a unique work of art, whether you’re looking to stand out on social media, creating branded imagery for marketing materials, or simply producing some personal projects.

When it comes to helping you achieve the illustrated look you’re loving, BeFunky has two great tools up its sleeves: the Paint Brush tool and the Graphic Library. They’re both fun and easy to use, so keep reading, because we’re going to show you how!
Use the Paint Brush Tool
Looking to get in touch with your inner artiste? BeFunky’s Paint Brush tool is located in the Touch Up tab of the Photo Editor, and lets you add freehand illustrations to your image.
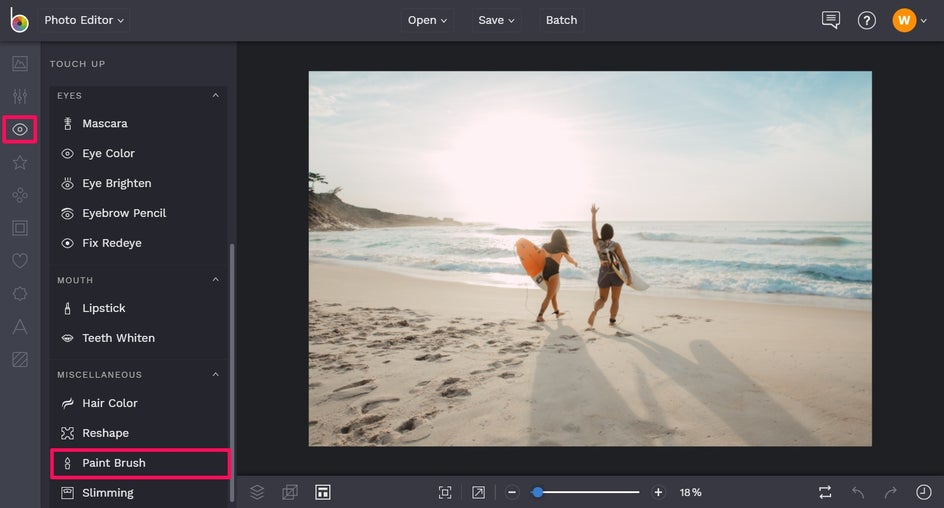
Once you’ve located the Paint Brush tool in the Photo Editor, a variety of options will be available to you. Start by selecting your Paint Color by clicking the box next to Color. This will open up the Color Palette, from which you can choose your desired color.
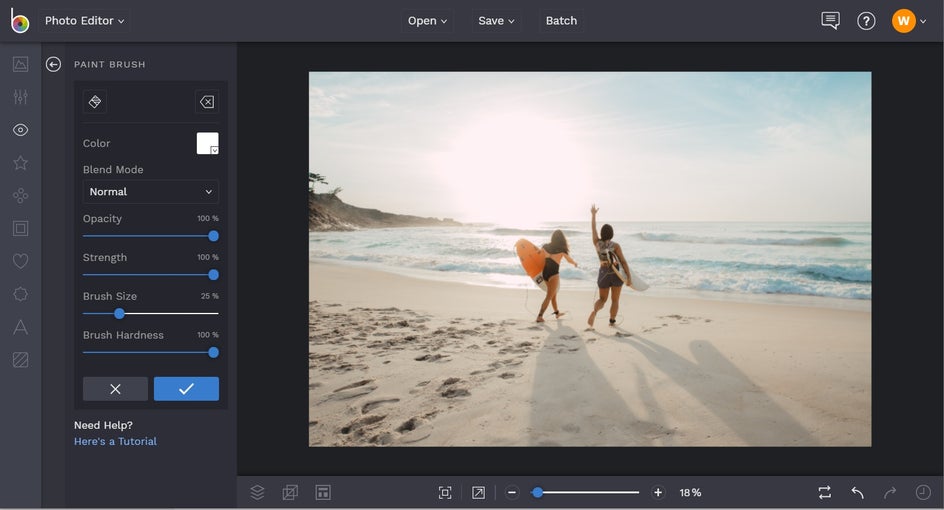
Additional elements you can change include the Opacity, Strength, Brush Size, and Brush Hardness. Simply use their corresponding sliders to increase or decrease the effect.

Then, use your mouse to move the Paint Brush around on your template, clicking to apply the paint.
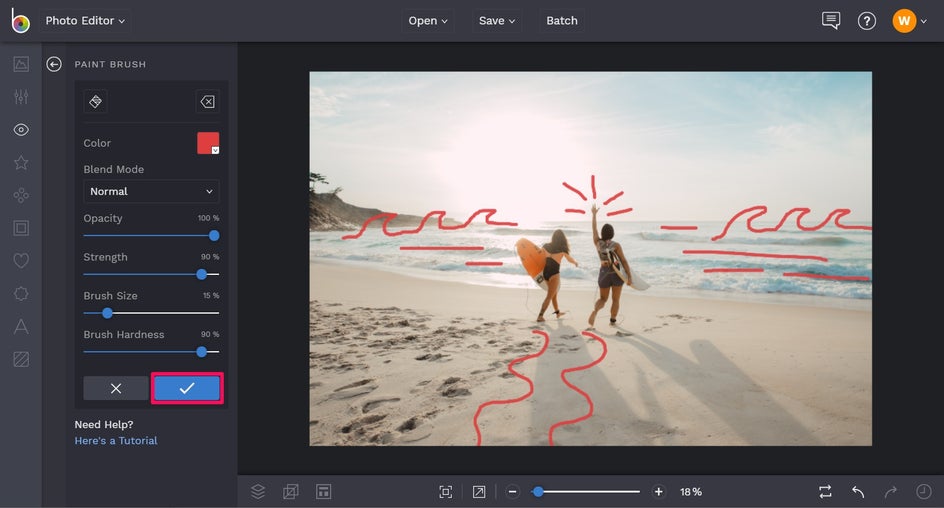
Once you’re done illustrating your photo, just click the blue checkmark button to apply your effects. Then, it’s time to click Save at the top of the screen and choose your desired save location. Easy!

Use the Graphic Library
Not quite ready to freestyle your illustrations? That’s ok! Our Graphics tab has a wide range of ready-made graphics you can add to your photo, saving you the need for freehand painting.
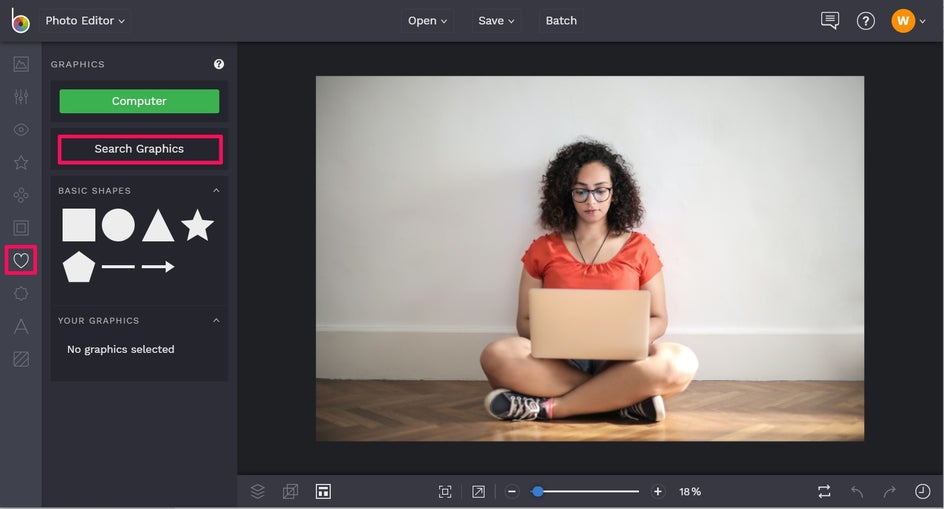
You’ll find the Graphics tab in the main menu on the left (it’s the heart symbol) of any of our creative suite, including the Photo Editor, Graphic Designer, and Collage Maker. Just click Search Graphics to access BeFunky’s huge collection of graphics.
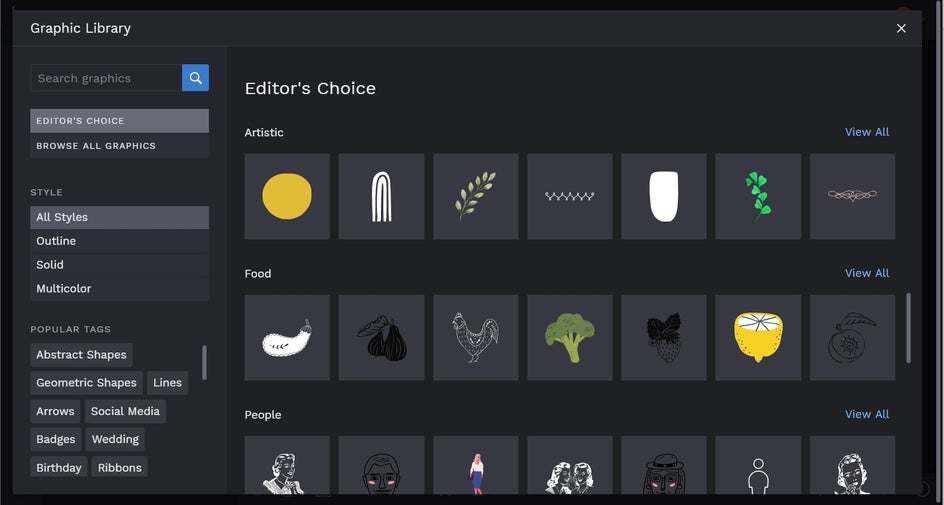
You can browse our Editor’s Choice graphics for inspiration, click on one of the Popular Tags in the left menu, or type your search term into the Search Bar at the top left. You can also filter your results by Style, including Outline, Solid, Multicolor, or All Styles.
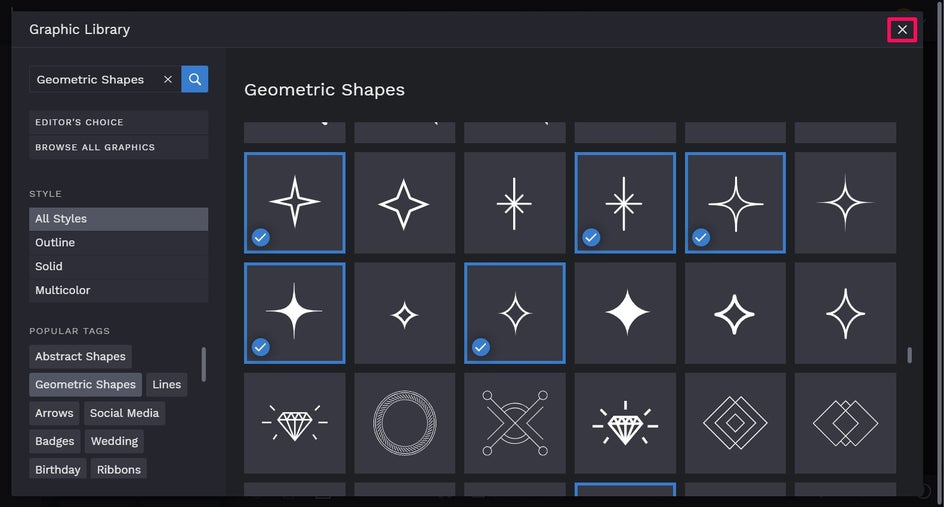
To select graphics and add them to your Image Manager for use in your photo, just select them with your mouse and a blue checkmark will appear in the chosen image’s corner. Once you’re done selecting graphics, click the ‘x’ in the corner to navigate back to your project.
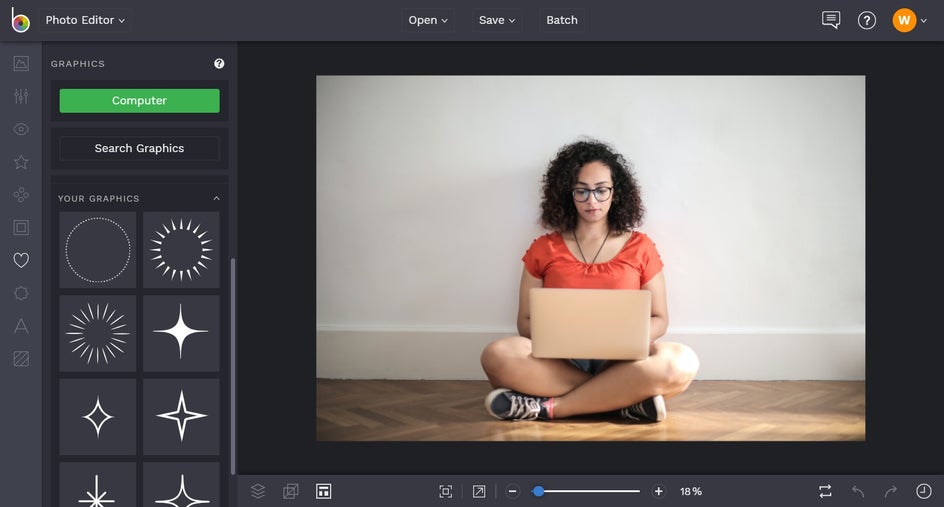
You can then drag-and-drop your graphics onto your photo. Use your mouse to move them into their desired positions. You can also make your graphic larger or smaller by clicking on it once, then dragging the outer corners outwards or inwards. Want to rotate your graphic? Just click your graphic then rotate it using the outermost circle. When you click on any graphic, you’ll also notice the Graphic Properties toolbar which appears. From here, you can change things such as the graphic’s Color Overlay, Tint, and more.
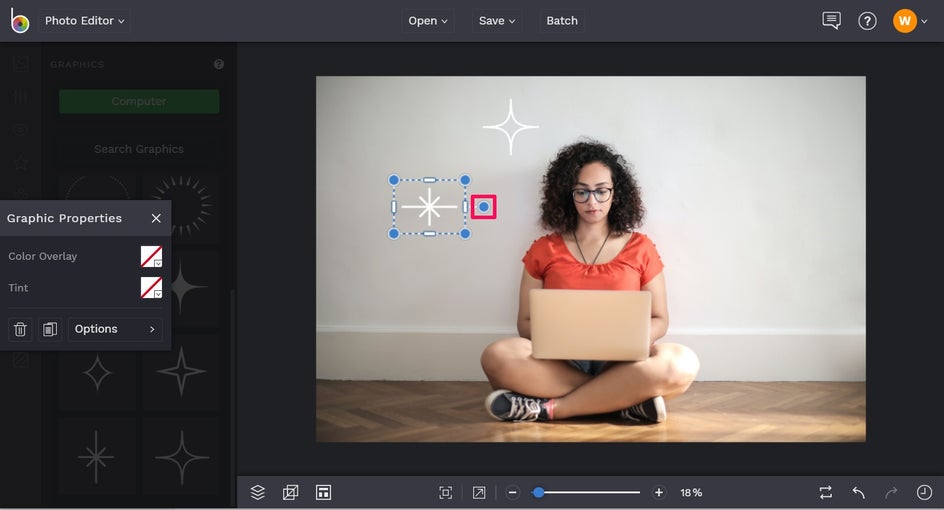
To change your graphic’s color, for example, click the box next to Color Overlay, then select your desired color from the Color Palette, by typing in the color’s HEX Code, or by using the Eyedropper Tool to select a color already present in your photo (as we’ve done here).
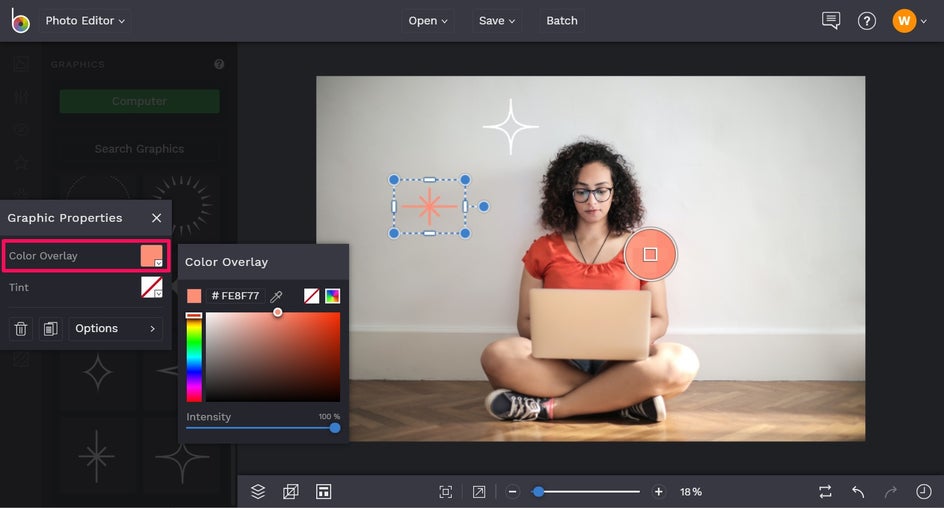
Once you’re happy with how your graphics look, it’s time to save your photo. Just click Save at the top of the screen, then select your desired save location. Simple!
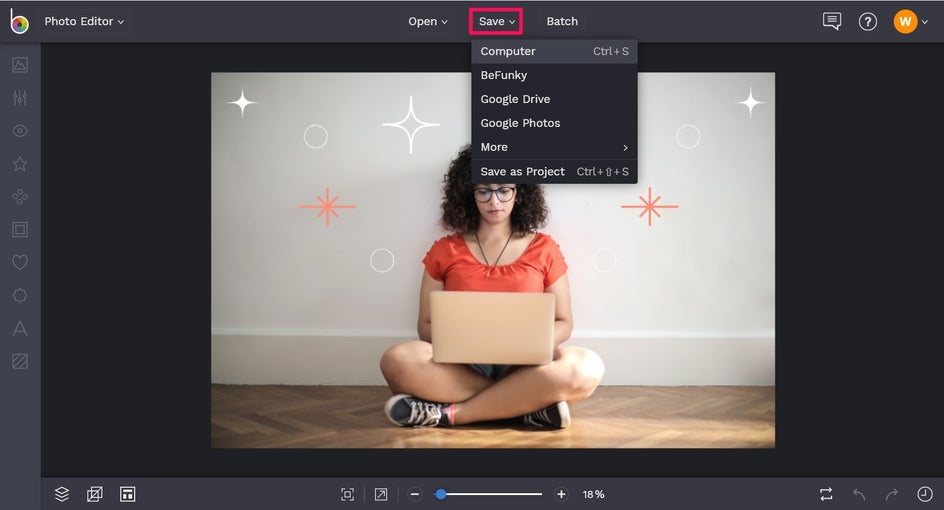
Final Results

If you’re looking to quickly and easily transform your images, you just can’t go past adding illustrations to ramp-up the wow-factor. Ready to take your own photos from blah to hurrah?


