Everything You Need to Know to Create the Perfect Double Exposure Photograph
Staying innovative in your photography can be a challenge for even the most experienced creatives. To stay ahead on social media, maintaining a creative presence is an important step to building an audience and creating projects that stand out in the sea of online content. One way to up the intrigue on your feed: post some eye-catching double exposure photography!

Even if you don't know the first thing about double exposure photography, it's easy to create with BeFunky. You don’t even need an expensive camera to bring these unique images to life. Instead, all it takes is a few great images you'd like to blend together and the Cutout tool in BeFunky's Photo Editor! It's the perfect, easy way to create the kind of content that makes your feed pop.
What is Double Exposure Photography?
In photography, double exposure involves combining two exposures to create a single image. This is achieved in the capturing process using a DSLR camera and enabling Multiple Exposure in the shooting menu, then manually capturing both exposures. Creating an intriguing double exposure takes a little planning though – you have to set out with an idea of what each photo will be, then make sure they combine well.
Instead of planning out and capturing a double exposure on the fly, BeFunky's Cutout tool makes it super easy to create these same types of beautiful images, minus the complicated and expensive DSLR! We'll show you some cool examples to inspire you, plus walk you through exactly what you need to do to get the look with your own photos.
Double Exposure Photography Inspiration
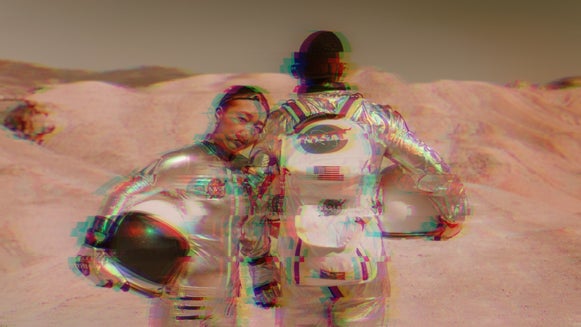
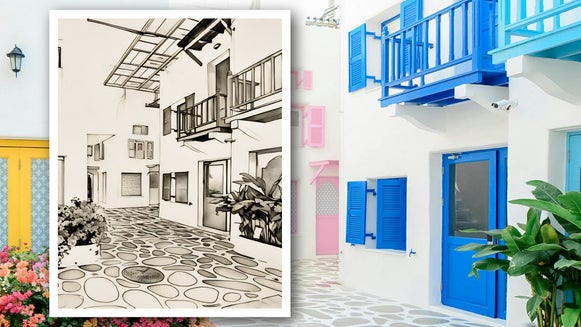
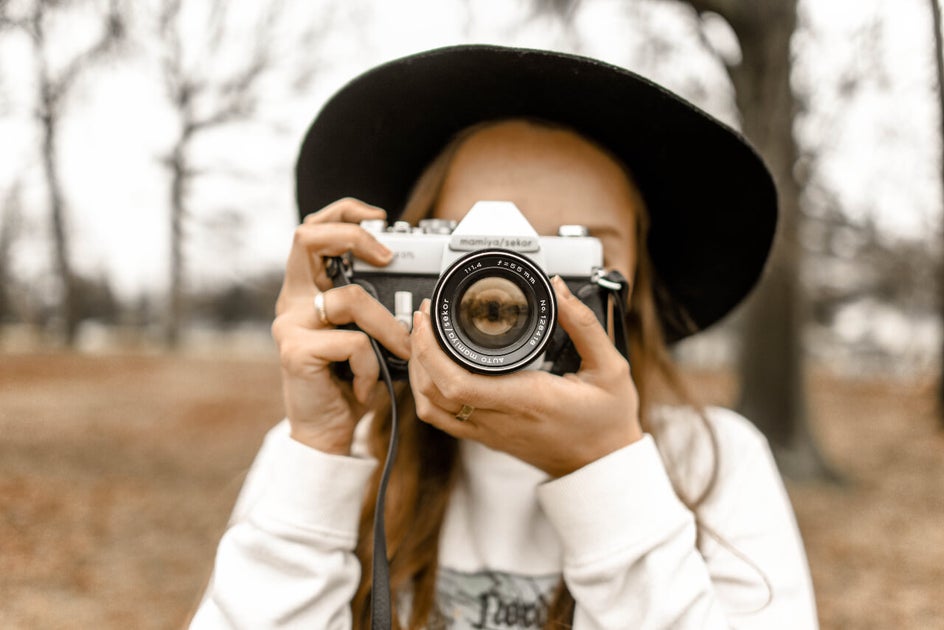
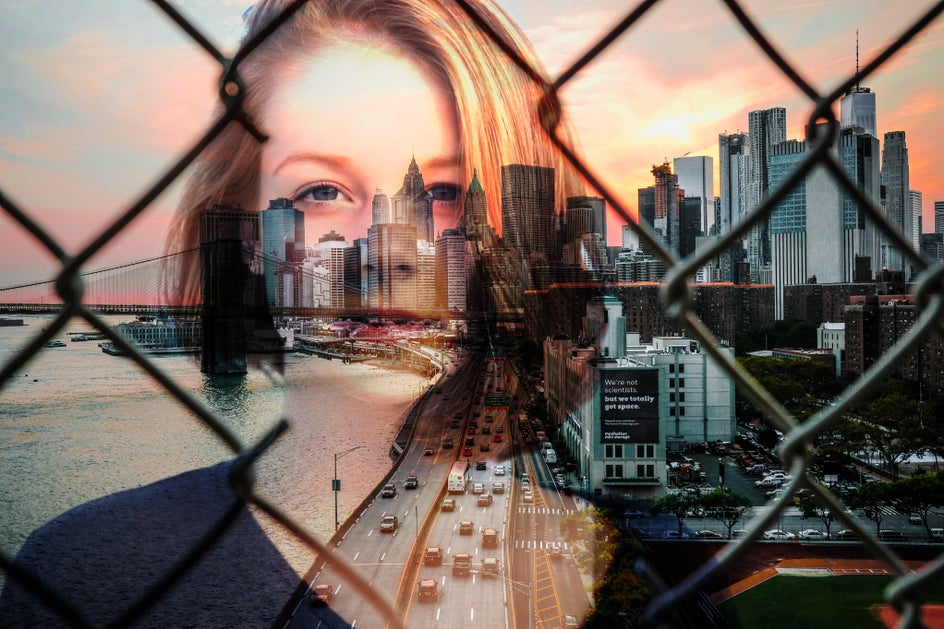
The most popular type of double exposure photograph usually involves some form of portrait intermixed with a natural background. These types of photos highlight the different outdoor textures of the natural world, with the personal nature of portraits. Many of these portraits involve nature scenes or cityscapes, with the portrait blended into the background and foreground of the shot.
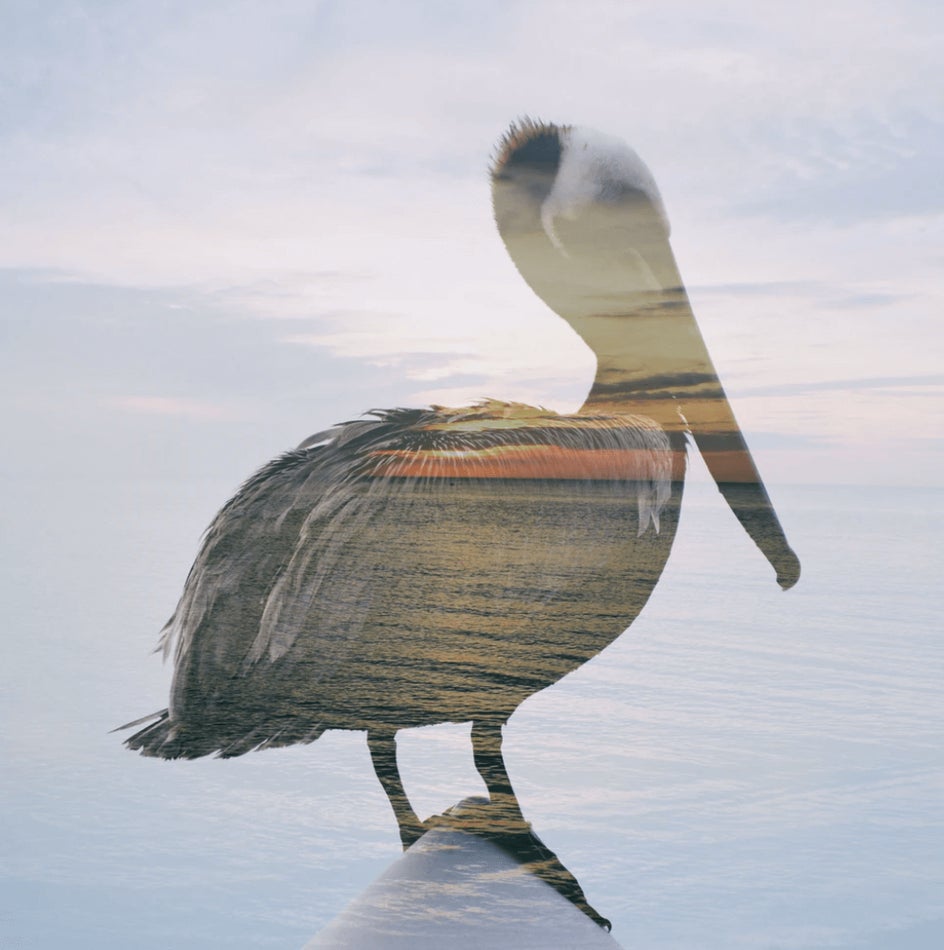
Combining two distinct images is common in animal and wildlife photography. Double exposure is a great way to capture an image of an animal and the environment it calls home.
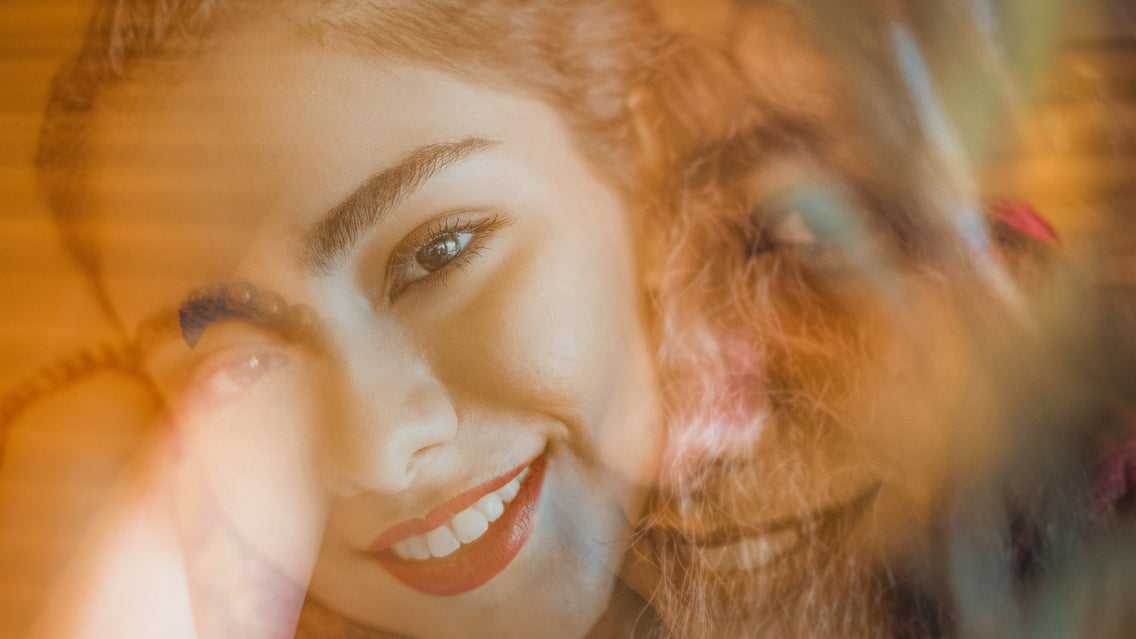
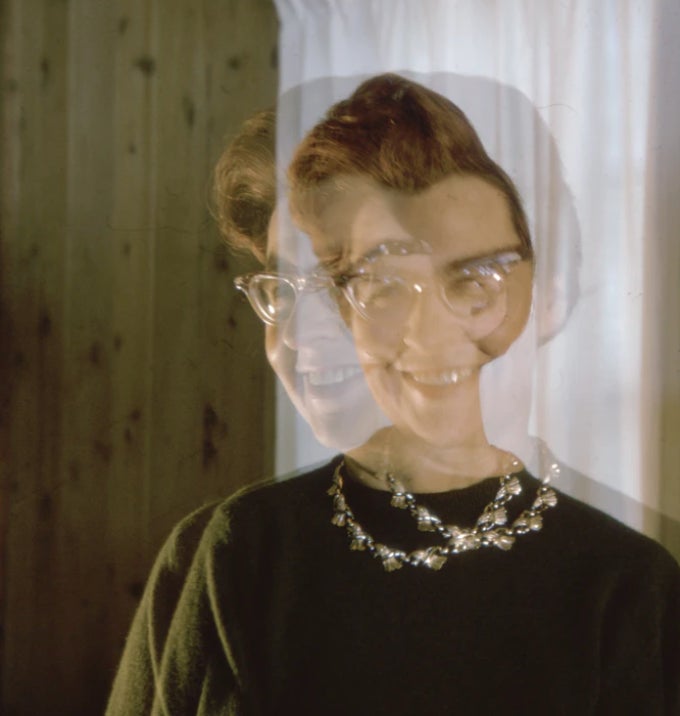
You can also use double exposure to capture multiple facial expressions in creative portraits. This technique allows for a multifaceted story to be told in a singular photograph.
Using these techniques is a great way to give your photos an edge unlike any other. Here’s how you can use the BeFunky cutout tool in order to break your wildest creative visions to life.
How to Create Double Exposure Photography in BeFunky
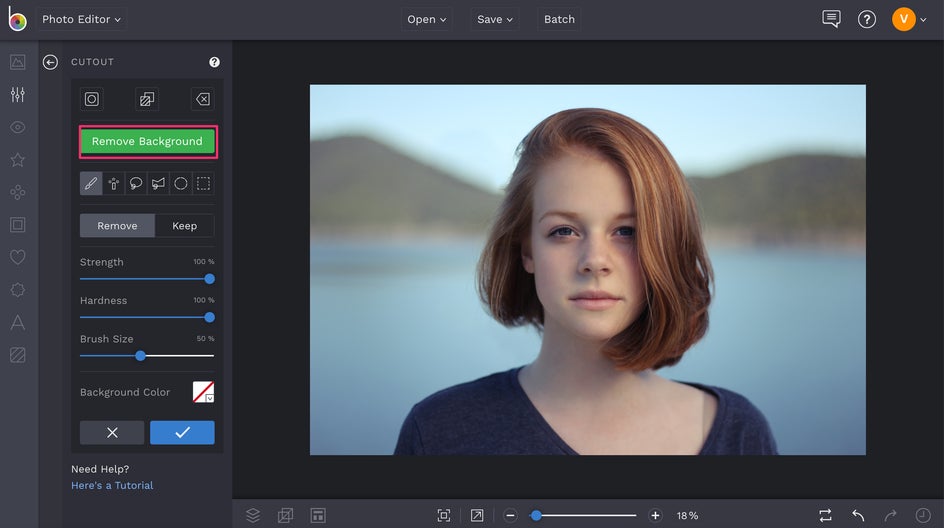
To create a double exposure photo in BeFunky, begin by opening Photo Editor. Then, upload the photo that you would like to use as a layer over the background to create the double exposure effect. You can do this by using the Open tab at the top of the Photo Editor and choosing your image file, or simply dragging and dropping an image into the interface. Once you've got your image uploaded, click on the Cutout tool in the Edit menu on the left.
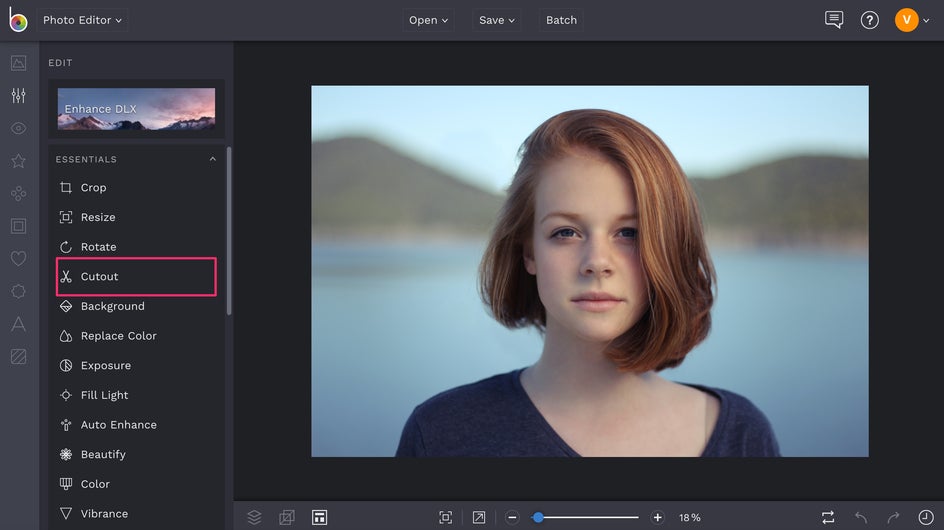
Once you're in the Cutout tool, click on the Remove Background button to remove the background from your image. This tool uses AI to detect the subject in your photo and erase the background behind it.
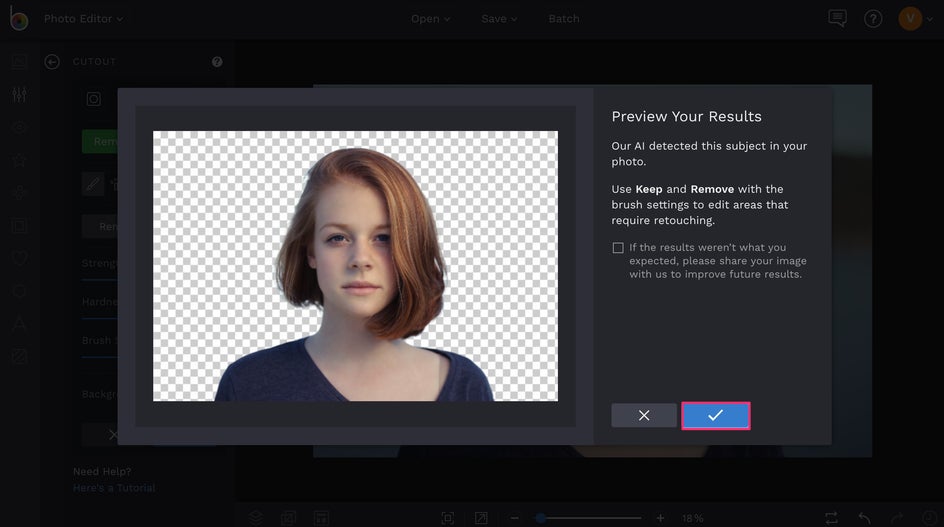
A preview of your Cutout will appear, showing you the subject that the Background Remover detected. Click the blue checkmark to proceed, and note that you can use the different Cutout tool brushes to clean up any areas that need it.
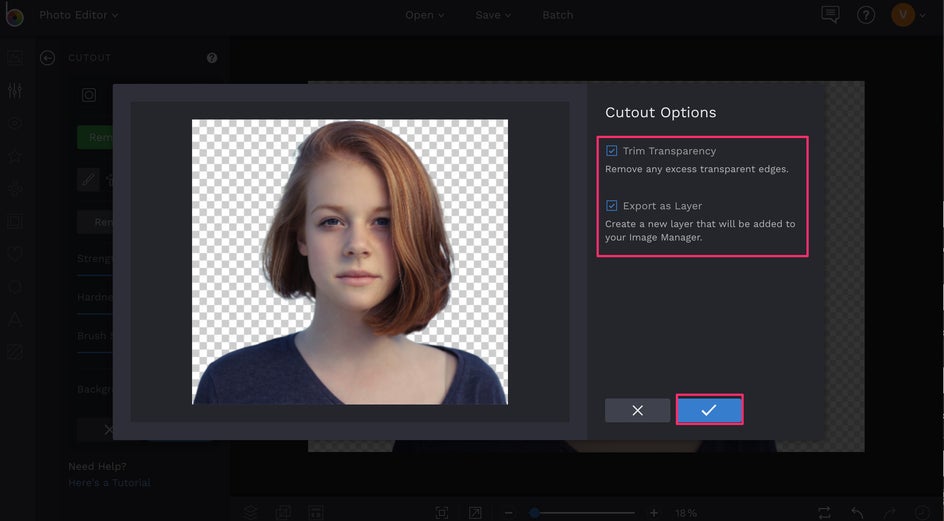
When you are returned back to the main Cutout tool interface and all looks good, click the blue check mark again. You’ll then be prompted to choose some final Cutout Options. Make sure that you check the box for both Trim Transparency and Export as Layer. The Trim Transparency option will trim any excess background from around the subject, while the Export as Layer option will add the image layer to the Image Manager. We'll show you why this is important next, but until then, click the blue checkmark.
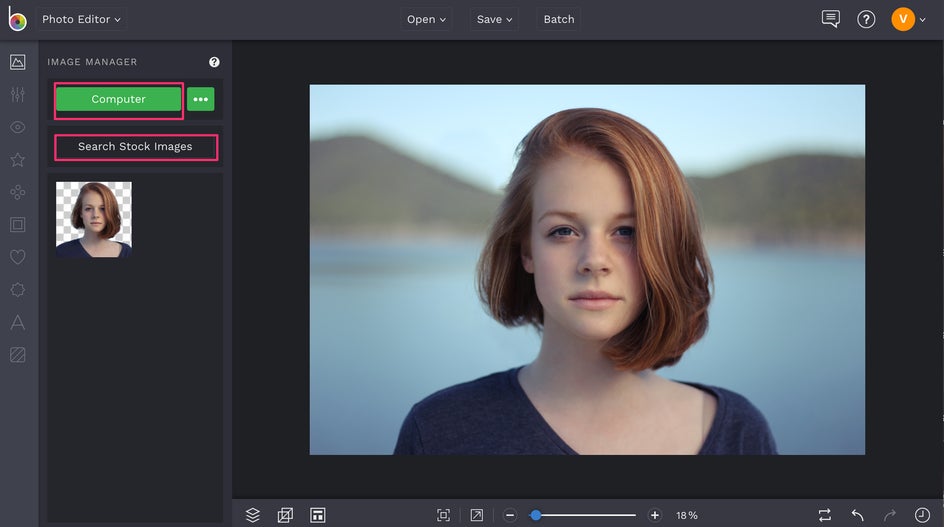
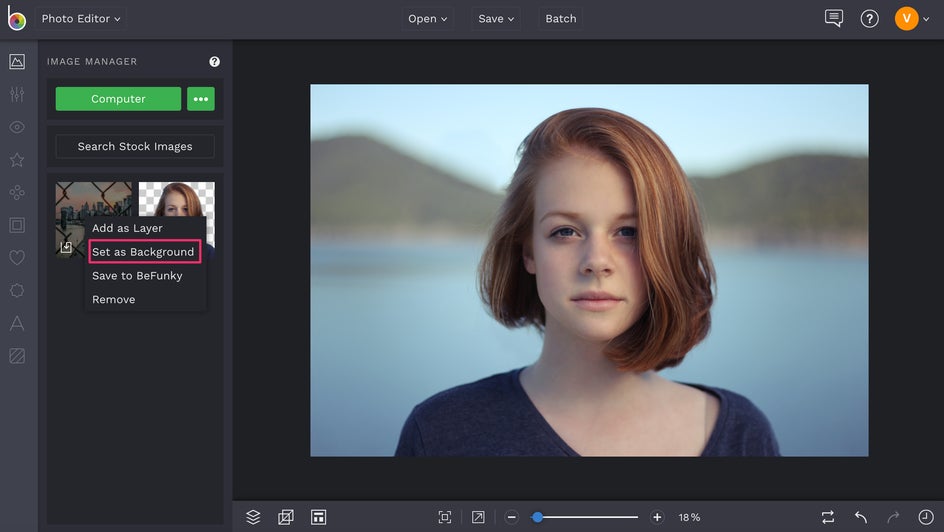
Next, open the Image Manager tab (the top icon) in the menu on the left and you'll see the image layer you just created loaded in there as a thumbnail. From here, you'll need to upload the background image you'd like to blend with your image layer to create the double exposure effect. You can either use the Computer button to upload an image from your computer or choose the Search Stock Images button to browse over a million free stock images to use. Remember, environmental scenes like forests or cityscapes are a great place to start for creating beautiful double exposure photos.
Once your background image is uploaded in the Image Manager, click on it's thumbnail and choose Set As Background from the pop up menu.
Now, you’re ready to start blending your two photos together to create a double exposure image! Click and drag the image thumbnail of the layer you created from your Image Manager and onto your background. Use the blue circles around the layer until it's resized to your liking.
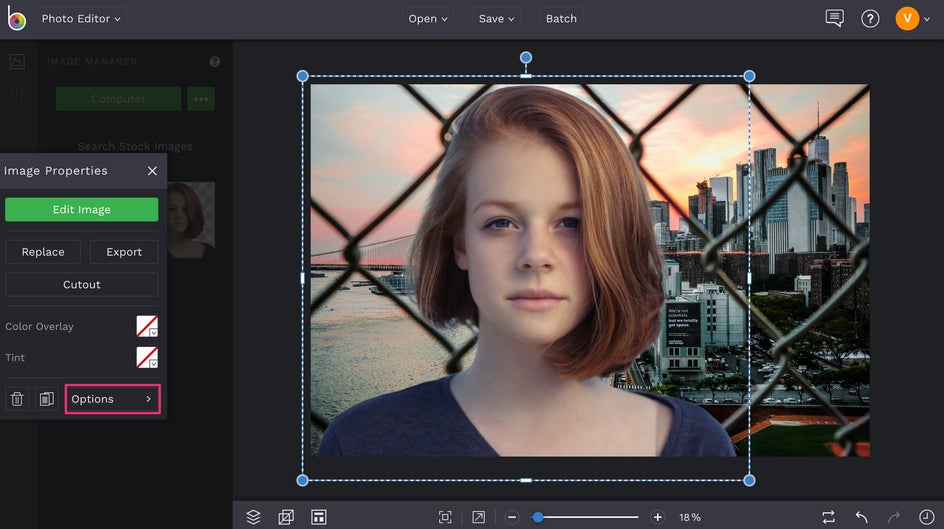
Here’s the fun part. Click on your image layer and choose the Options button from the Image Properties menu that appears. In the dropdown menu beneath Blend Mode you can explore the different options of blending your initial image into the background until you find your favorite. We've gone with Hard Light to create this look, but be sure to try out all of the Blend Mode options until you like what you see with your images.

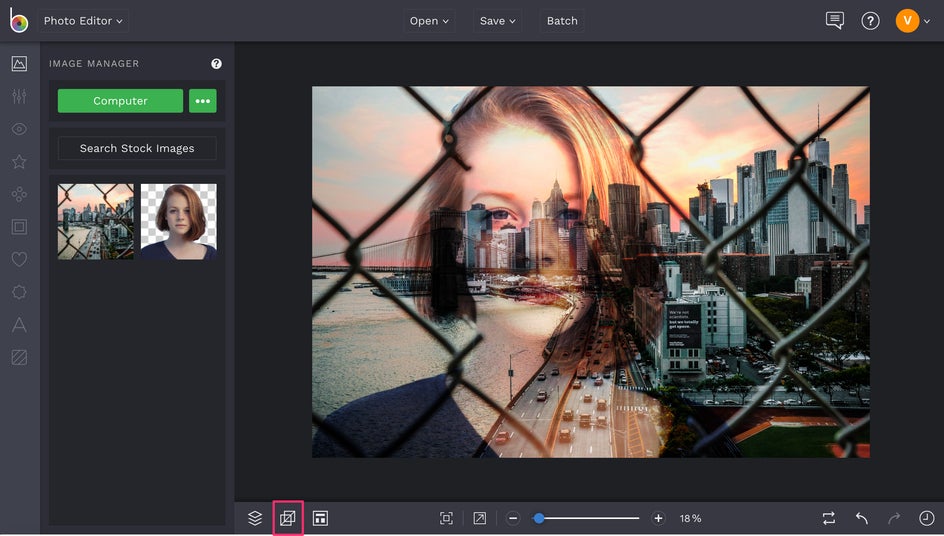
After you've got your Blend Mode down, all that's left to do is click the Flatten Layers button in the bottom menu to essentially "glue" the two photo layers together.
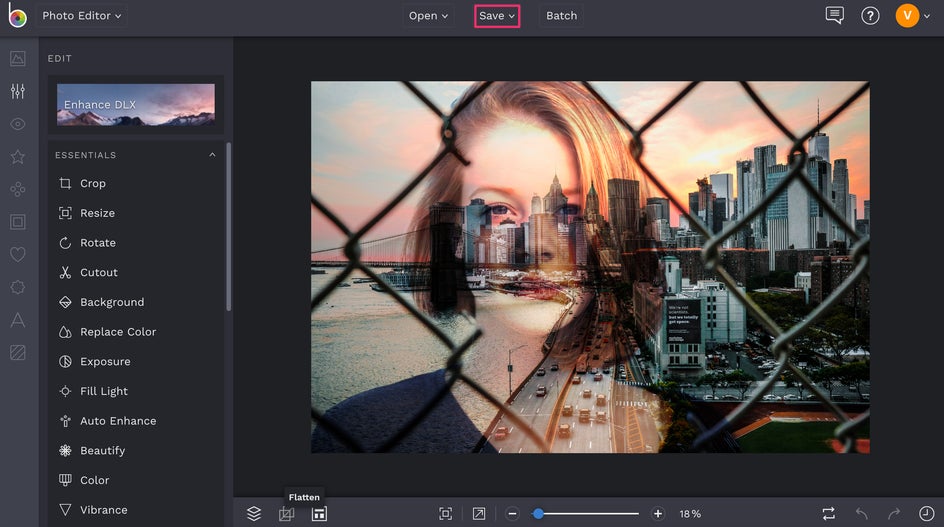
From here, you can continue editing the double exposure however you want! When you're finished, just click the Save button at the top of the Photo Editor to save your work.
Final Results
Voila! The perfect double exposure photograph can be achieved in just a few clicks – no DSLR required!
Double exposure photographs are a unique way to combine your photographs into a singular masterpiece. We can't wait to see how these features amplify your photos. Start getting creative with them by clicking the link below!