How to Make a New Year’s Vision Board Background for Every Device
With New Year’s around the corner, talks of resolutions and yearly goals begin to fill many conversations. Most people want to make physical changes by investing in a new gym membership or quitting a certain habit of theirs that they feel is holding them back. As much fun as it is brainstorming these resolutions, most people lose steam in a couple of months and their desire to accomplish their yearly goals begins to fade – it is one of the main reasons why only 16% of people are able to follow through with their New Year’s resolutions. One of the main ways to make sure you don’t fall into this same category is to create a digital vision board.
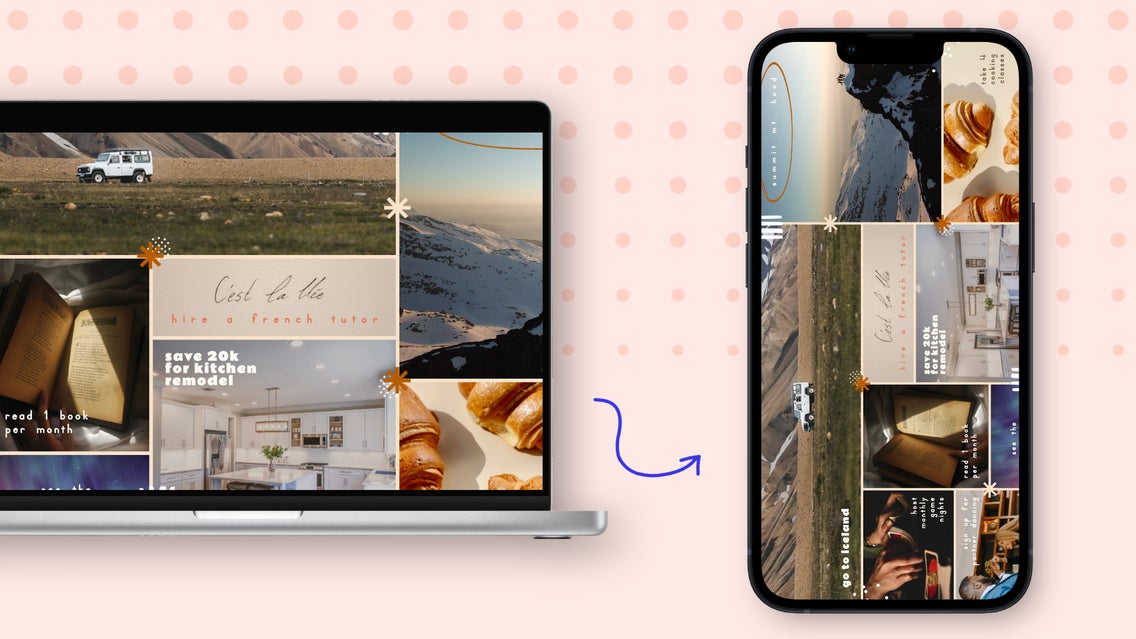
We tested out an easy and simple way to keep our visions front and center in 2022 – and that was by creating a digital vision board. Last year, we easily created both a phone and computer background with BeFunky’s Collage Maker so that we were reminded every day of our goals. Looking back, many of these goals were achieved without even realizing it. There is something beneficial to being reminded of your goals every time you look at your phone or computer – even if it subconsciously reminds you of them while you do other things.
Before You Start Creating Your Vision Board
The first step is to write out your goals for 2023. I usually write out ten goals with a few big goals and many smaller goals. You can create goals that have to do with physical wellness, travel, relationships, or your career. It is important to include smaller goals so that they are easier to accomplish – this will give you encouraging momentum in order to accomplish your bigger goals.
How to Create a Vision Board Background for Your Devices
Because one of the main reasons people lose steam is due to lack of motivation, it is important to create a vision board that is both aesthetically beautiful and excites you when you look at it. With BeFunky’s Collage Maker, you can quickly create a digital vision board for 2023 that will keep you motivated throughout the year.
We will start by creating a mobile version of a vision board and then we can easily save our project and keep working on it on desktop. It might seem like a hassle to have to navigate two kinds of platforms, but it is simple to navigate between the two.
Step 1: Choose a Layout on Mobile
Once you are ready, open the BeFunky app on your mobile device and then select Create a Collage.
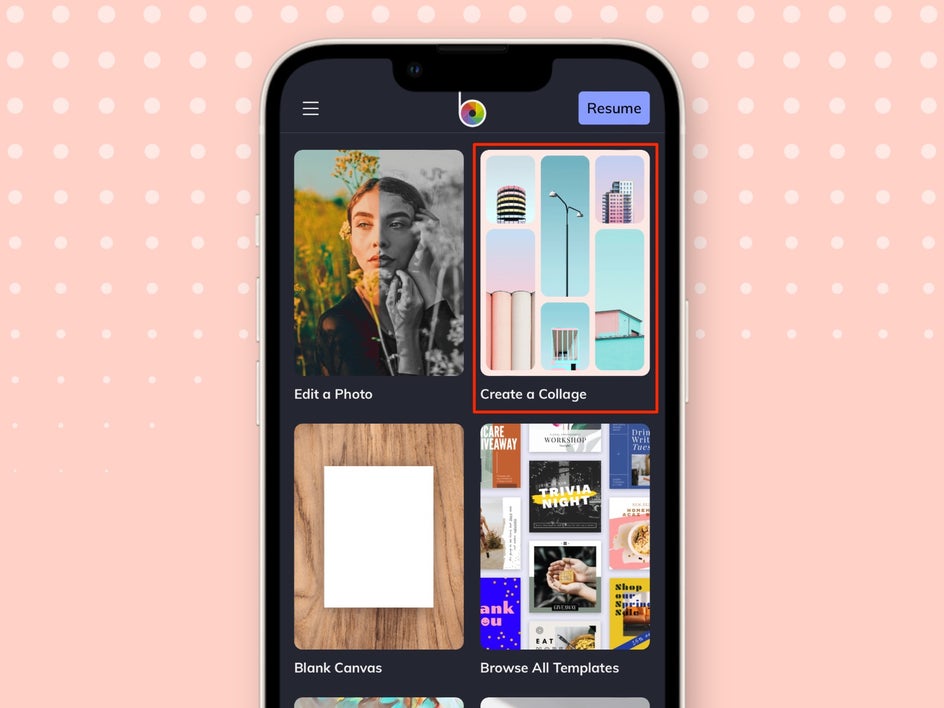
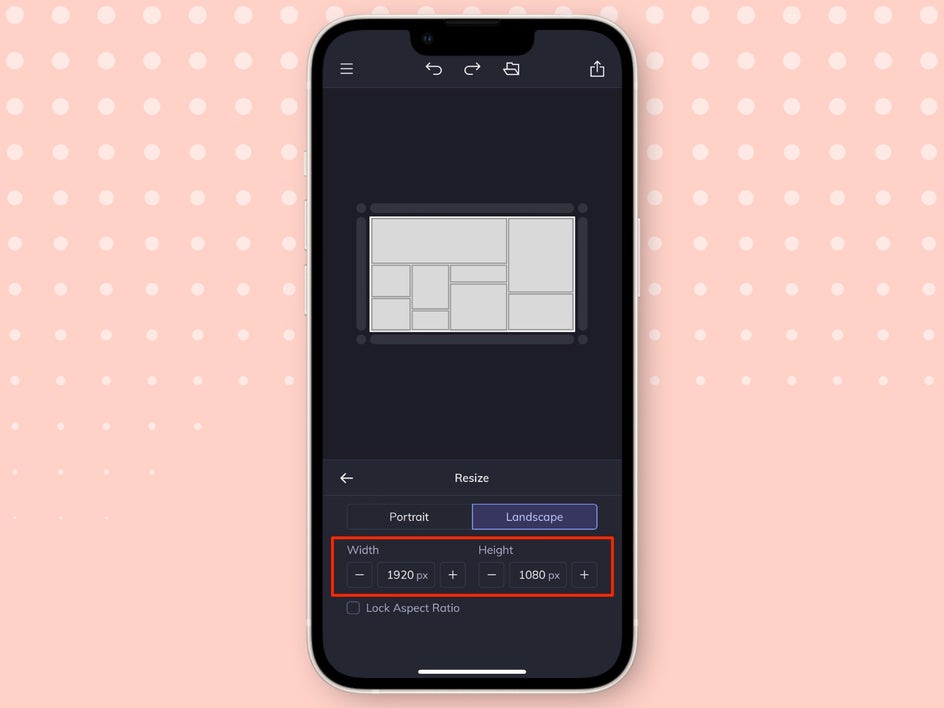
Click Layouts in the bottom menu and then select Grid. Choose a grid layout that you like.

We will then adjust the size of the collage to fit a digital screen. Once you have your layout selected, select the Customize tab in the bottom menu and then select Resize. Set the width to 1920 and the height to 1080. This is a 16:9 ratio and will work for both the dimensions of a phone and computer background. Select the back arrow to return to the previous menu.
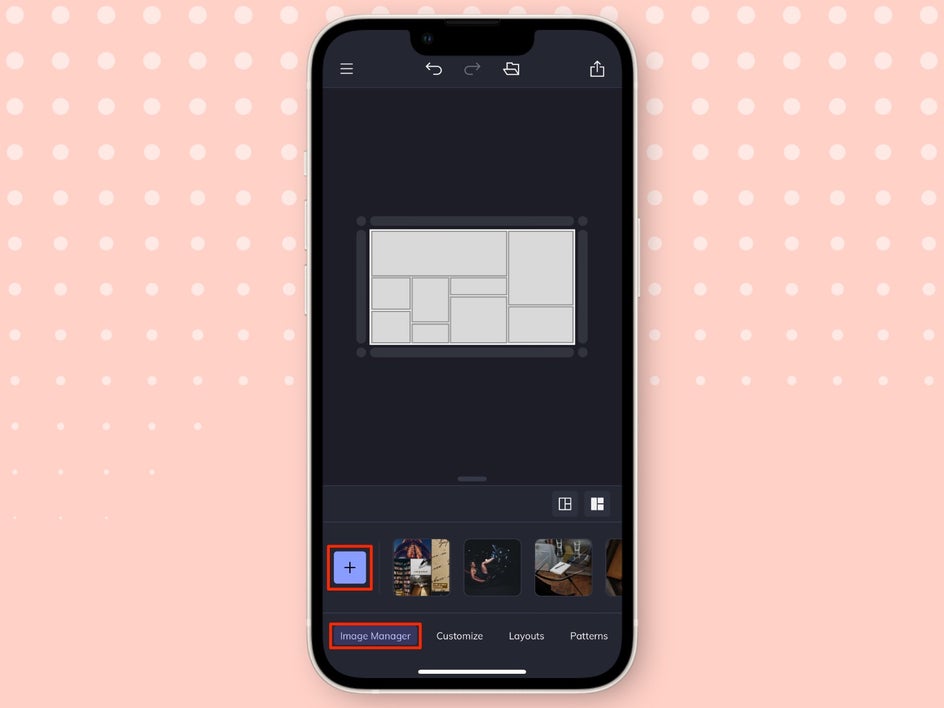
Step 2: Add Photos to the Image Manager and Collage
Once you have your collage laid out how you want, select Image Manager in the bottom menu. Select the Add Images button (plus sign).
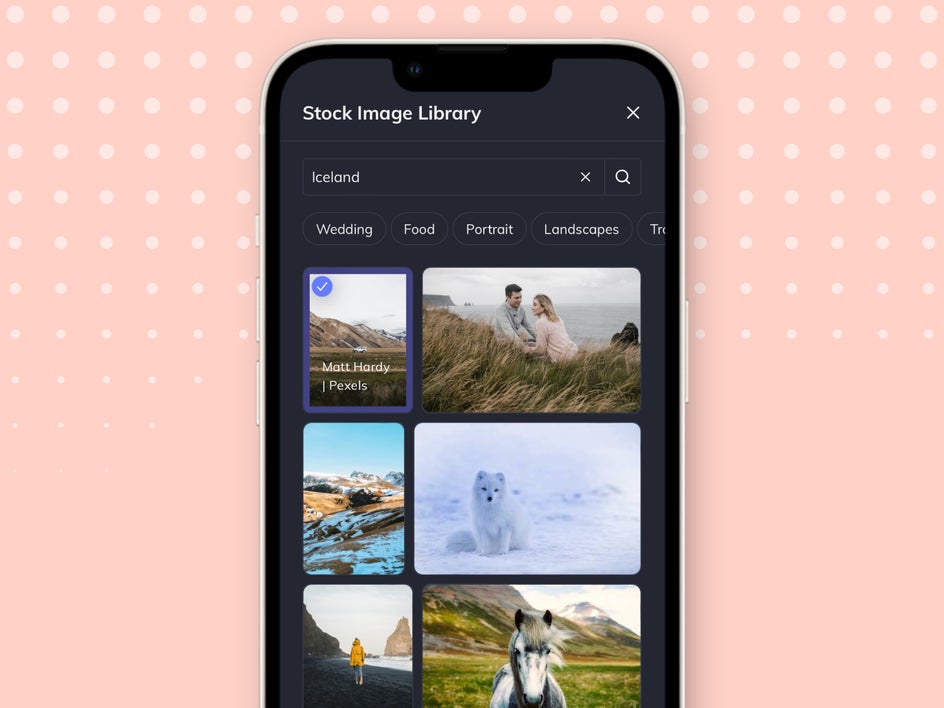
You can either upload your own photos by selecting Camera Roll, or you can choose from hundreds of stock images by selecting Stock Images.
Choose one photo for every goal you write down. Most of the time I lose motivation if I don’t have my own photos to include in my projects - but this is really a procrastination tool. To work around this, last year I committed to making a vision board that included mostly stock images that I found to be beautiful and inspiring. All you have to do is select Stock Images and search for a photo that has to do with something you want to do this next year. Simply select it and the blue checkmark means that it was automatically added to your Image Manager. Do this until all of your goals have a photo that represents it.
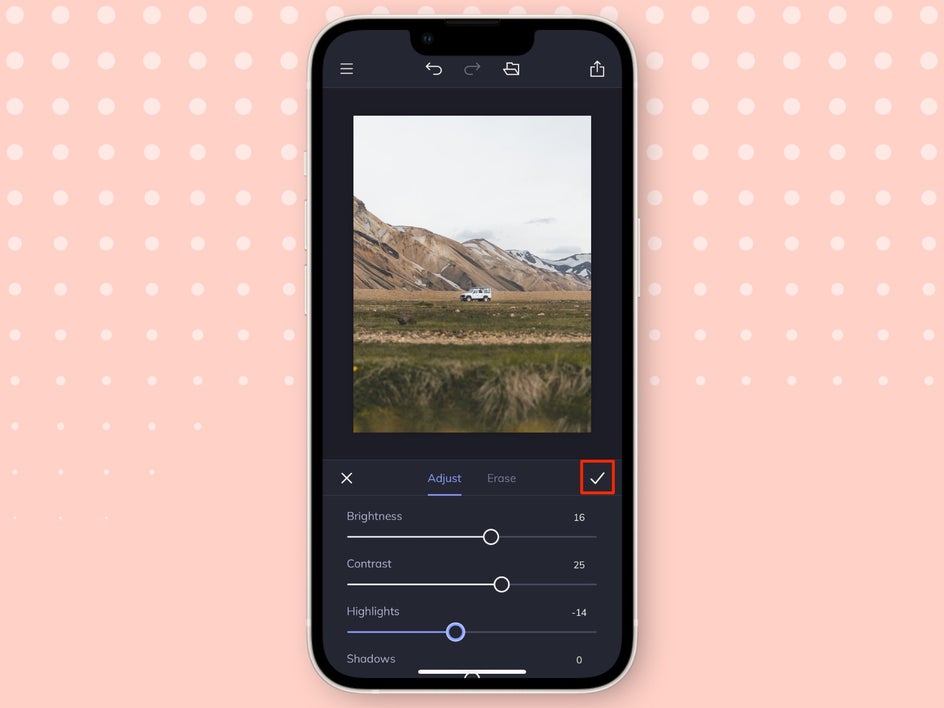
After you do this, you will simply click on the image you want to add to your collage and select Add to Cell. You can click and drag them to reposition the composition, drag one photo into another cell to change its location by clicking and holding the image and then dragging it over another cell and releasing, or click on a photo once and select Edit Image to increase the size of your image.

You can even edit it directly in BeFunky’s Photo Editor by selecting Open Image in Editor. Make your adjustments and save each of them by selecting the check mark on the right. Once you are finished making your edits, select the collage image to go back to your main collage.
I try to edit my photos so that they all have a similar aesthetic.
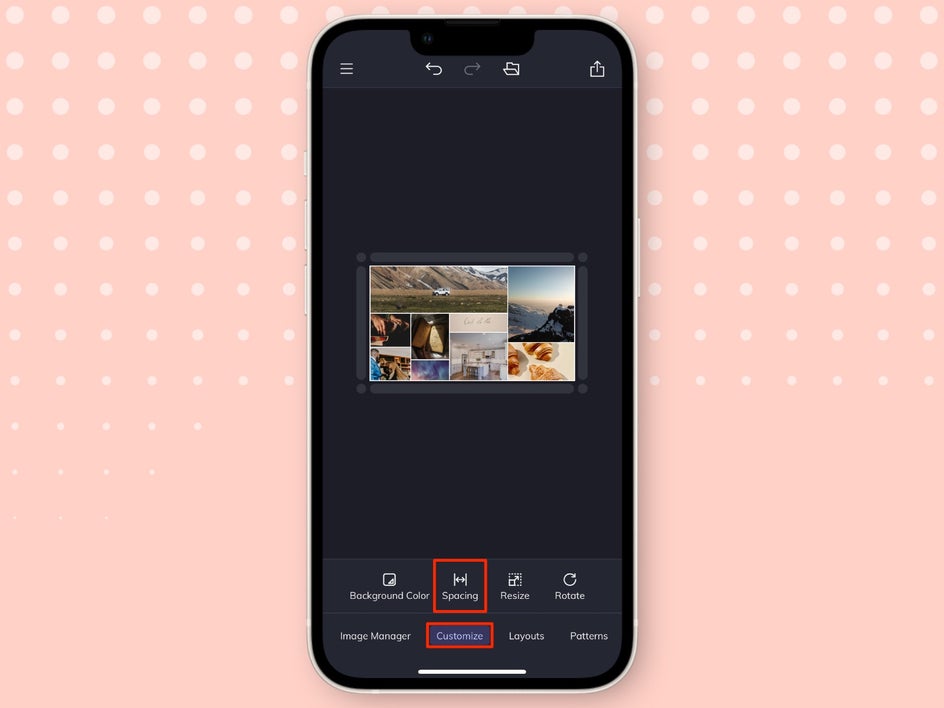
Step 3: Customize Spacing and Background Color
Head back into the Customize tab. Select Spacing. I will adjust my Spacing by dragging the spacing slider to the right if I want to increase the spacing or to the left if I want to make the spacing thinner.
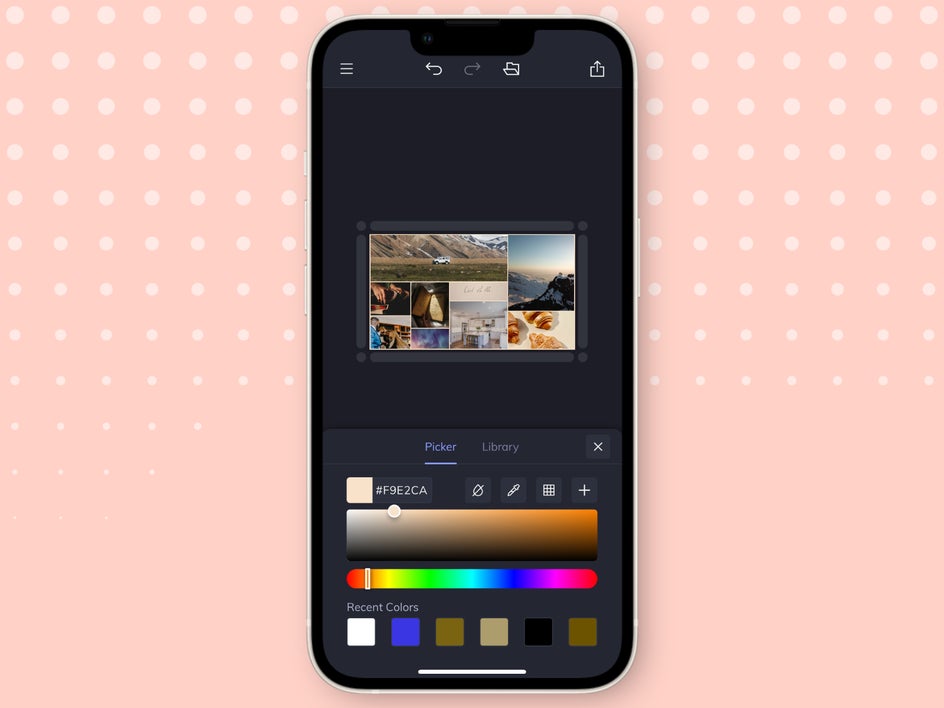
Select the back arrow to get to the previous menu. Select Background Color. Adjust the Background Color by selecting the first box. Last year I chose a darker theme but this year I am brightening things up with a warm neutral. You can even use the Eye Dropper Tool to select a color from one of your images.
Press the back button on the left. In the same menu, I will also adjust my Spacing by dragging the spacing slider to the right if I want to increase the spacing or to the left if I want to make the spacing thinner.
Step 4: Save the Collage as a Project
We are going to finish this on the desktop version. You can either stop here or switch over to BeFunky’s Designer on desktop to continue the tutorial. Feel free to finish on your phone as well, but we find it easier to do these next steps on desktop.
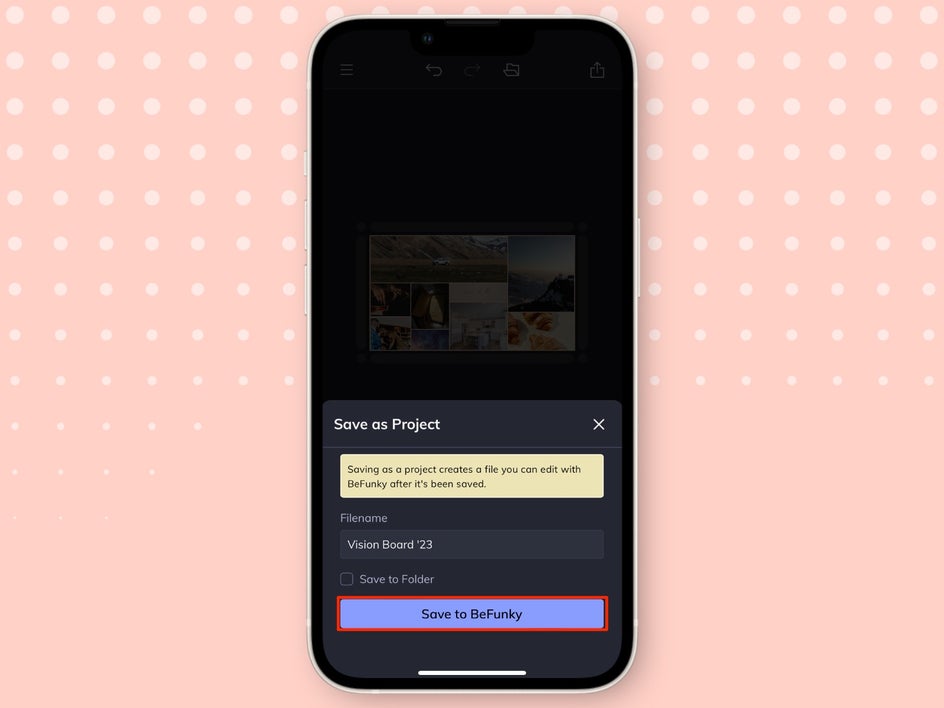
Make sure to select the top right icon with the arrow pointing up to save and then select Save as Project to save your project to BeFunky in order to access it on desktop.
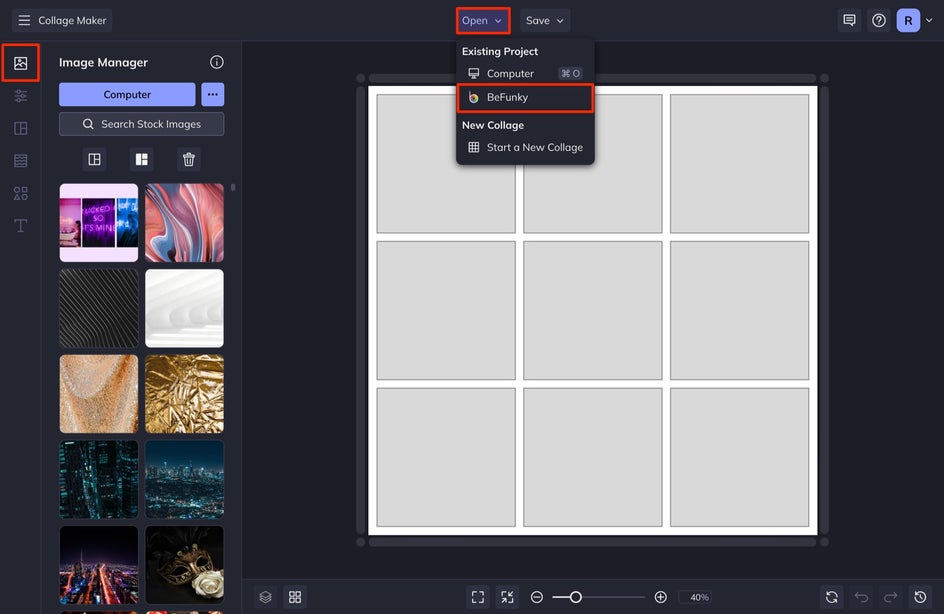
Step 5: Add Text Goals
Open your project in BeFunky’s Designer by selecting Open and then under Existing Project select BeFunky. Select your project in the menu that appears.
Select Text in the left-hand menu and then select Add Text. To adjust the font, size, and more, simply click on your text and a Text Properties menu will appear on the left where you can make any changes.
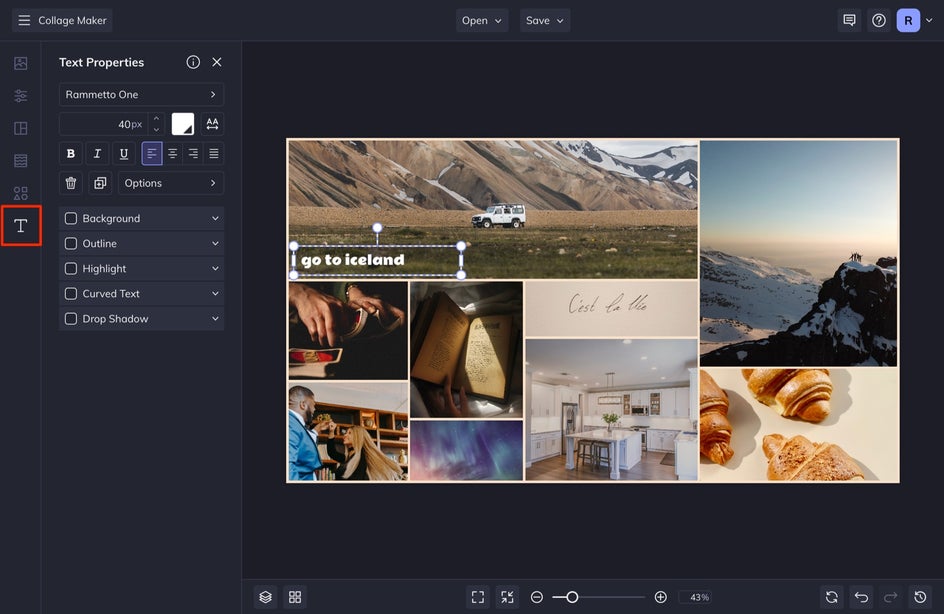
I write out each of the goals over the images and then change the font, letter spacing, and color one by one. If there is a certain style I like, I will simply click the text box and press D to duplicate it, and drag it over another image. I usually include a couple of different fonts with a bolder one emphasizing the goals I want to focus on the most – but this also makes it more visually appealing.
Step 6: Add Graphic Elements
Select Graphics from the left-hand menu and then select Search Graphics. Select the graphics you want to use and they will be automatically added to your Your Graphics catalog.
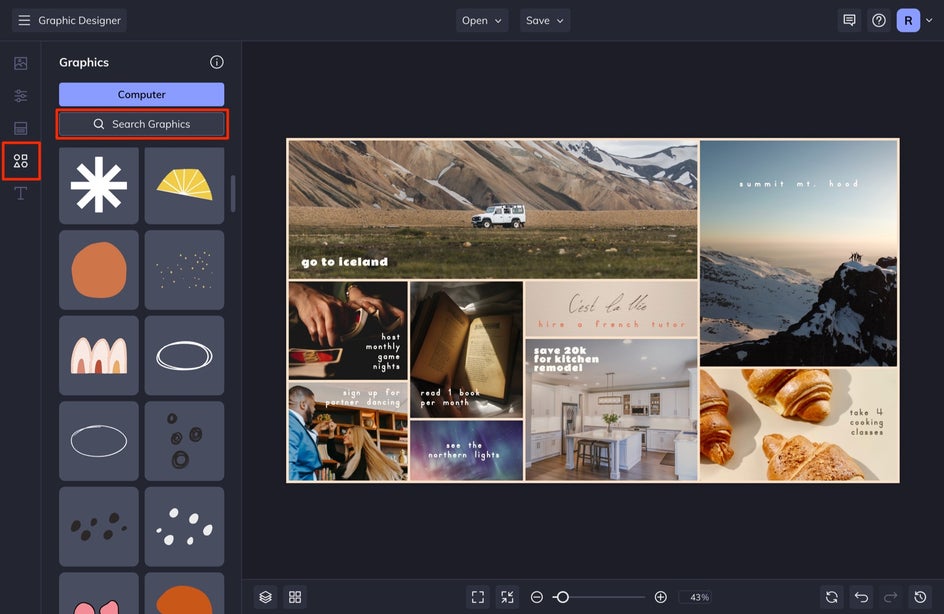
Drag and drop a graphic onto your artboard. You can adjust the size with the corner selection points, or with the graphic selected, you can adjust the color or orientation in the Graphics Property menu that appears.
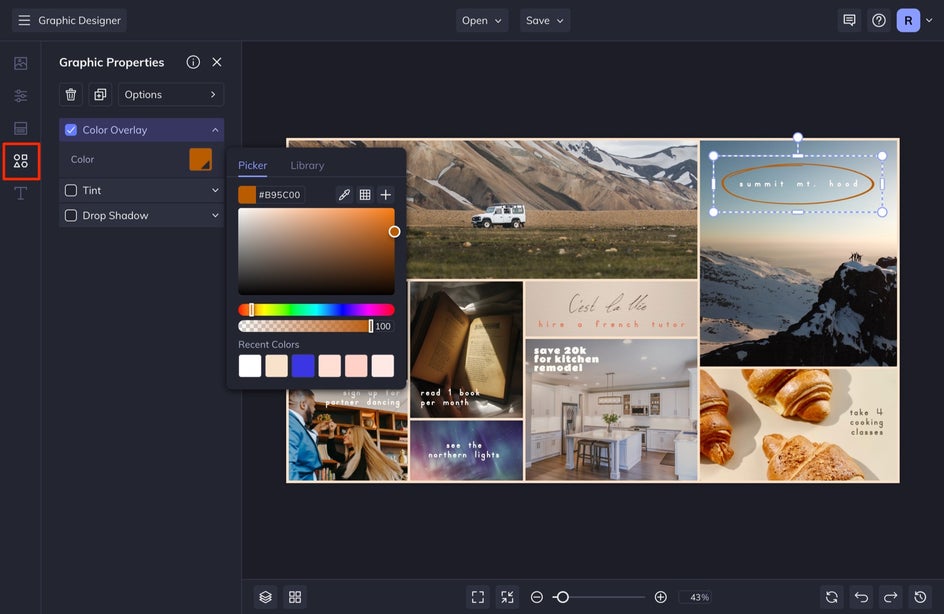
I add graphic elements to my vision board almost like sprinkling a cake - it is really just for decoration and greater design depth.
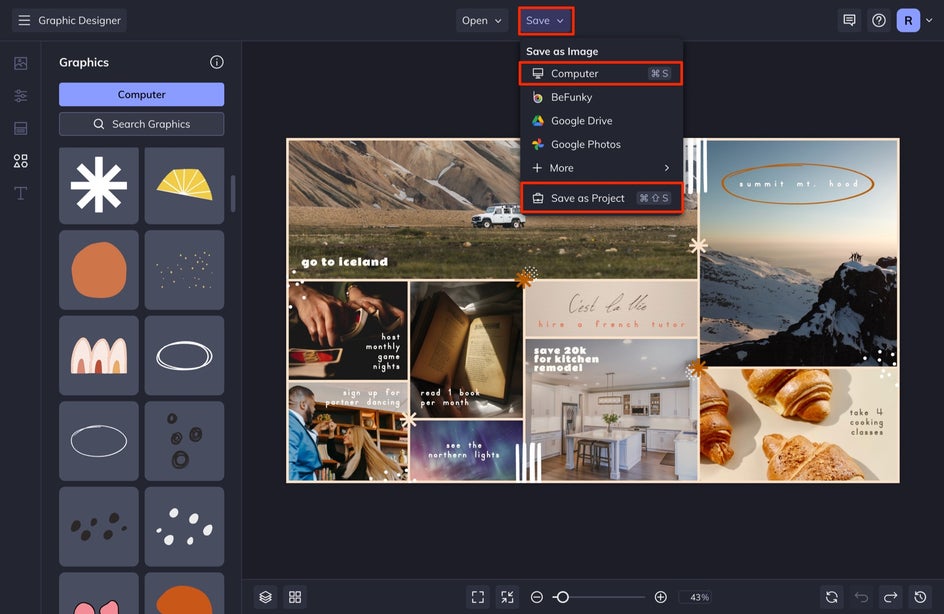
Step 7: Save the Collage
Once you are finished, head up to the top menu and select Save. Save as Project to update your current progress and then also select Save as Image to Computer.
Create a Digital Vision Board for the 2023 New Year
Once you finish your design, you can set your image as your desktop background on a Mac or PC. I recommend sending the image to your phone (either by AirDrop or email) so that you can set the vision board as your home and lock screen.
This is the second year I have used BeFunky to create a vision board because it worked so well for me last year. Any goal I didn’t accomplish that was still a goal of mine, I simply carried over onto my new vision board for the year. Try this method out and let us know how it goes for you in the new year!