


Now You Can Wrap And Align Your Text and Graphics Easier Than Ever

Perfecting the appearance of your layers can be tricky and tedious, we know that! You want tools that work with ease, and we’re here to help. Our recent updates to text wrapping and group alignment are sure to streamline and solve many of your design complications, so you can spend your time focusing on being creative.
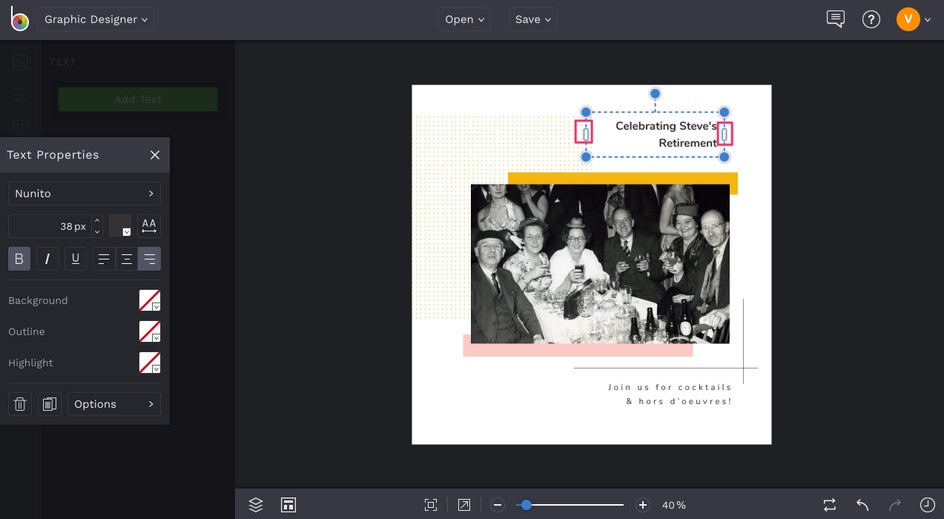
Using the Designer, Photo Editor or Collage Maker, begin typing your text to see the updated text wrapping at work. Your Textbox width will remain the same as you type, only expanding if you adjust the size or according to your widest single character. Your text will stay in place even if you have to fix a typo or change out the text entirely.
With group alignment, you can easily customize the alignment of your layers by clicking the alignment button that corresponds to the position you’d like to align it to, and then clicking the same alignment button a second time to align the graphic elements individually.
No longer will you have to manually adjust your text box to the next line or struggle with the alignment of your layers. In other words, these updates are sure to simplify your design work!
Text Wrapping Becomes a Breeze
To see the text wrapping update in action, start by opening up a template in the Designer and click on Text.
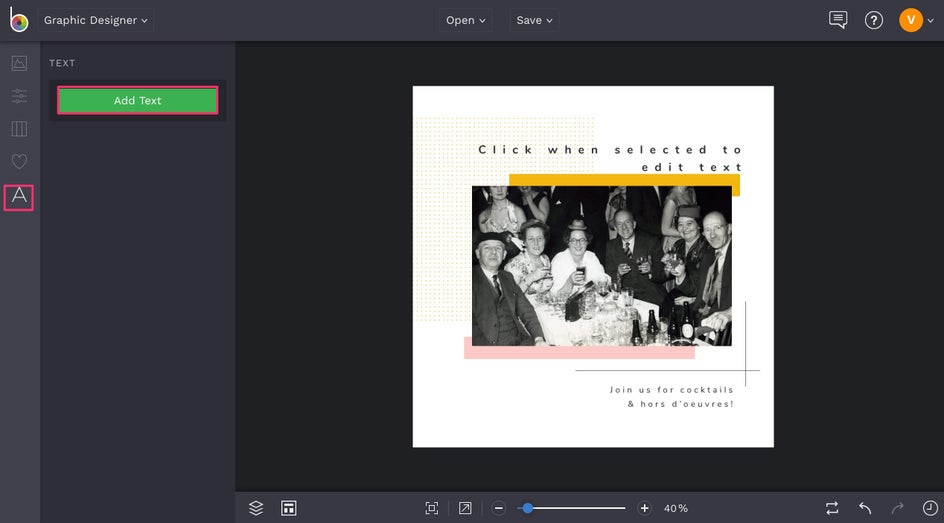
Begin typing your text or copying and pasting it into the Textbox. You’ll quickly notice that as you approach the right side of your Textbox, the next part of your text will jump down to the next line, so there’s no need to adjust the size of the box manually to force your text to the next line.
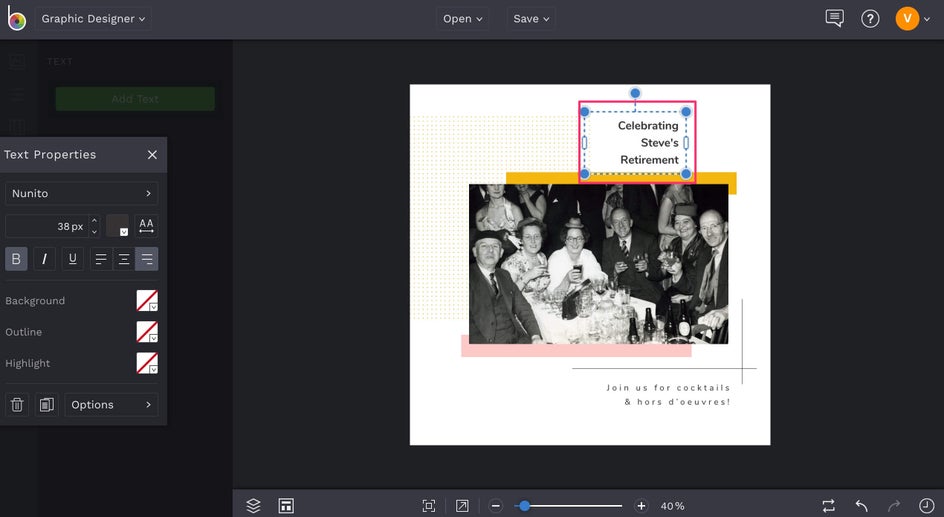
If you want to expand your Textbox, simply pull on the white boxes on either side of your rectangle. This will allow the text that had been brought down to the next line to come back up as your Textbox becomes longer.
This update will help to keep your text concise for formatting, without any extra work on your part!
Keep All Your Elements Aligned with Group Alignment
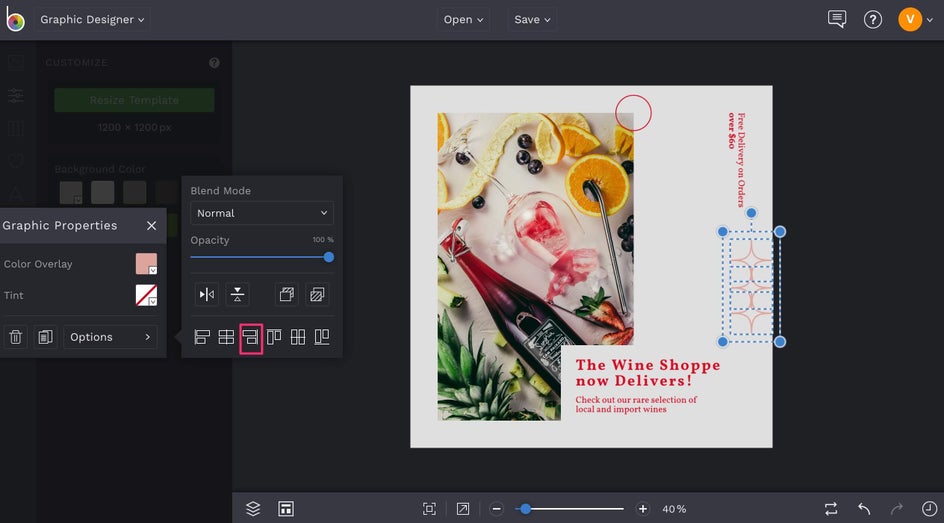
Do you have multiple layers in your graphic design that you want to keep together? Group alignment allows you to adjust these elements and their alignments with just a few clicks! See these new updates in action by opening up a template in the Designer.
Select a group of graphics that you would like to align by clicking and dragging over the graphics on your design.

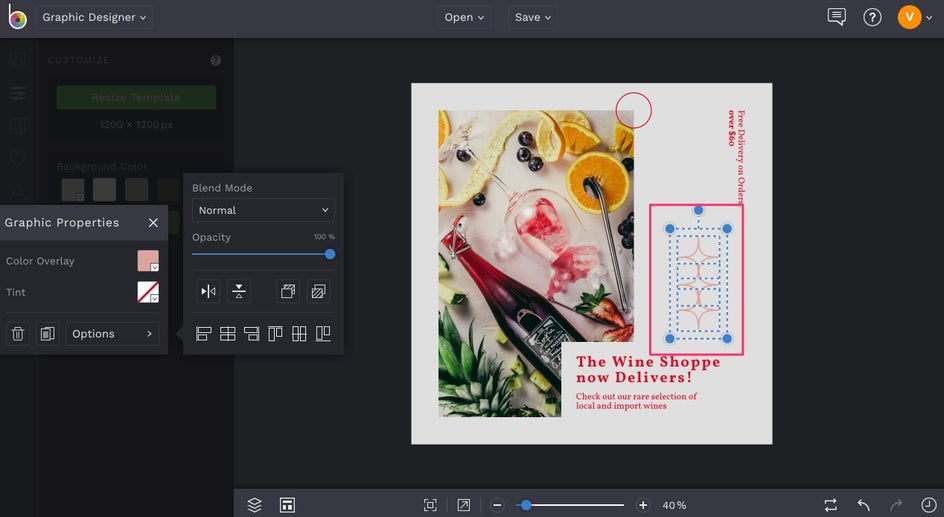
Find your desired mode of alignment by clicking Options. For this tutorial, we are going to align the stars to the right side of the canvas. Click on Right Alignment once to shift the alignment of the graphics.

Click on Right Alignment a second time to align the graphic elements individually on the canvas.
Pro Tip: If you hold CMD/Ctrl while clicking an alignment button, rather than aligning relative to the canvas dimensions, the contents of your group selection will align according to the selection boundaries instead of to either side of your design.
There you have it: a common design problem, solved!
Click the link below to get working on your next creative masterpiece!


