Turn BeFunky Into Your Own Meme Generator
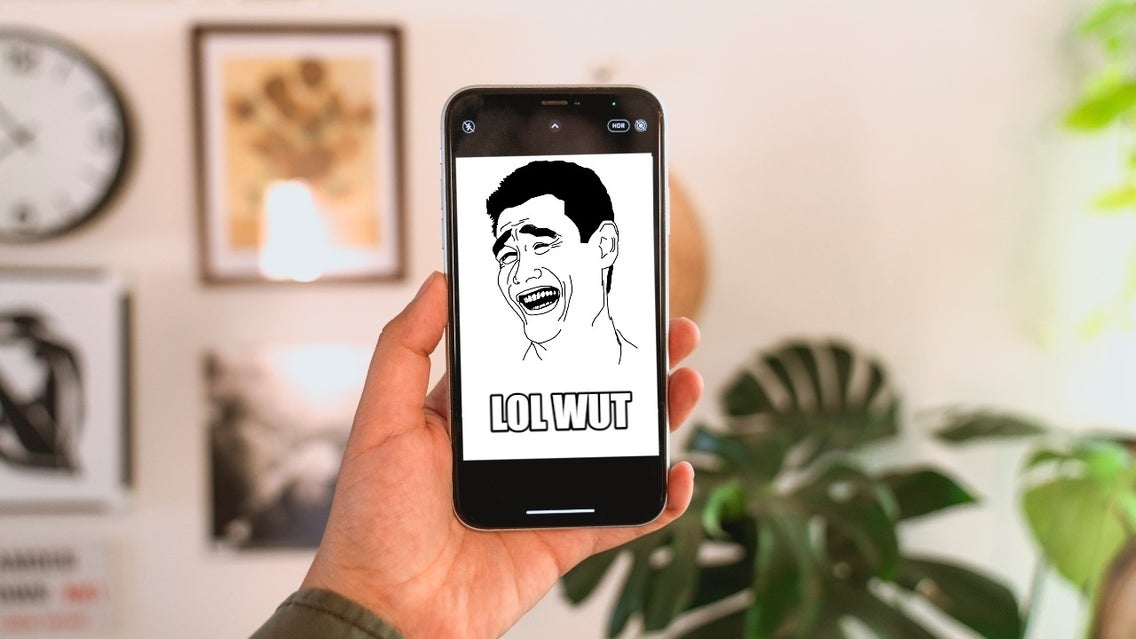
Unless you’ve been kidnapped by aliens and haven’t been around the internet in the past decade, you most likely know what a meme is. They’re the bits of humor that sprinkle your social media feeds, the word pictures that you can’t help but chuckle at, the hilarious thing you have stuck in your head for years. The coolest thing about memes is they’re so simple to create - all it takes is a sense of humor, a great visual, and an awesome meme generator like BeFunky’s Photo Editor to put it all together. The best part? We’re going to show you how to make your own meme, so keep reading!
What Is a Meme?
According to Urban Dictionary, "meme" isn’t “a word, it’s a lifestyle." You see, memes use images and text to transmit social and cultural ideas to one another. These can be images of anything, including people, animals, signs, and symbols.
What Makes a Meme Go Viral?
A meme goes viral for a variety of reasons, but mainly because it’s struck a chord with a wide range of people. It’s something so share-worthy that one can’t help but hit the retweet button and say, “SAME.” The best part is that anyone can reach meme stardom with a relevant (and hilarious) idea and a knack for pairing a great image with an equally great caption.
So how do you come up with a stellar idea for a meme? Pay attention to what is trending in pop culture for inspiration or flip through an old yearbook from the ’90s. Did something funny happen at an award show? Did you see something funny on a sign while you were driving by? Did you dig up your old kindergarten photo and realize it was priceless? Capture that screenshot, scan that photo, or park your car and take a picture – those moments could catapult you to meme stardom.
How to Create a Meme With BeFunky’s Meme Maker
To create your meme, head over to our very own free Meme Generator. You can open an image from your own files, use a photo from BeFunky’s huge stock photo library, or even use a trending meme template. Then, just follow the 4 steps below.
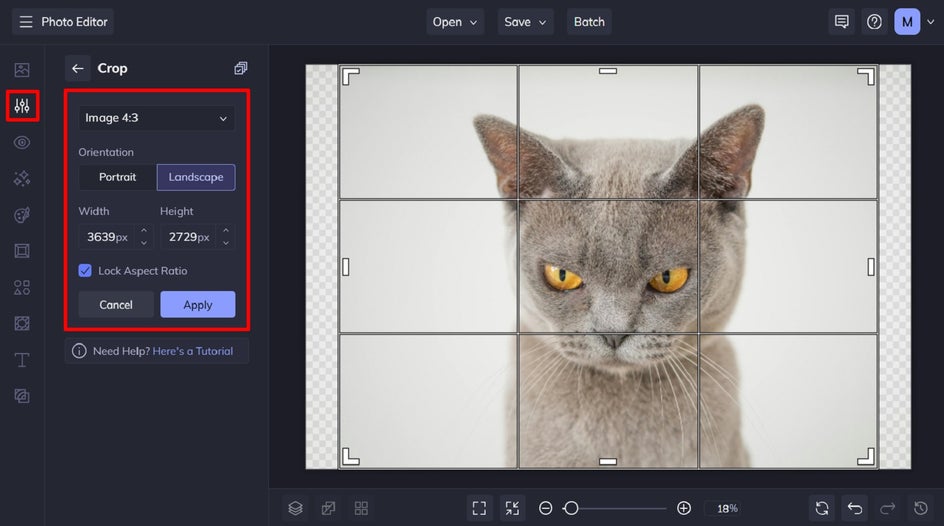
Step 1: Crop And Resize Your Meme Image
Within the Crop tool, select a crop preset from the Aspect Ratio or Orientation drop-down menus. Alternatively, you can manually input your width and height. Make sure to select Lock Aspect Ratio if you want to keep the same proportions in your crop as your original image.
Click and drag the corner or edges of the crop frame to best reframe your image. Then, click Apply to save your changes.
Next, you’ll want to resize your meme image so it’s the perfect dimensions for the social media platform you wish to share it on. Head back to the Edit menu, then click Resize.
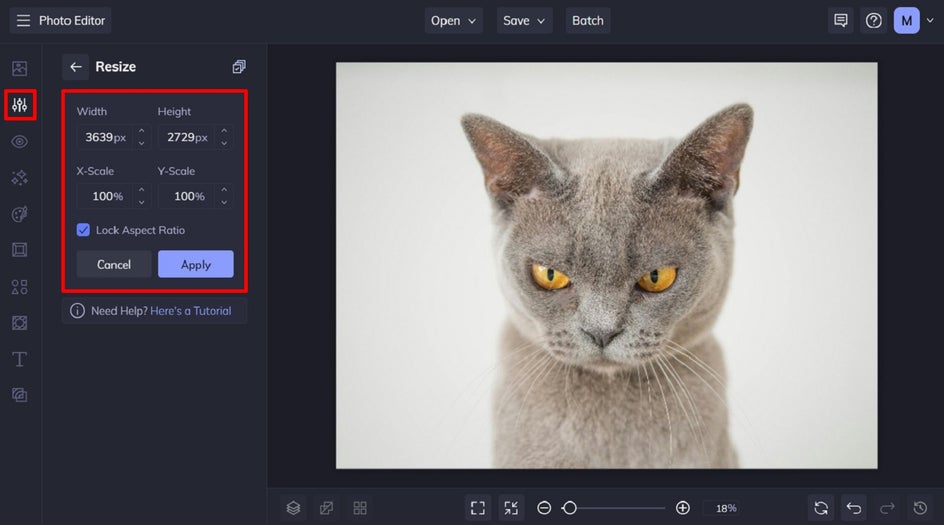
Enter your required Width and Height dimensions into their corresponding boxes, then hit the blue checkmark button to apply. Check out our guide to social media image sizes to get it just right! Be sure to keep Lock Aspect Ratio checked, as this will keep your image’s ratio the same, so it doesn’t look distorted.
Step 2: Add Text to Your Meme
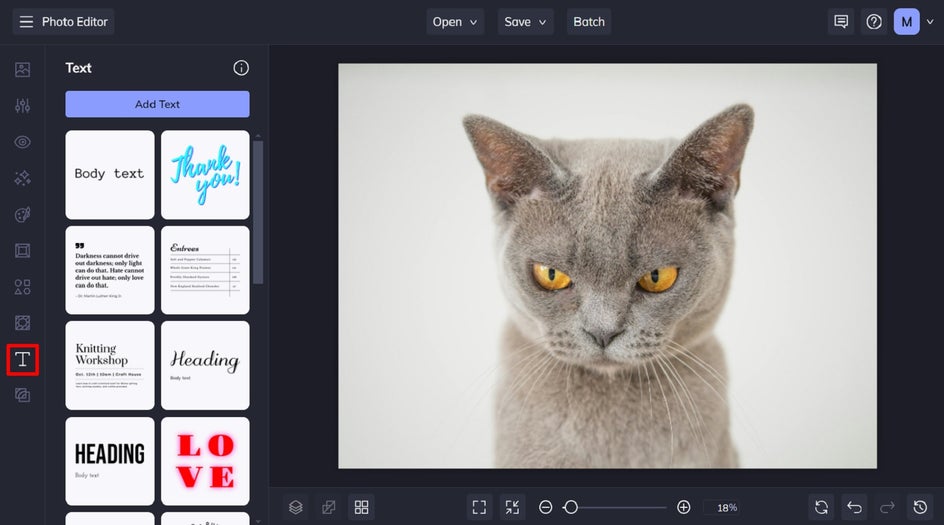
The next step is to add your custom text to your meme. Select one of the premade text patches or click Add Text to insert a blank text box. Then, simply double-click your new text box and type in what you want it to say.
When you select a text box, you’ll also notice a Text Properties panel appears. From here, you can change things such as the font, font size, text color, spacing, and more.
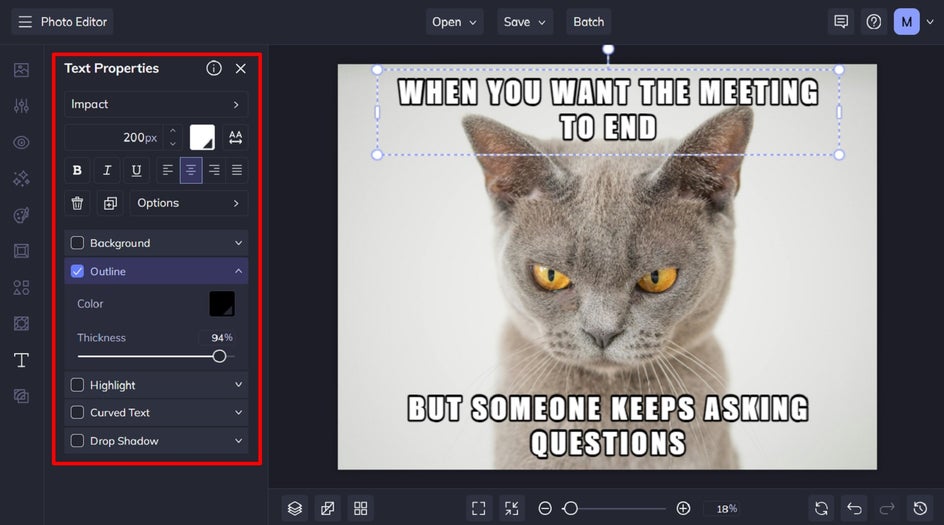
Pro Tip: Impact" is the font used in most classic memes. Set the font color to white, then add a black outline to really make it pop.
Step 3: Save Your Meme
Once you’re happy with how your new meme looks, it’s time to save it so it’s ready to share with the world! Click Save at the top of the canvas, then select your desired save location.

Other Fun Ways to Use BeFunky’s Meme Generator
Looking for some additional ideas for your next funny meme? Here are just two more ways you can use BeFunky to create your best meme yet.
Add a New Background
If you’ve got the perfect subject for your meme, but a background that doesn’t quite match, you can use BeFunky’s Background Remover tool to create exactly what you had in mind. Simply remove your image’s background, then replace it – all within the same tool! You’ll find our Background Remover within the Edit menu underneath the Remove/Replace category.


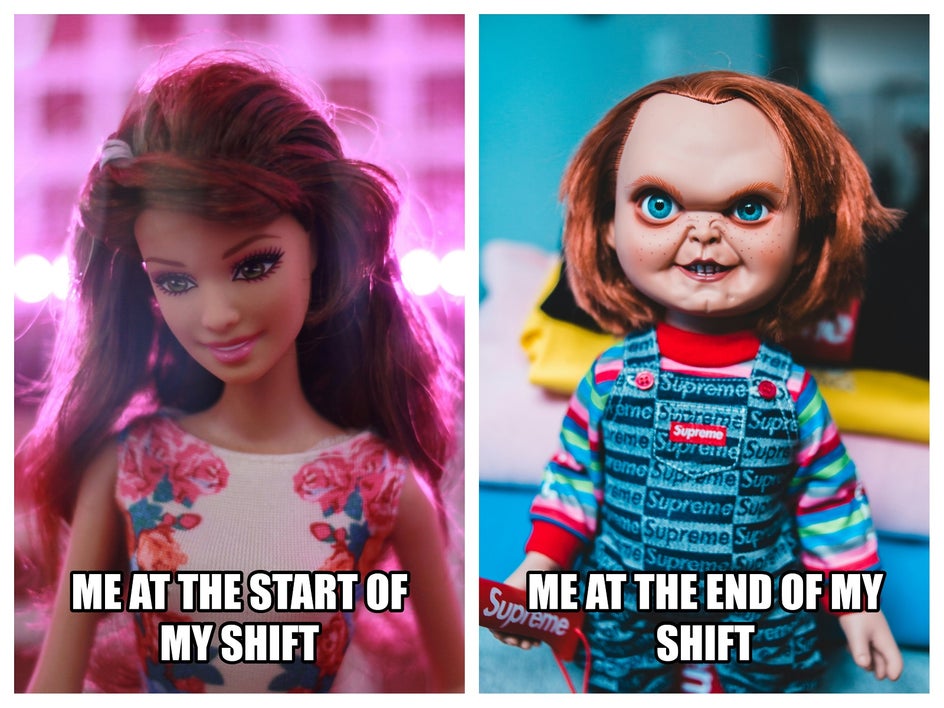
Create a Collage
BeFunky also offers the Collage Maker – the perfect for creating memes featuring two or more images. Here, we’ve utilized a simple side-by-side collage layout to create our meme.
It's Time to Go Viral
Ready to make the next hit meme by using our quick and easy meme maker? Thanks to the awesome tools available in our Photo Editor, you can create your own meme in just minutes!
Go on, create your own meme today!