How to Create a Haunted Double Exposure Photo
There’s no denying it, spooky season is here! As we prepare for pumpkin spice and all things fall, there’s no way to forget that Halloween is also on the horizon. Embracing the spirit of the season can also be accomplished by adding a touch of haunting paranormal to your posts!
While there are plenty of interesting ways to help transform your photos in the spirit of the holiday, one of the most unique ways to accomplish this spooky aesthetic is through the use of double exposure photography. While you may have already learned the basics of this technique in our last tutorial, today we’re going to amp this technique up to create vintage, ghostly photos!
BeFunky’s Photo Editor is stocked with all of the tools you need to transform your photos into Halloween masterpieces!
How to Create a Haunted Double Exposure
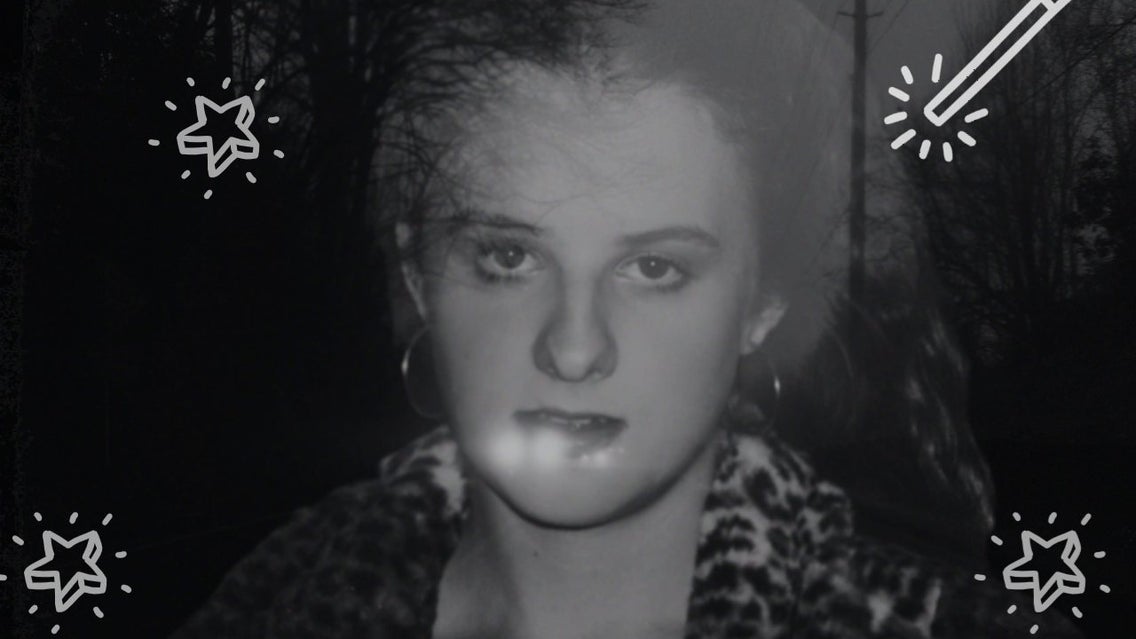
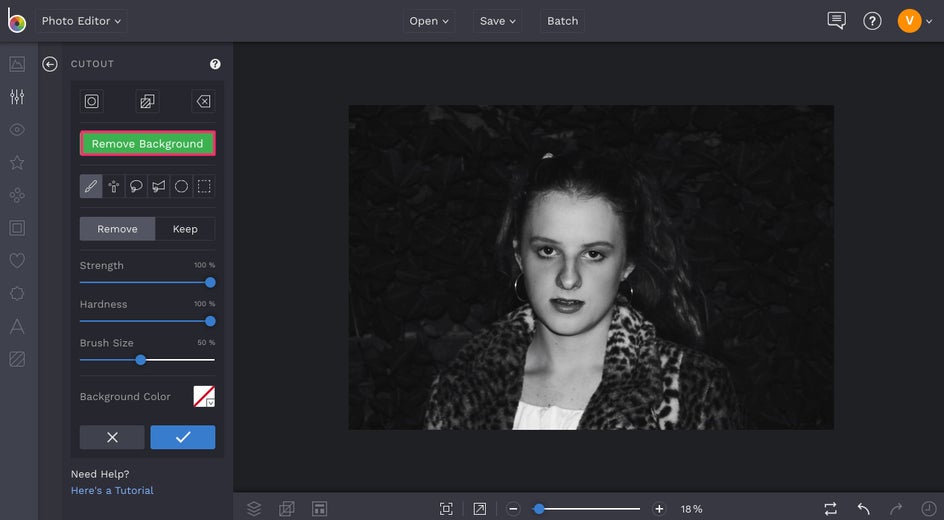
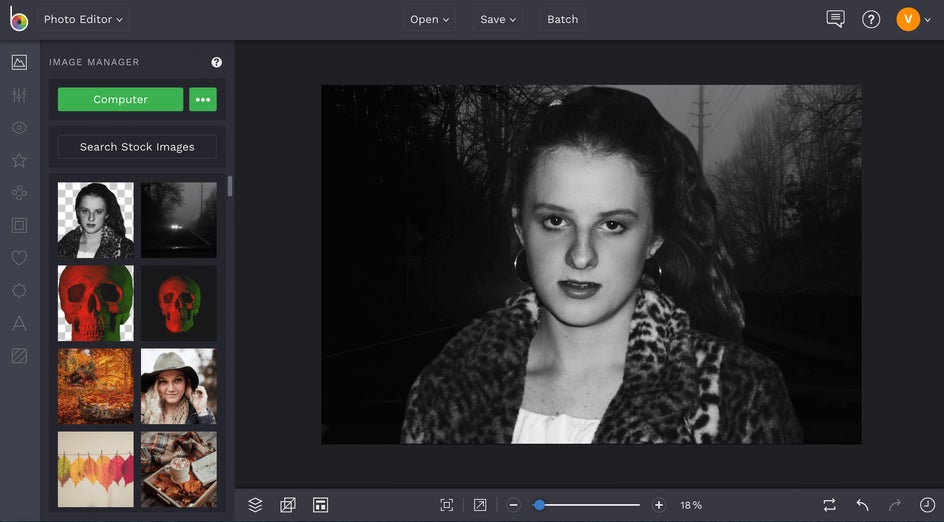
To create a haunted double exposure photo, start by opening the Photo Editor and opening up your photo. We suggest using a black and white photo to increase the spooky aesthetic.
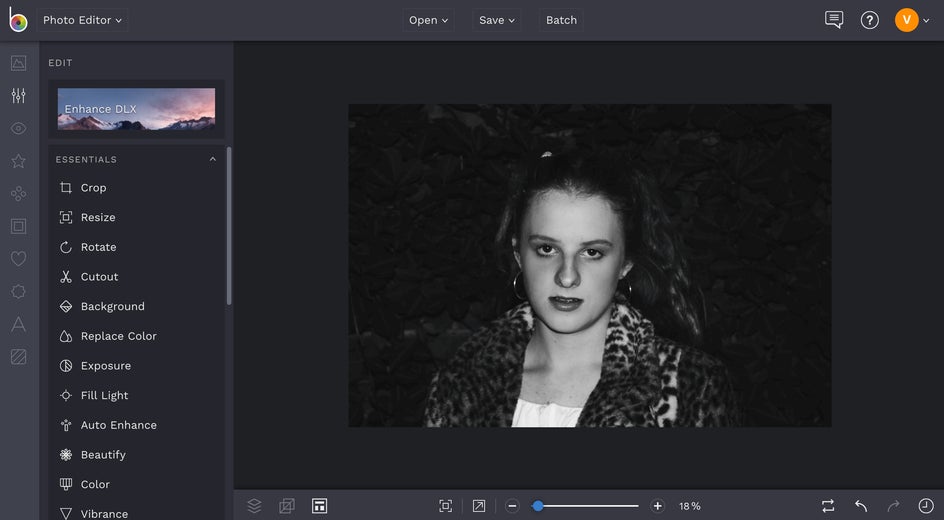
Once you've got your image uploaded, click on the Cutout tool in the Edit menu on the left. Next, we’re going to remove the original background of the image in order to help create a haunted double exposure effect. Click on the Remove Background button to remove the background from your image. This tool uses AI to detect the subject in your photo and erase the background behind it.
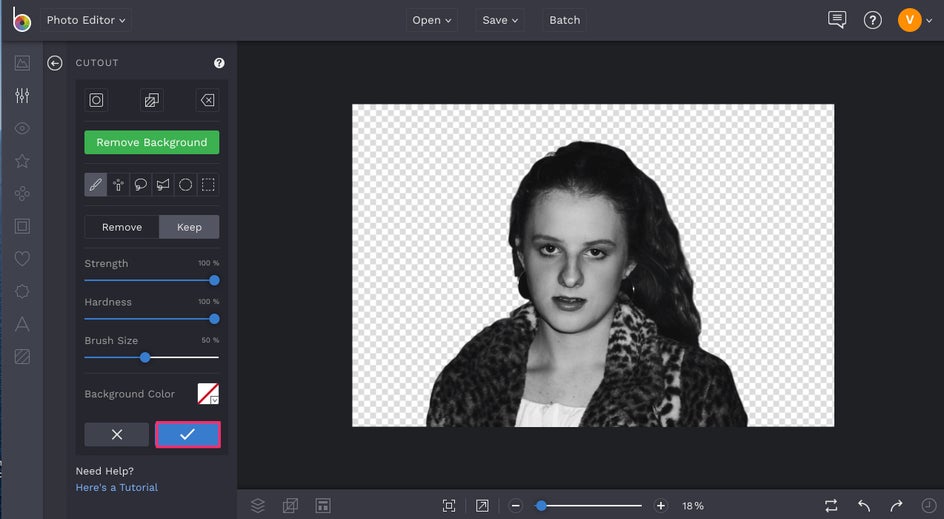
A preview of your Cutout will appear, showing you the subject that the Background Remover detected. Click the blue checkmark to proceed, and note that you can use the different Cutout tool brushes to clean up any areas that need it.
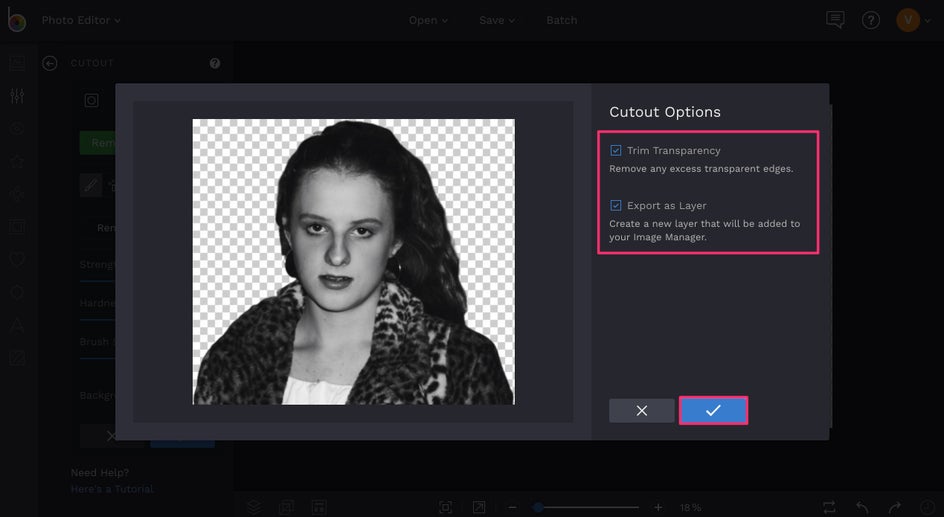
You’ll then be prompted to choose some final Cutout Options. Make sure that you check the box for both Trim Transparency and Export as Layer. The Trim Transparency option will trim any excess background from around the subject, while the Export as Layer option will add the image layer to the Image Manager. We'll show you why this is important next, but until then, click the blue checkmark. To get a better understanding of how to use layers in BeFunky, checkout this tutorial to see how you can use different layers of an image to make different creations within BeFunky!
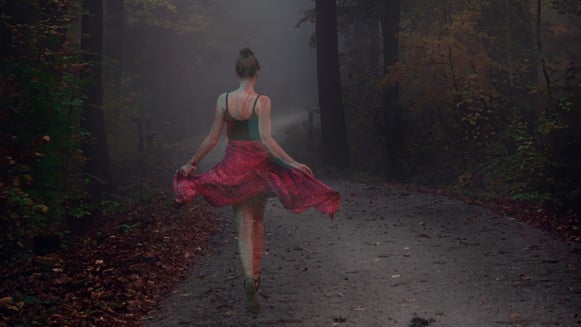
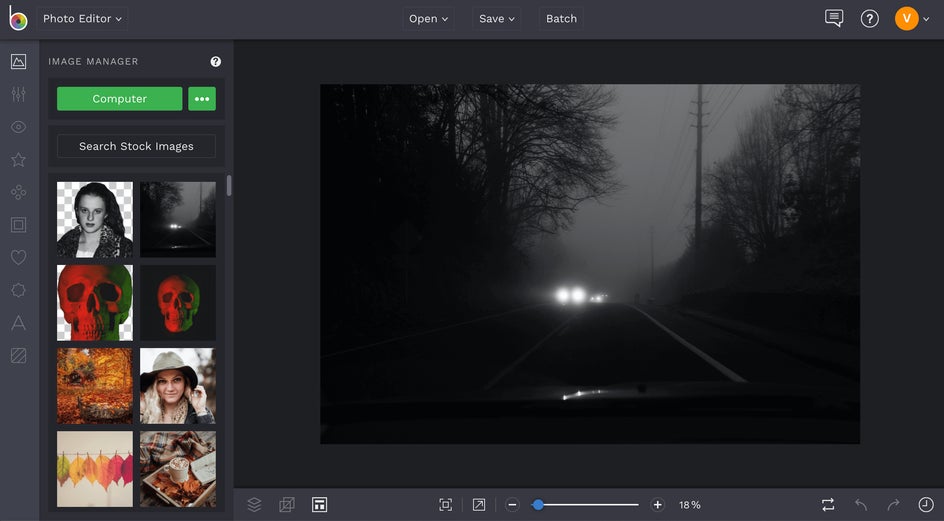
Next, open the Image Manager tab (the top icon) in the menu on the left and you'll see the image layer you just created loaded in there as a thumbnail. From here, you'll need to upload the background image you'd like to blend with your image layer to create the double exposure effect. Because we are trying to create a hunted double exposure photograph, we suggest selecting an image that captures some kind of spooky feel. Think haunted house, cemetery, abandoned road or otherwise eerie scene that you can blend your original photo with.
You can either use the Computer button to upload an image from your computer or choose the Search Stock Images button to browse over a million free stock images to use. Once your background image is uploaded in the Image Manager, click on it's thumbnail and choose Set As Background from the pop up menu.
It’s finally blending time! Click and drag the image thumbnail of the layer you created from your Image Manager and onto your background. Use the blue circles around the layer until it's resized to your liking.
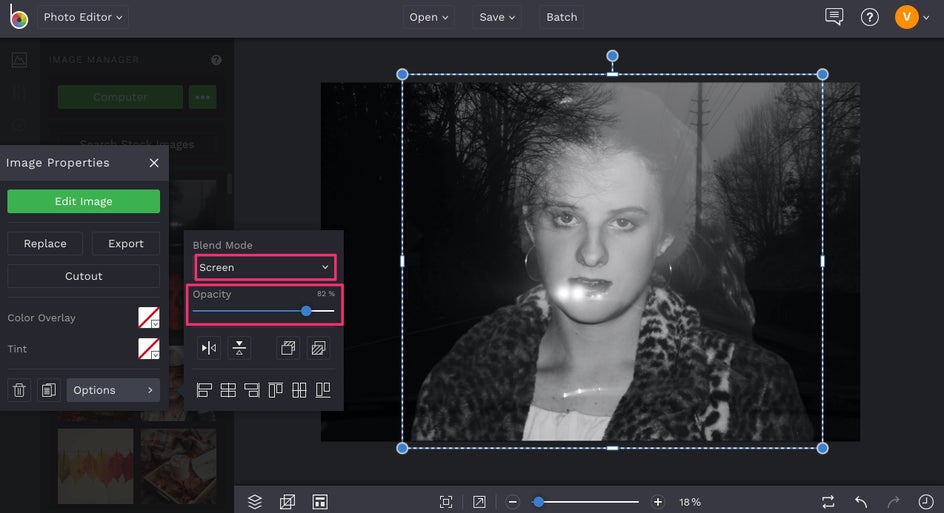
Now we really get to start making this image look spooky. Click on your image layer and choose the Options button from the Image Properties menu that appears. In the dropdown menu beneath Blend Mode you can explore the different options of blending your initial image into the background until you find your favorite. We’ve gone with Screen as a blend mode on this photo and taken the opacity back to 82% to maintain that haunted aesthetic. To learn more about these different Blend Modes, checkout this article.

After you pick your Blend Mode, all that's left to do is click the Flatten Layers button in the bottom menu to essentially "glue" the two photo layers together.
From here, you can continue editing the double exposure however you want! If you want to increase the “spooky” effect, you can always go in and add graphics, film grain or a border to help continue to capture the haunted aesthetic. When you're finished, just click the Save button at the top of the Photo Editor to save your work.

Final Image

Boo! There you have it, the perfect spooky, double exposure photograph for your Halloween feed. Are you ready to create your own haunted double exposure? Click the link below to get started.