Crop Me, Baby! (aka Cropping Pictures 101)
Now, while I’ve never been to art school per se (all I really need to recreate that experience is a Goodwill camera, a beret and a cigarette holder), I imagine the first day of Photography 101 looking a little something like this:
Teacher (in thick French accent): “Now, the first pillars you must learn in order to craft your soul into a photo...yes, yes...are these: how to crop, exposure, lighting, composition…” *exhales cigarette*
(Yes, I’ve made it so that my art school teacher is smoking here, too...because I can.)
The snooty Frenchman is right, of course. Before you can master anything, you have to officially suck at something first—which is exactly why we’re going to start out with the basics today. The most basic of the basics? Cropping.
Cropping is merely cutting away unwanted areas of your photo. It could mean that annoying photobomber that thought putting bunny ears over your Disneyland shot would be hi-larious, or even just an area of the photo where the quality is subpar. Whatever the reason, knowing when and how to crop your photos is essential to good composition, so today I’m going to show you how to utilize the BeFunky Photo Editor’s Crop Tool to help make your photos that much more awesome.
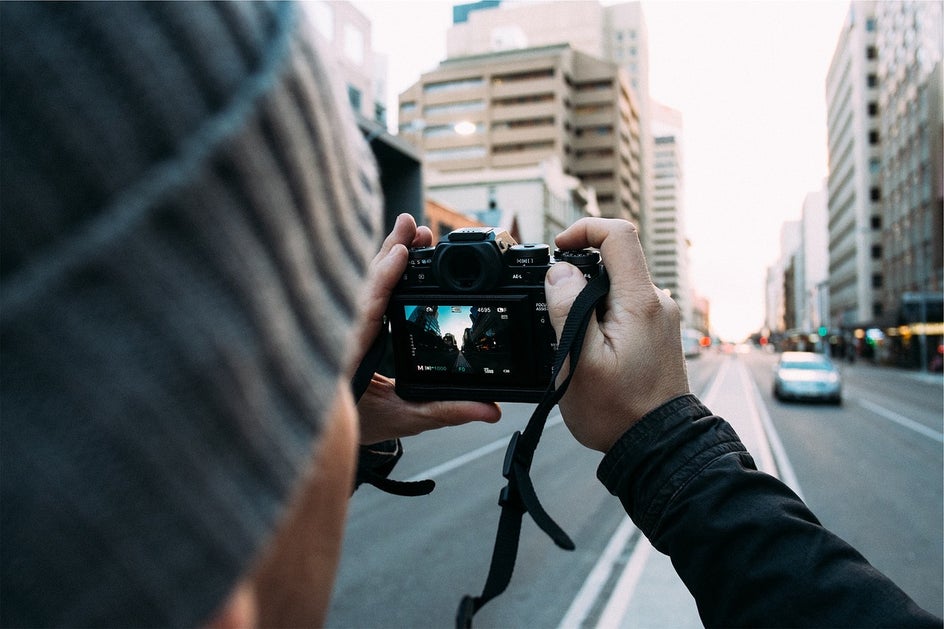
Start by heading over to the BeFunky Photo Editor and upload a photo:

Time to take a cute childhood moment and make it a memory. Head to the Edit panel on your left to access the Crop tool:
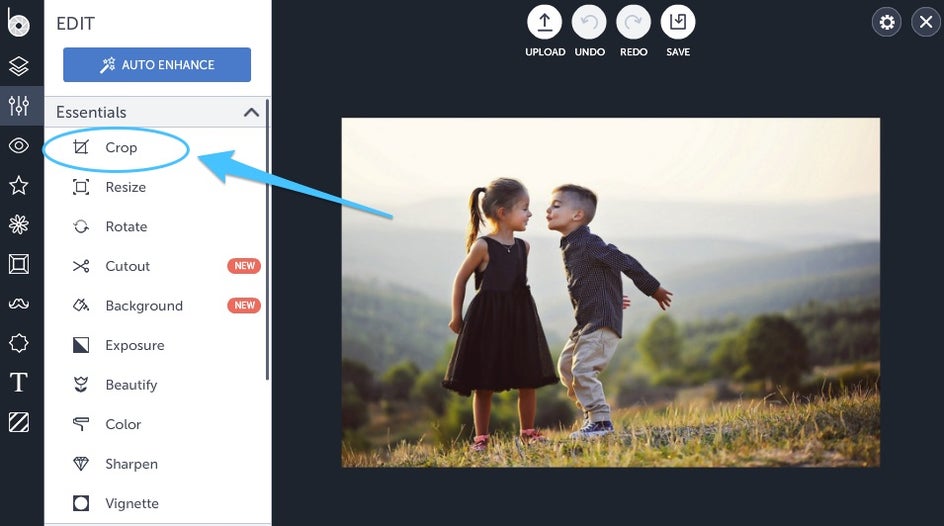
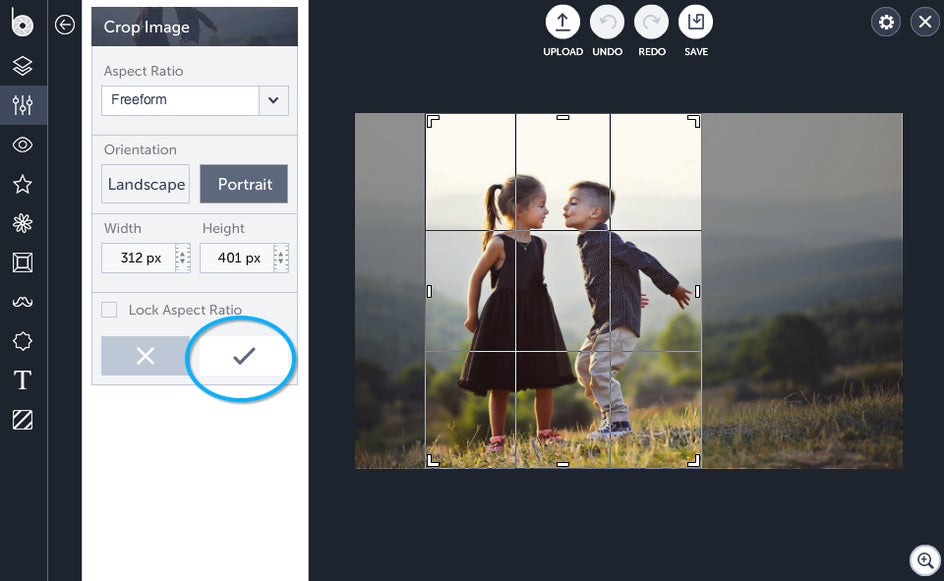
Click on Crop to open up the panel. You’ll be greeted with a variety of options including whether or not you’d like your photo to be landscape or portrait oriented…
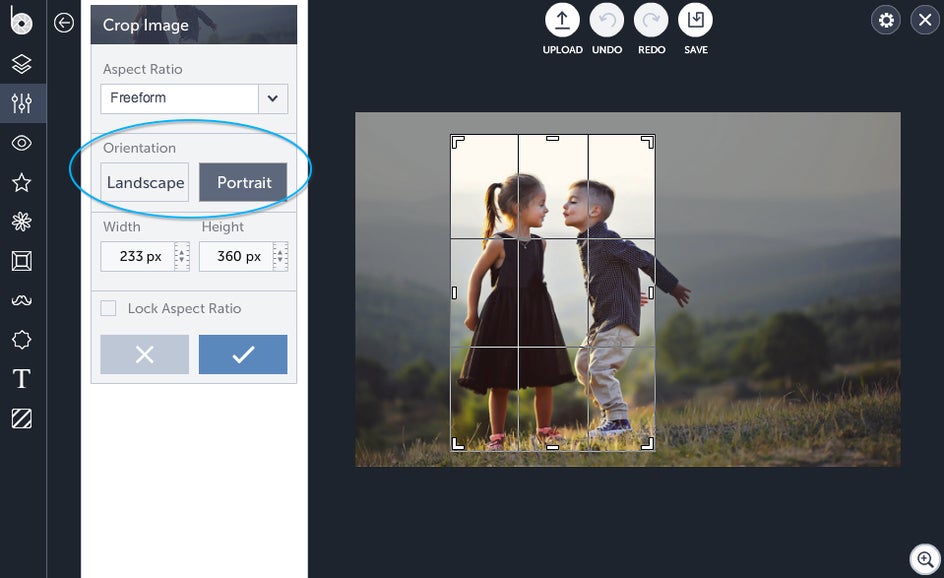
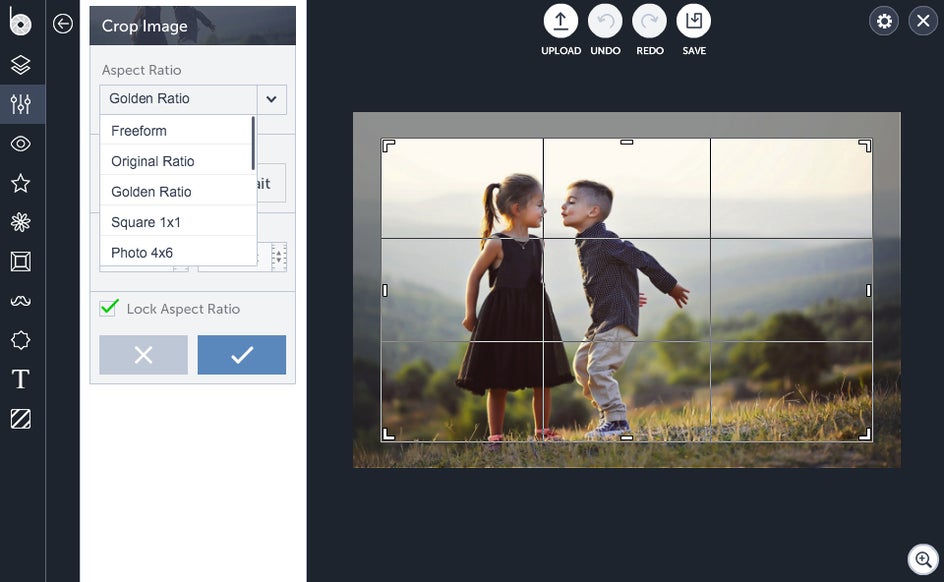
...as well as a drop-down list of aspect ratio options. You can optimize your aspect ratio for just about anything here, including selecting the infamous “Golden Ratio” or just a plain old square one.
In this case, I want to focus on the kids in this photo rather than the landscape, so I’m going to use the portrait mode orientation. Click on ‘portrait’ under orientation, then click and drag to adjust the size of your cropped area. When you're ready to go, take the red pill hit the blue checkmark.
The final result? Too much cuteness for one frame to handle. Save it to your computer, Facebook, Google Drive or even Dropbox—basically anywhere you can think of, really.

Want to turn up the cute factor? Add in a nice frame, throw in a cutesy overlay or even turn your photo into a spiffy Polaroid for mom and dad—either way you do it, you’re still the king of this castle, darling.
Ready to crop your way to the big leagues?