A Guide for Creating Digital Blue and Golden Hour Photos
In the realm of photography, there are magical periods known as the Golden and Blue Hours, where the sun's departure or expected arrival covers the world in ethereal hues, casting a warm golden glow or a tranquil blue ambiance. For many photographers, capturing the elusive beauty of these moments is a pursuit that often involves meticulous planning, patience, and sometimes even a pure stroke of luck. However, what if the opportunity to witness and photograph these natural phenomena slips away due to unpredictable circumstances or time constraints? The digital realm offers a fascinating alternative – the ability to recreate the enchantment of the Golden and Blue Hours through the wonders of the BeFunky Photo Editor. Welcome to a new era of photography where the Golden and Blue Hours are not just fleeting moments in time but malleable canvases waiting to be painted with strokes of pixels and creativity.
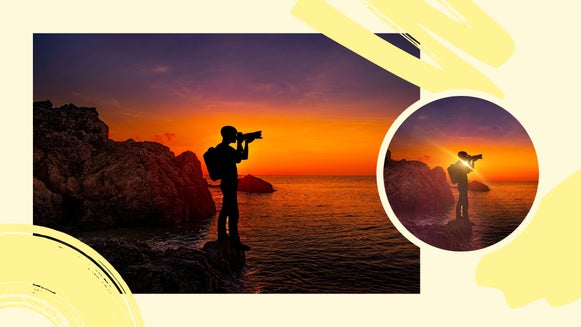
What Is Golden Hour?
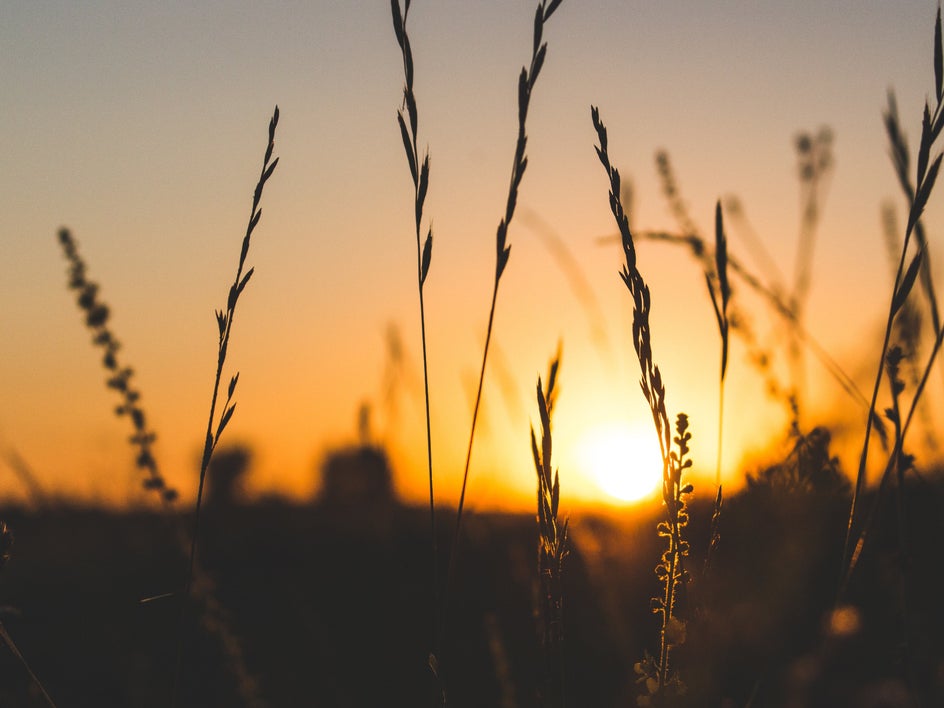
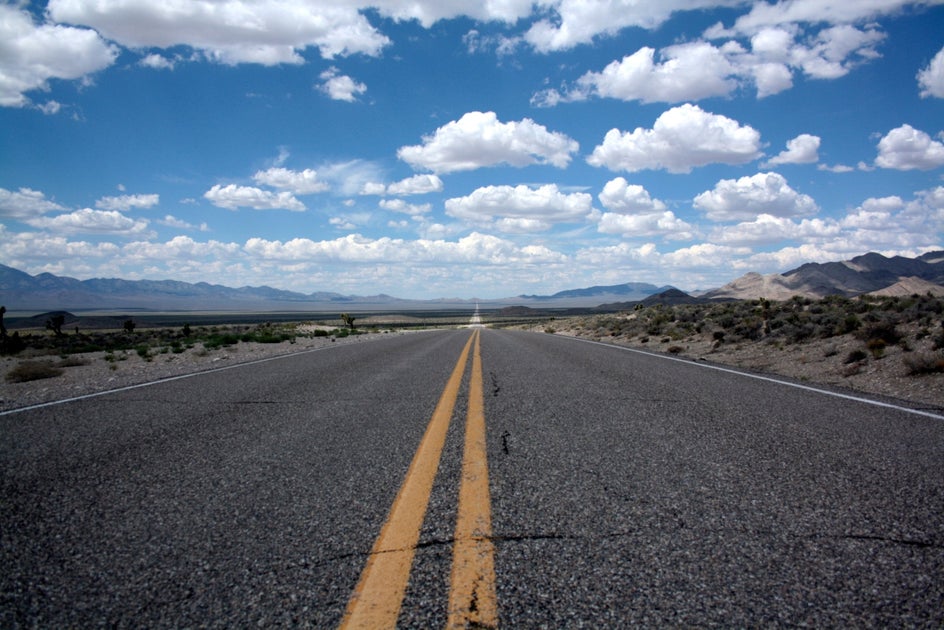
Picture this: it's that magical slice of time right before sunset or after sunrise when the world gets wrapped in a warm, golden embrace. It's like the universe hits the dimmer switch, casting everything in a soft, honeyed glow. During the moments just before the sun gracefully dips below or makes its radiant entrance above the horizon, the sunlight undergoes a captivating transformation. It becomes diffused, casting a softer glow with a warm reddish tint. The harshness of direct sunlight fades away, and shadows cease to exist. This is known as the Golden Hour. Here's the behind-the-scenes magic – the sun is low on the horizon, and its rays catch this dreamy golden filter as they paint the sky. Why do photographers swear by it? Because the golden hour transforms the mundane into the magnificent. Your average park bench becomes a throne, a city skyline turns into a golden tapestry, and suddenly, everything's dipped in liquid gold.
How to Digitally Create a Golden Hour Photograph
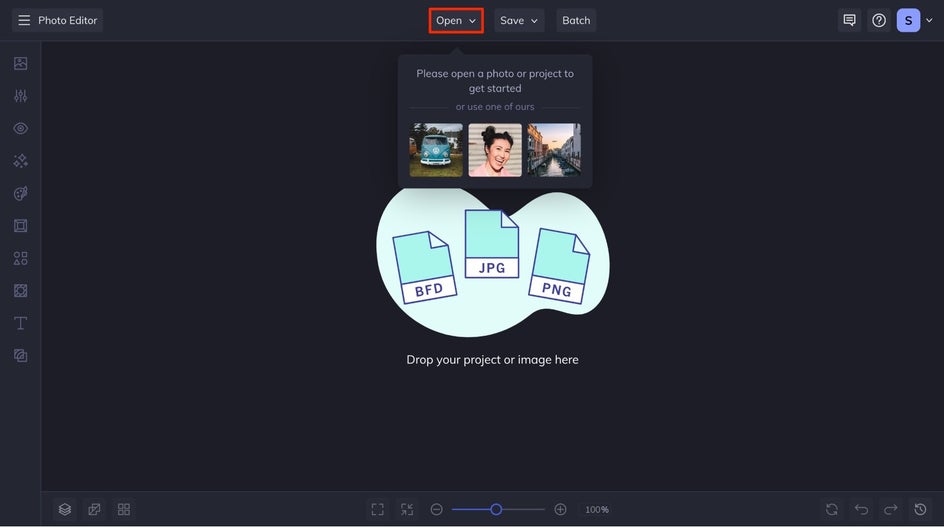
Get started by opening your image in BeFunky’s Photo Editor, you can either drag and drop your image into the interface or open it from your computer by clicking the Open button at the top of your canvas.
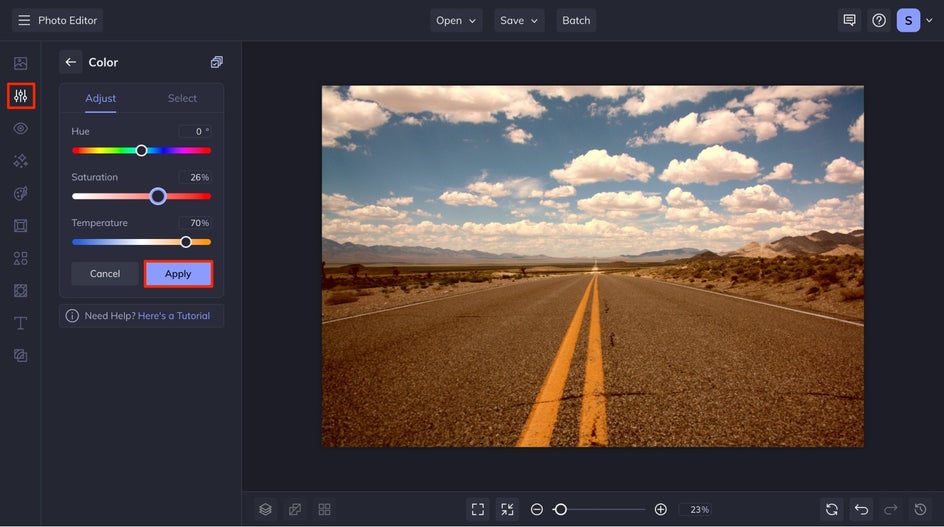
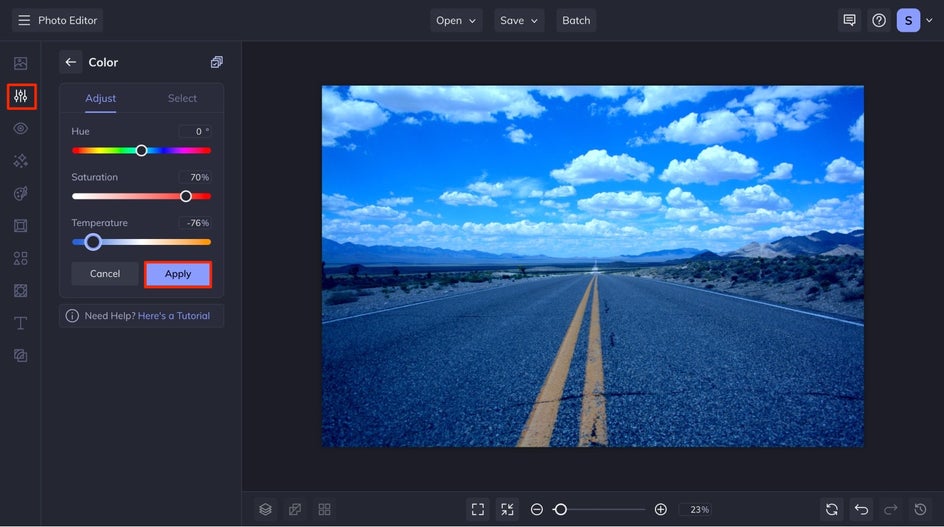
Navigate to the Edit tab and find the Color tool under the Essentials section. Here you will move the slider of the temperature bar to the warmer side till your image reaches the desired golden tint that you are looking for. A slight increase in the saturation of your image will make the colors a bit brighter. When you are satisfied with the adjustments, click the Apply button.
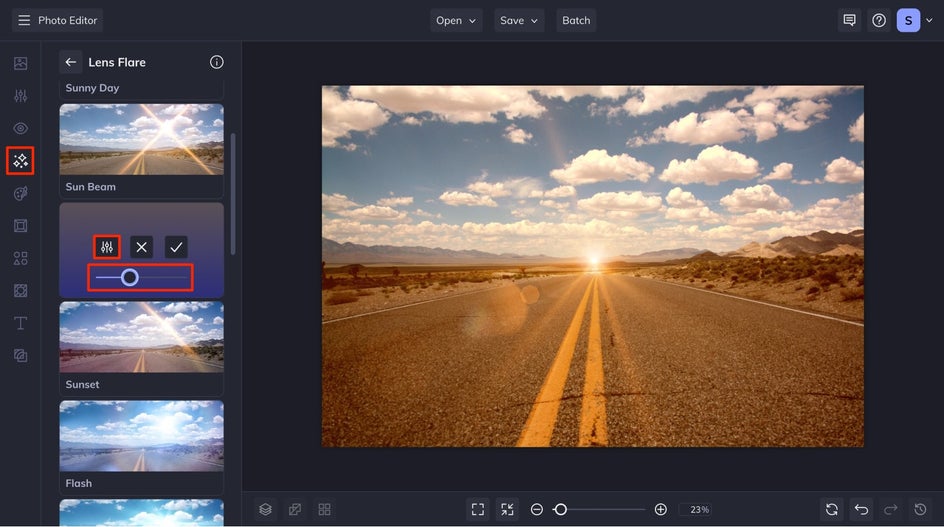
Next, head to the Effects tab and locate the Lens Flare Effect. There are several different types of lens flares, but you want to be able to find one that fits your image and emulates the sun just before it crosses the horizon. Our favorites to use are Sunny Day and Warm Sun. When you select an effect, two circles will appear on your screen and you can move them independently by clicking and dragging them into place. Be sure to place the larger of the circles right above your horizon line to have the most authentic results. The smaller circle can be placed wherever you desire on the canvas. Use the slider to increase or decrease the intensity of the sun flare, for a more natural look, reducing it slightly below half has a greater impact. If you want to increase the golden impact, click on the Settings box.
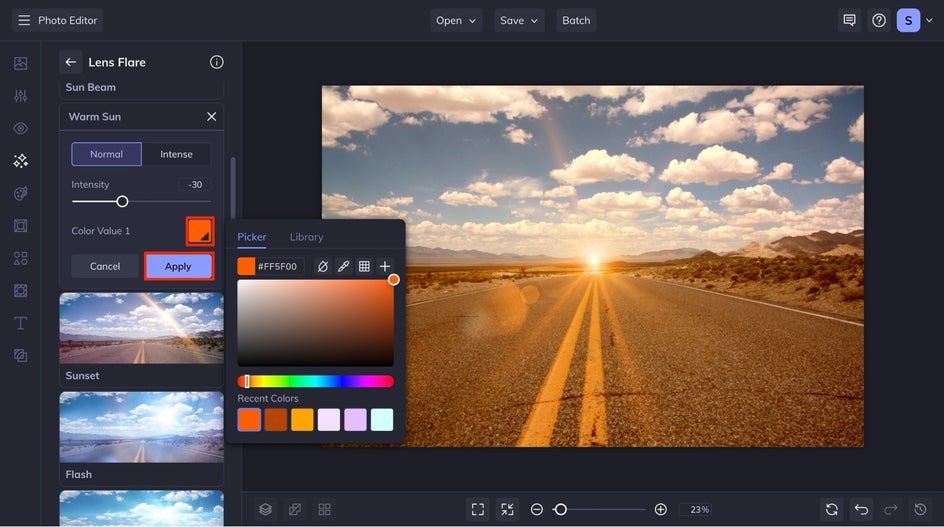
Adjusting the Color Value to an orange color will allow for your image to be more golden in its appearance. Once you are happy with the placement and color of your lens flare, click the Apply button.
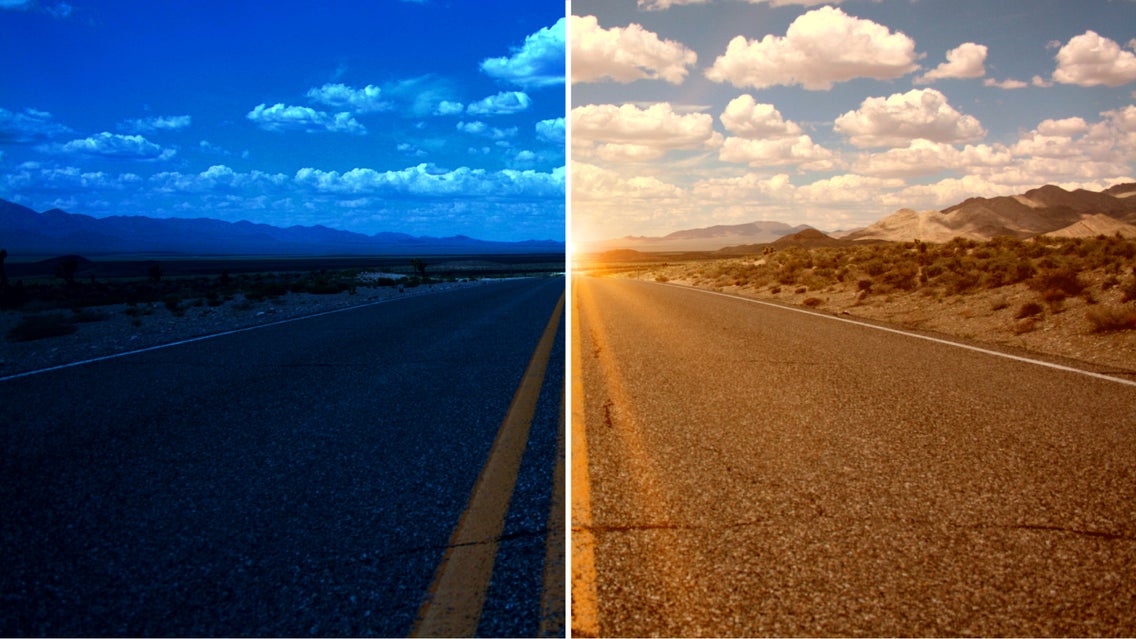
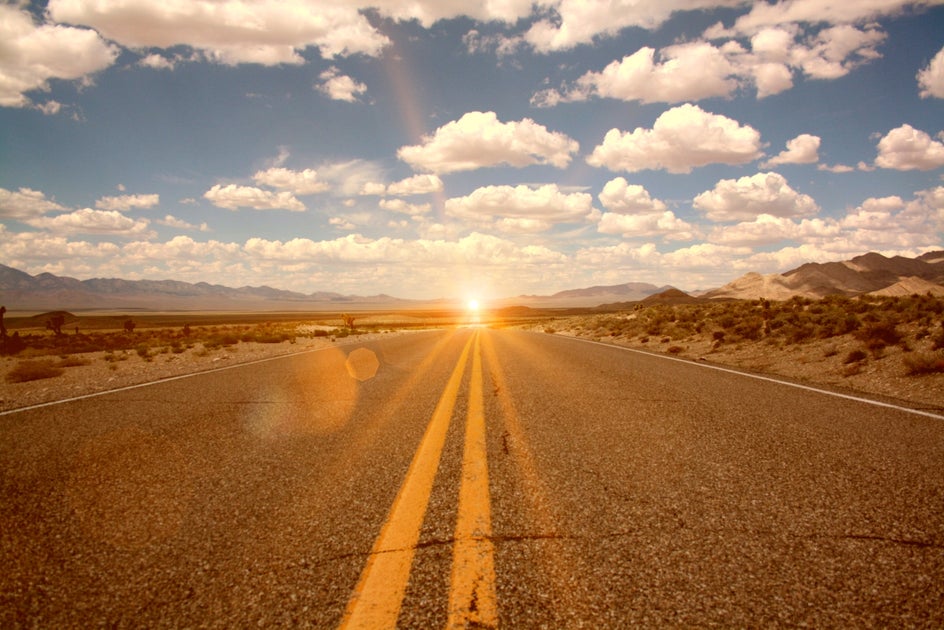
After you are satisfied with your final image, click the Save button at the top of your canvas and save it to your desired location! Check out this image's glow-up! We turned a regular daytime roadscape into a total dream with that magical golden hour vibe, giving the scene a touch of enchantment.
What Is Blue Hour?
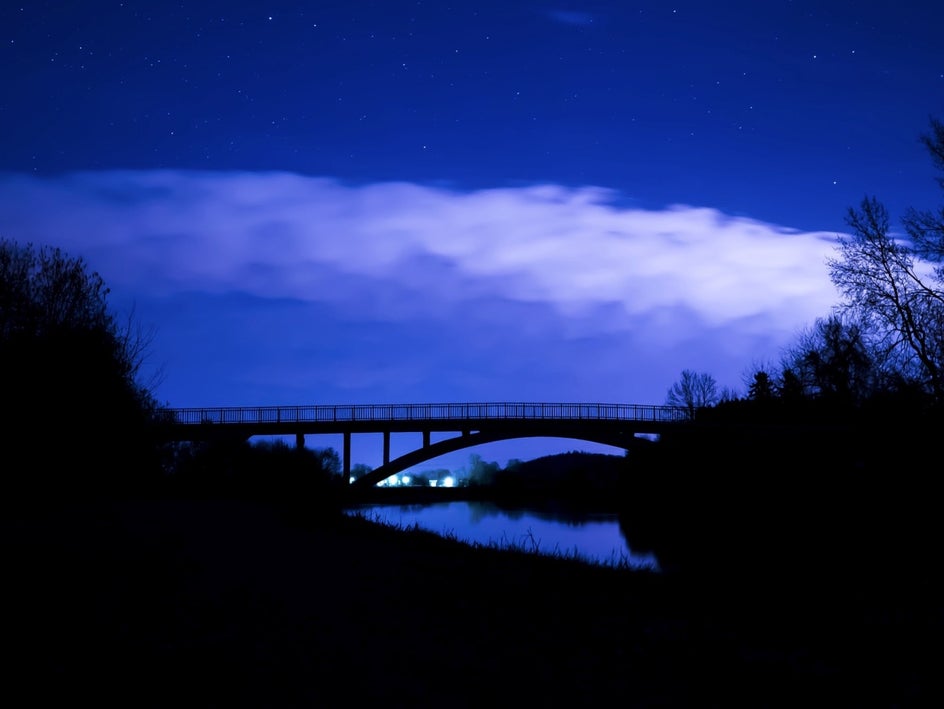
The "Blue Hour" is a photographer's secret weapon. It's that breathtaking period just before sunrise or after sunset when the sky puts on a show, swapping its usual colors for a dreamy deep blue. Why does this magic happen? Well, it's a sun-and-Earth tango. When the sun decides to escape below the horizon, its light takes a detour through our atmosphere, scattering and leaving behind this enchanting blue glow. Now, here's the kicker – the duration is a swift 20-30 minutes, like a cosmic sneak peek. And guess what? It's a diva – the exact timing, the intensity of that blue, it's all changing its mind daily. Factors like the weather, pollution, and where you're standing in the world influence this cosmic performance. Why do photographers love it so much? Because the blue hour turns ordinary scenes into dreamscapes. Landscapes, cityscapes, you name it – they all get a touch of that celestial wonder.
How to Digitally Create a Blue Hour Image
You’ll start the same as the Golden Hour image, by opening your image in BeFunky’s Photo Editor.
Head over to the Edit tab and locate the Color tool again, under the Essentials section. Here you will move the slider of the temperature bar to the cooler side, we suggest about -75%. Increase your saturation to about 70% to have your image have the staple blue of a blue hour image. When you are satisfied with the adjustments, click the Apply button.
Next, you’ll head over to the Exposure tool, under the Edit tab in the Essentials section. Here you want to reduce your brightness, raise your contrast, reduce your highlights, and slightly reduce your shadows. This will create the look of the iconic blue hour images that you have seen. When you are satisfied with your image, click the apply button.
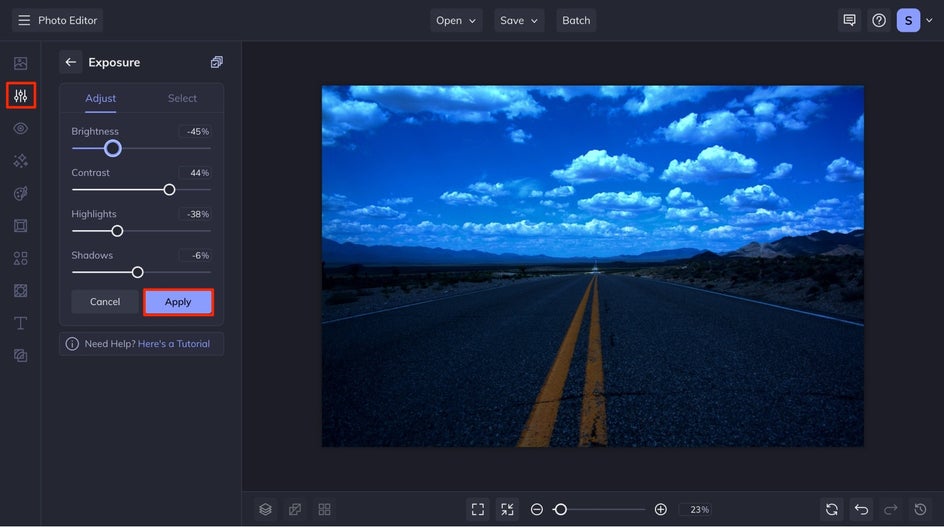
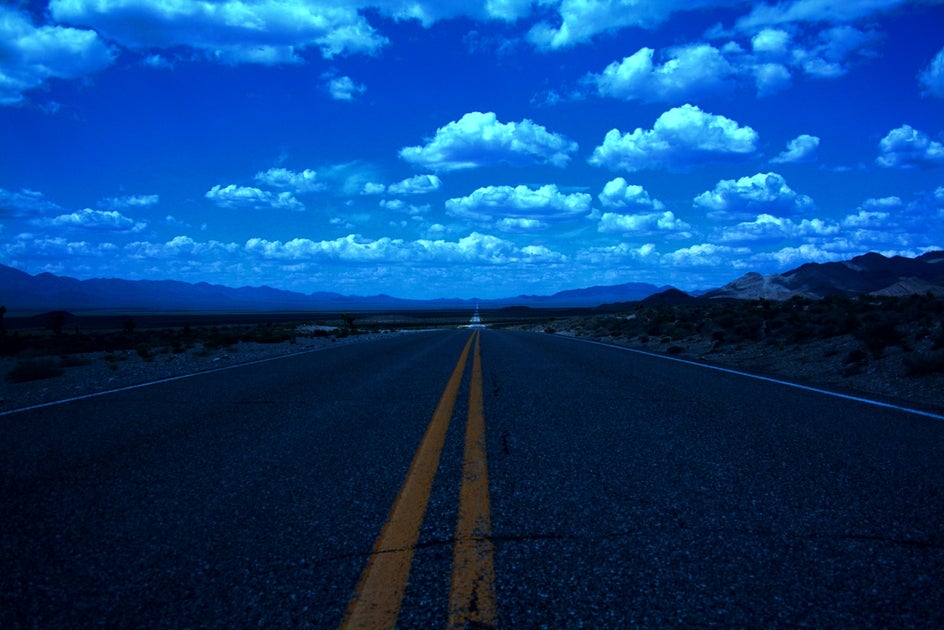
Lastly, click the Save button and save it to your desired location. Feast your eyes on this image's transformation! We took this same daytime roadscape and turned it into a glimpse of blue hour. In just a few simple steps, you can make any image into a blue hour dream.
Create Your Own Golden and Blue Hour Magic
The ability to transform images into the allure of the Golden and Blue Hours, even if the perfect moment is missed, marks a groundbreaking shift. Through the magic of digital editing tools, like the BeFunky Photo Editor, every photographer gains the power to infuse their visuals with the dreamy warmth of golden twilight or the serene ambiance of the blue hour. It's a creative rescue mission, rescinding the constraints of time and offering a canvas where moments can be relived and reimagined. This not only preserves the essence of those enchanting periods but allows us to craft our own visual narratives, painting the world in the hues of our imagination. Get started making your own!