How to Add an Overlay to Your Photos
Whether it’s on social media, blogs, or even album covers; photo overlays are everywhere these days, and for good reasons too! Not only do they let you overlay two photos or frames to create fun, new images with transparency, but they’re also more eye-catching than a single image on its own.
If you’re wondering “How do you overlay my photos?”, you’re in luck. Our Photo Editor gives you access to a wide range of overlays to transform your own images.
How to Create a Photo Overlay Using BeFunky
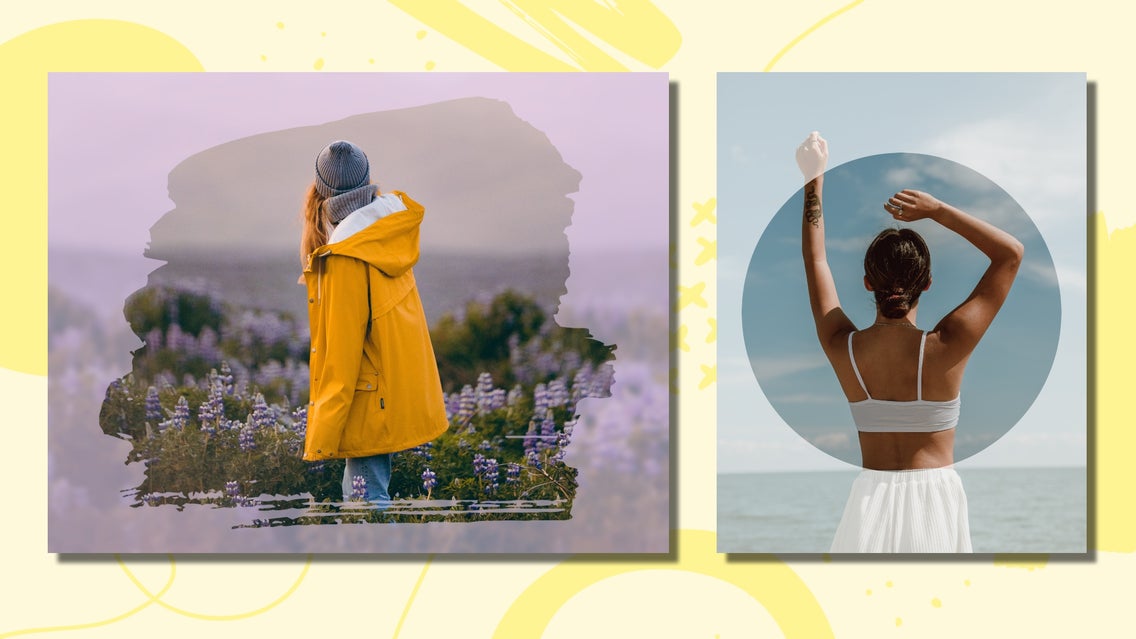
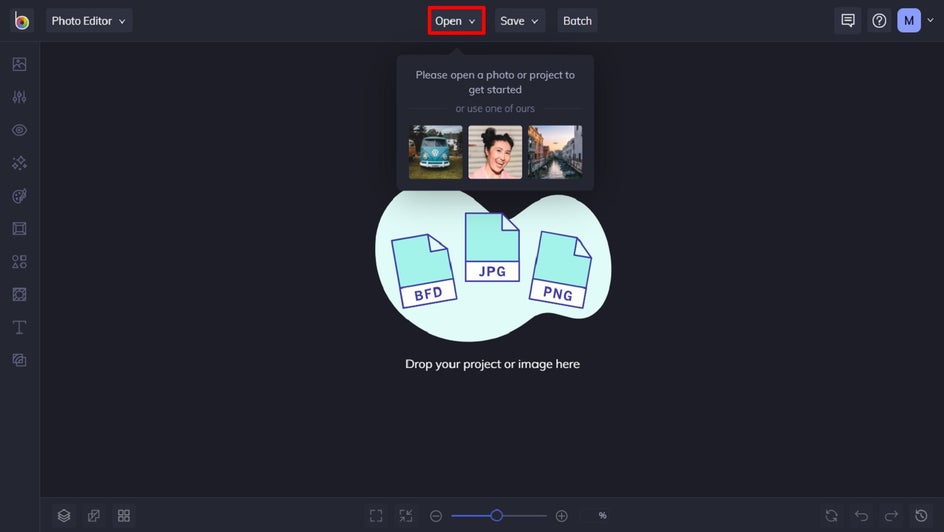
Ready to add an overlay to your image? To get started, head to the Photo Editor and open an image of your choice. This will form the base image underneath your photo overlay.
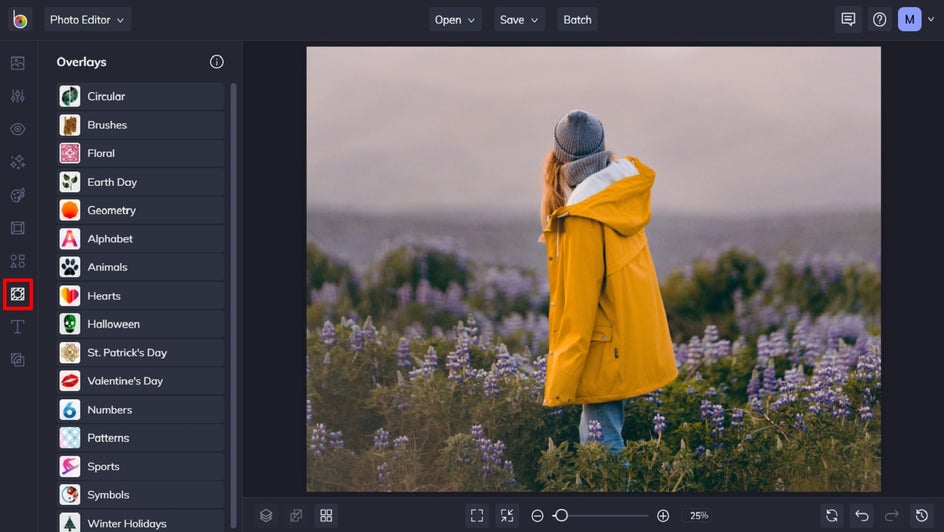
Step 1: Navigate to Overlays
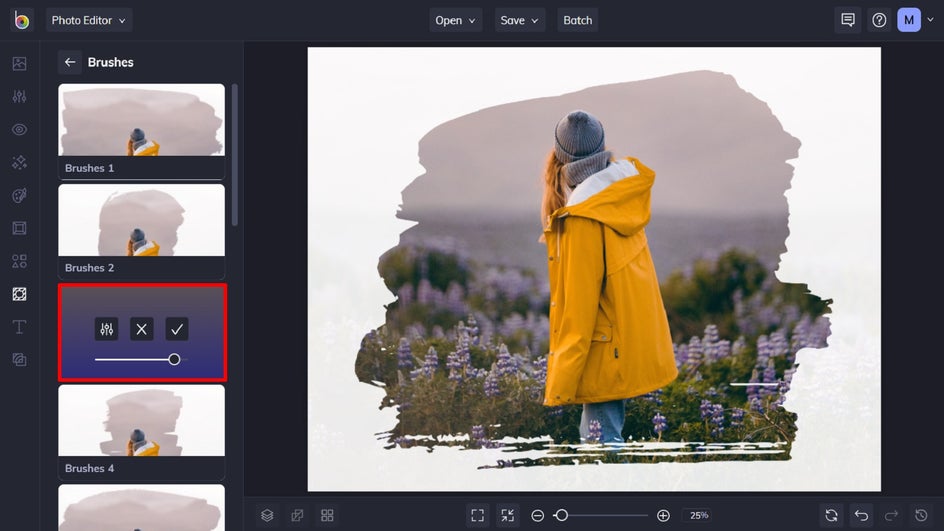
Click on Overlays in the main menu on the left of your screen. This will bring up all of the photo overlay categories to choose from. Simply select the category that takes your fancy. In this example, we’ve chosen the category Brushes.
Step 2: Select an Overlay
Click on an Overlay option to sample how it will look on your image. You’ll also notice when you click on an effect, three options are available: Settings, which allows you to alter the effect further; Cancel, which cancels the selected effect; and Apply, which applies the effect as-is. You can also adjust the strength of the effect using the slider.
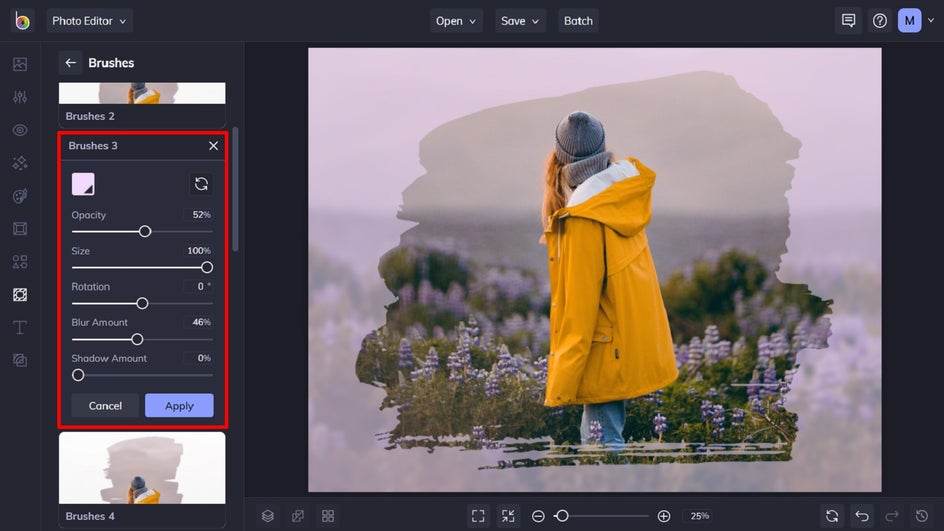
To adjust your Overlay effect further, click the Settings icon.
Step 3: Make Adjustments
Clicking on the colored square lets you change the background color of your remaining image, outside of the overlay. The Opacity slider lets you adjust how much of your background image is visible, while Size increases or decreases the size of your overlay. You can also use the Rotation slider to rotate the overlay over your image or adjust the Blur slider to blur the background of your original image. Finally, you can adjust the Shadow slider to add a shadow to the exposed area on the overlay and give it depth.
Step 4: Save Your Photo Overlay
Once you’re done editing your photo overlay, simply click Save at the top of the screen, then select your desired save location.

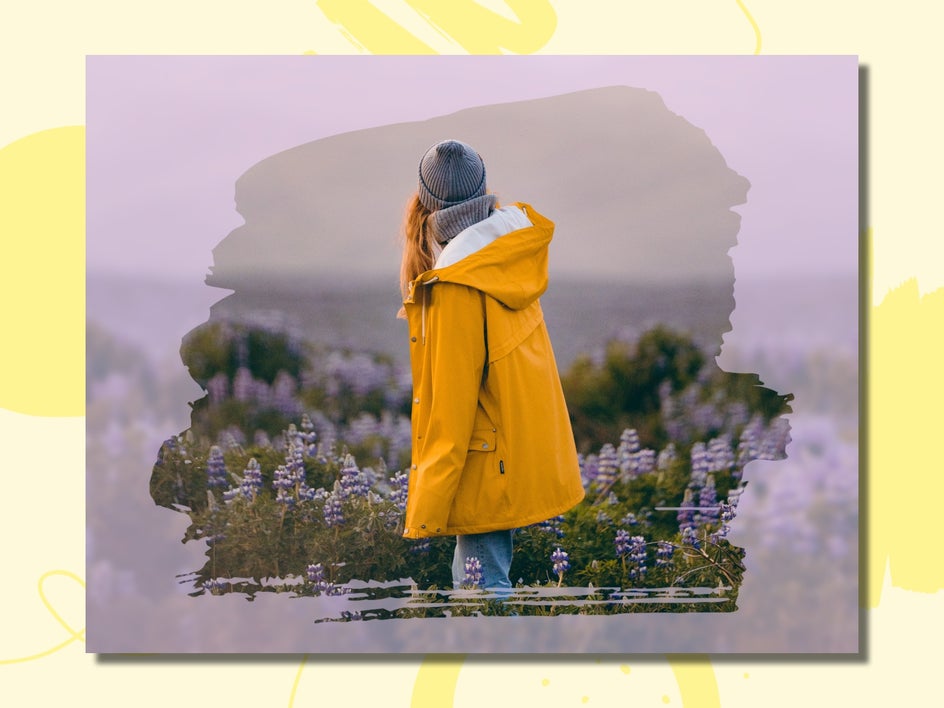
Final Results
There you have it! Creating a photo overlay online has never been faster or more fun.
The Best Photo Overlay Ideas
Need some additional ideas to inspire your next photo overlay? Don’t worry, we’ve got you covered! Here are just three of our favorite looks below.
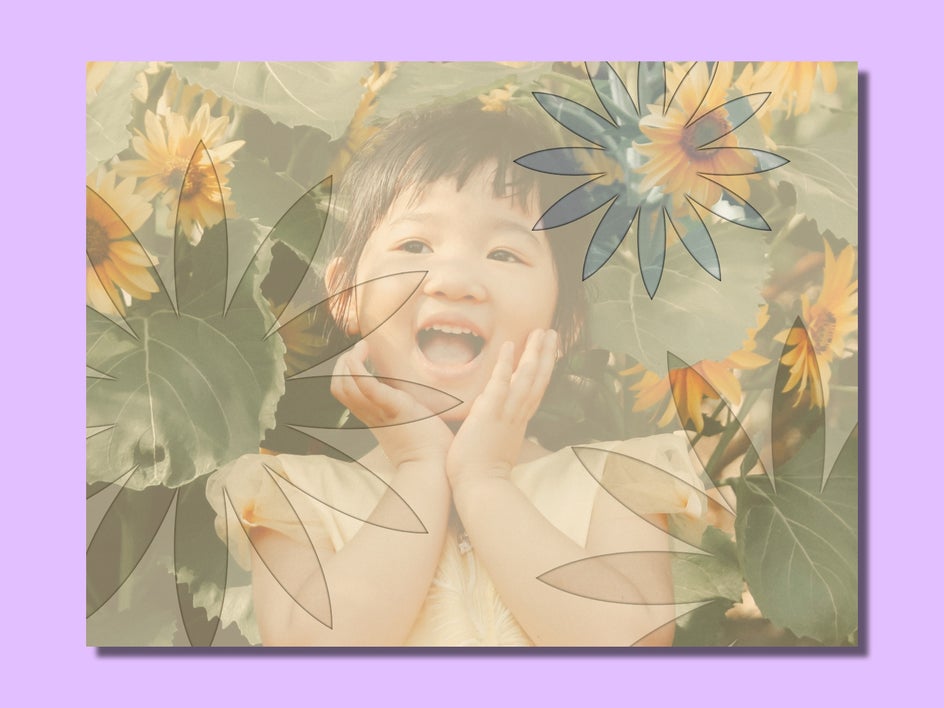
Whimsical
With a wide range of floral, patterned, and Earth Day-related Overlays, adding a whimsical touch to your photos is easy. In this example, we’ve layered the same Floral 1 overlay three times to create a fun and unique look. To create a whimsical, layered look yourself, simply apply your Overlay with a low opacity each time. This will ensure your photo is still visible underneath your Overlay effects.
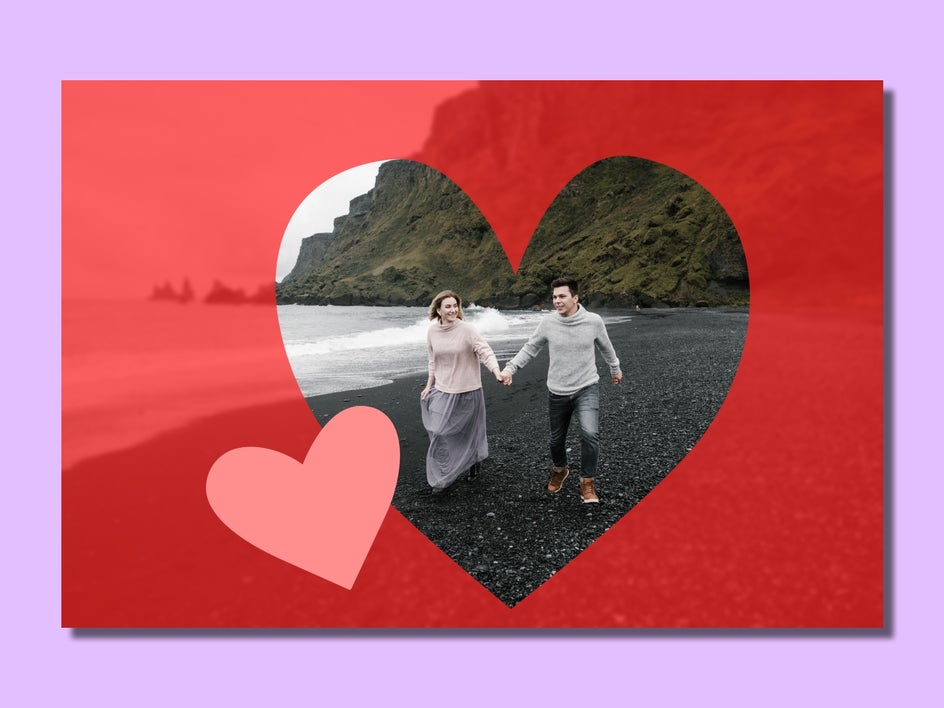
Romantic
With categories such as Hearts and Valentine’s Day, creating a romantic photo overlay is easy. You can even adjust the background color of your remaining image to be red or pink to really highlight the theme. Adding in related graphics from our Graphics Library can also make your overlay pop!
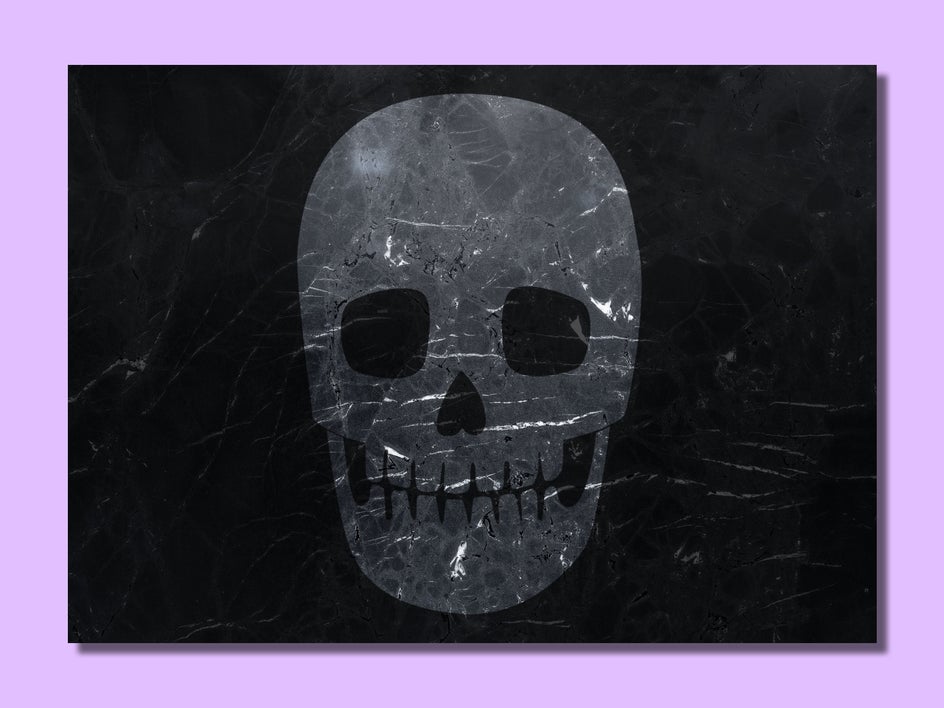
Spooky
If a spooky image overlay is more your thing, then the Photo Editor has got you sorted. Simply apply one of the Halloween Overlays to achieve your desired look. Adding these to a haunting background image is best!
Create Images With Transparency the Easy Way
Your quest for the perfect photo overlay app is over. With the huge range of Overlays available in BeFunky’s Photo Editor, overlaying pictures on photos has never been easier. What imaginative photo overlays will you create?
Experiment with these Overlays today!