2 Easy Photo Masking Examples to Elevate Your Designs
When making marketing material, design can start to become pretty bland when you continue to produce the same kinds of content. You can make a photo ad, add some text on top, or maybe add a colored section or a couple of graphic elements to spice things up. This works great, but if you want to elevate your brand’s ads or other content, you need a way to create dimension by using design layering.
Within an eye-catching design, there are multiple elements that should harmoniously work together – photography, text, graphic elements, and negative space. Each of these design elements should be layers in such a way that your design feels cohesive. There are others design elements but we are going to focus on these within our design today.
So, how do you include all of these elements within your design without your design feeling chaotic or disorganized? Enter photo masking with BeFunky’s Overlays. With BeFunky’s desktop Photo Editor and Mobile App, there are hundreds of customizable Overlays you can add to your photos.
What Is An Overlay?
Overlays are another term for photo masks. Imagine tracing a cookie cutter shape onto a patterned piece of paper. When you cut that shape out and place it on top of another pattern or photo, you just created an overlay. You can achieve these same results with photos in just a few clicks. Remember that whatever is outside of the cutout is hidden, or masked.
Overlays can be a shape, text, pattern, or a combination of any of those things. They’re great for highlighting a portion of your image or adding a unique look to your brand assets. The best part is, with BeFunky’s Graphic Designer, adding an overlay is easy whether you’re on the computer or your mobile device.
One thing to note. You are able to achieve this look in BeFunky’s Photo Editor, as Overlays are a part of the Photo Editor program. However, I like to use Befunky’s Designer for more design-based projects, and use the built-in Edit Image option – this is truly one of the most seamless transitions between photo editing and design programs on the market.
Example 1: Apply a Shape as an Overlay
You can get to the overlay effect in a few different ways. We will show you how to achieve it in BeFunky’s Graphic Designer. Shape overlays are one of the easiest ways to add interest to your designs.
Pro Tip: If you are wanting to add a simple overlay to a photo, you can achieve a similar look by starting in BeFunky’s Photo Editor. Follow the same steps below.
Step 1: Select a Canvas Size
In Befunky’s Graphic Designer, select Blank Canvas and then choose the size you want for your canvas. We are going to make an 11x17 poster.

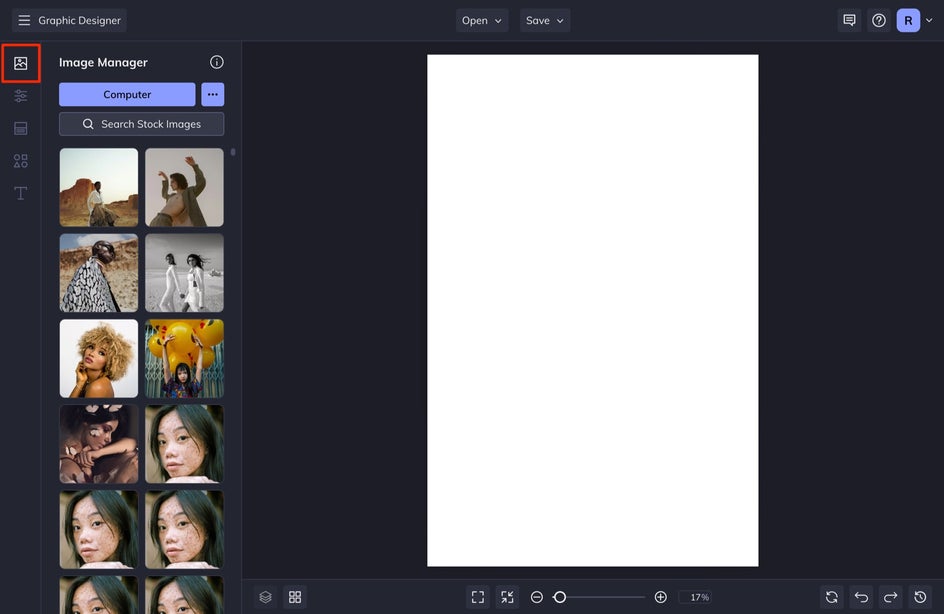
Step 2: Add An Image to Your Canvas
Once you have your canvas size selected, head into Image Manager. Upload the photo you want by selecting Computer. You can also use stock imagery by selecting Search Stock Images. Once you have your image uploaded into the Image Manager, drag and drop it onto your canvas.
Step 3: Choose Any Overlay
With the image selected, press Edit Image from the Image Properties menu that appears, followed by the Overlays tab.

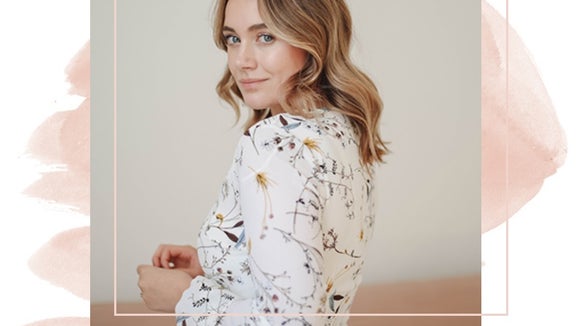
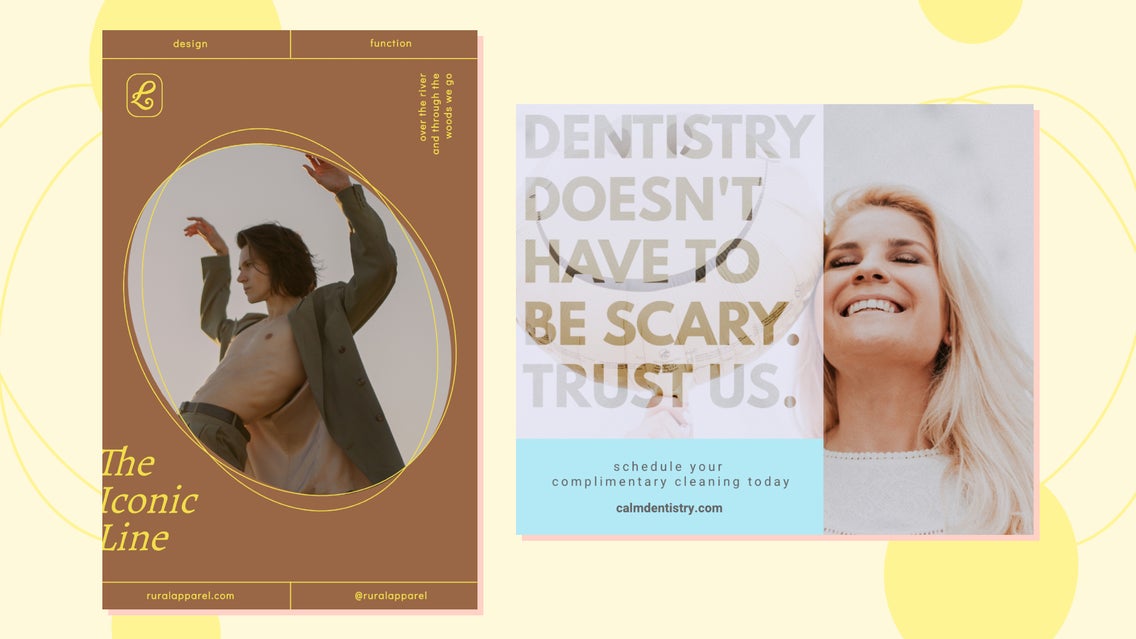
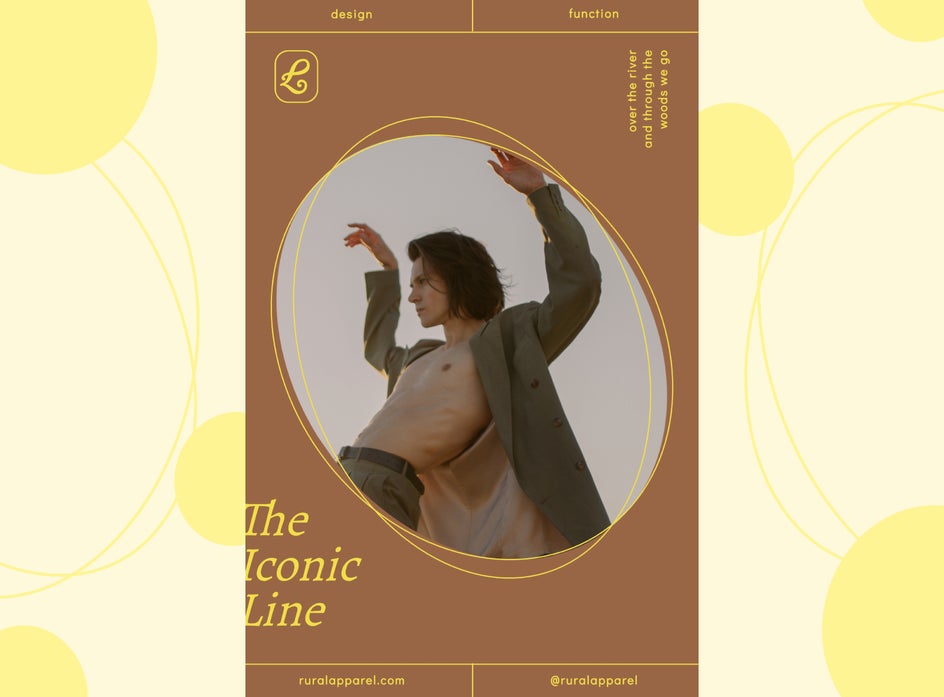
We are going to keep our design minimal-modern, so we rotated an oval 45 degrees. You can find options such as Rotation, Size, Opacity, Color, and more by selecting the left-most Settings option after clicking on the overlay you want.
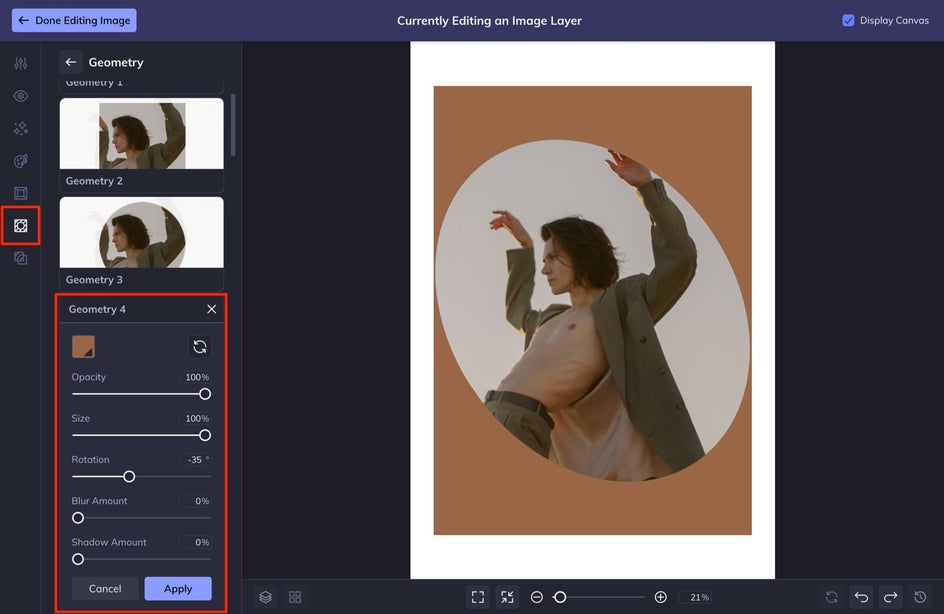
Once you are finished, head back to Graphic Designer by selecting Done Editing Image in the top left corner of your screen. You can then change the background color in the Customize tab, and add text from the Text tab around your image.
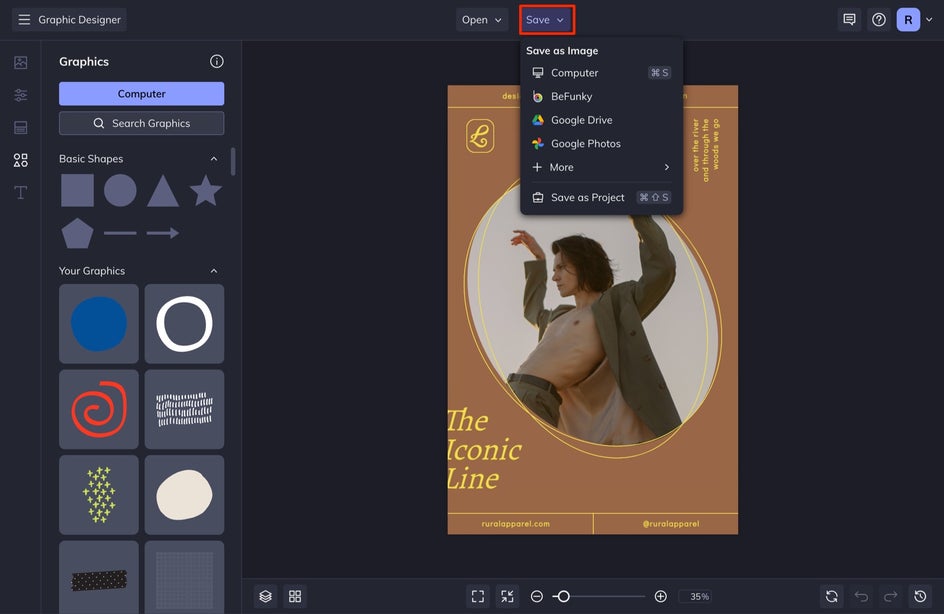
Step 4: Save the Image Overlay
Once you are all finished, make sure you save your design in the preferred format by heading up to the Save tab at the top of your screen. If you are keeping this digital, save it as a JPEG and if you are printing this out, save it as a PDF.
That’s it! Adding an overlay is such a simple way to elevate your designs, check out the final piece below. If you are wanting to see the second way of adding overlays to your images through text, keep reading!
Example 2: Apply Text as a Photo Mask
Follow Steps 1 and 2 from above. We are going to create a Large Rectangle Web Ad. Rather than continue with Step 3, we are going to deviate by adding a text overlay. Follow along to get these results!
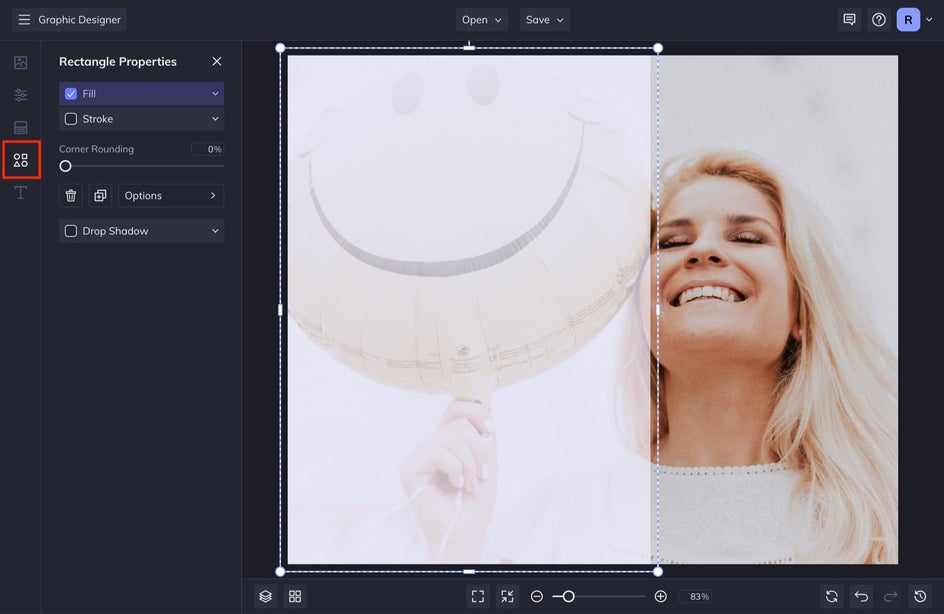
Step 1: Add a Square Graphic
Once you have your image formatted to your canvas, add a rectangle to one side of your canvas by selecting Graphics.
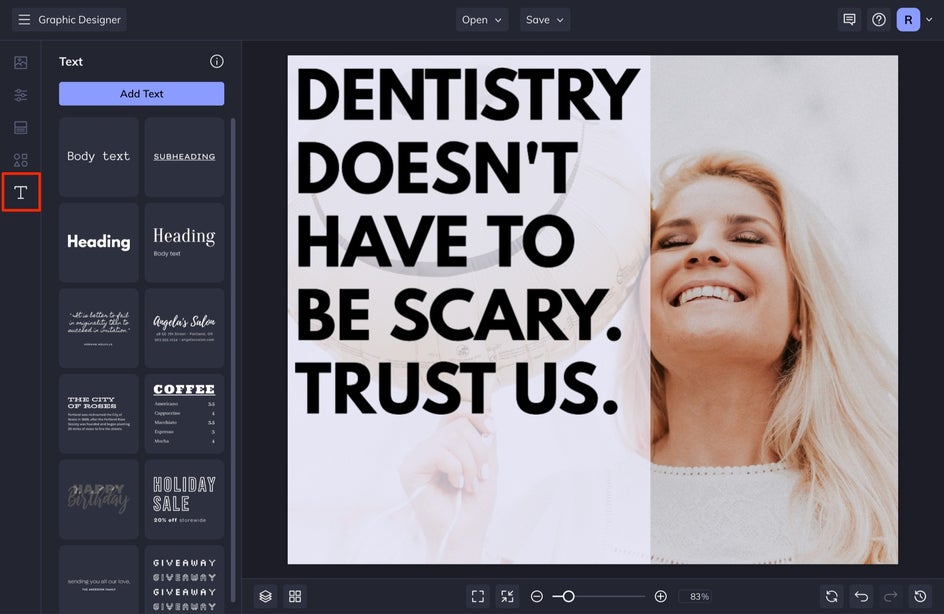
Step 2: Select and Edit Your Text
Select Text from the left-hand menu. Type out the text you want to say. With your text box selected choose a heavy font that is quite bold. You want to make sure there is enough surface space within each individual letter in order to execute this effect well.
Step 3: Create the Text Overlay
Simply head into your Image Manager and drag and drop your same background image onto your text. You will see the text have a blue overlay before releasing your cursor, this means that the image will be formatted within the text shapes.
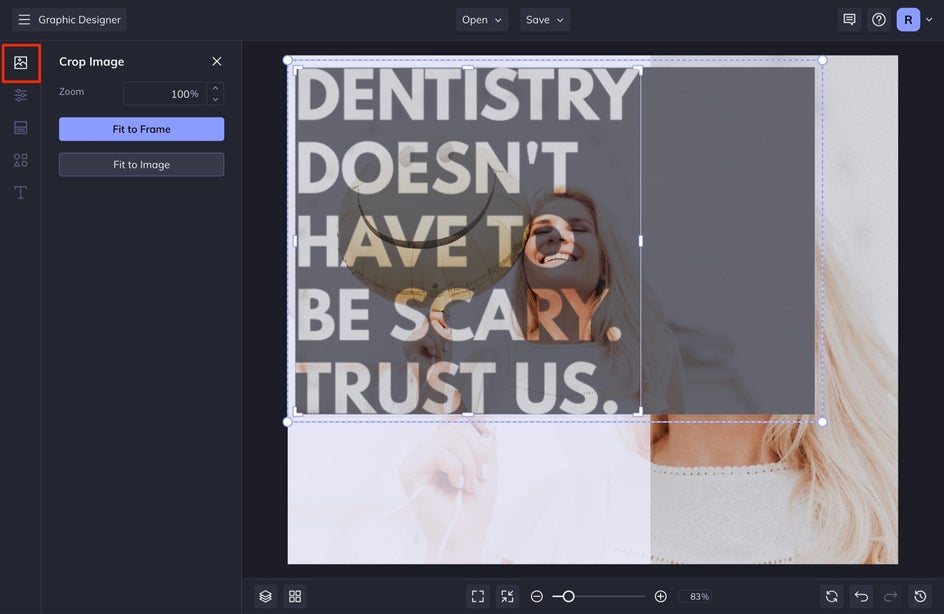
Once you do this, you will need to double-click on the text in order to resize your image to match the image behind it. This takes a few times to line up well, but once you do, your text will look like this! Pretty cool design, in my opinion.

Once you are finished, add some other graphic elements and text to advertise your company. Repeat Step 4 from above to save your graphic!

Elevate Your Designs With Overlays
With so many styles to choose from, BeFunky’s Overlays makes the ability to create high-level design very simple. Get started with either of the above techniques with Befunky’s Graphic Designer. Make sure you share your creations with us. We would love to see what you are creating!