Keep Your Elopement Stress-Free With These Elopement Templates

The days of big wedding celebrations are tapering off for couples choosing to spend their money on investments or honeymoon trips and choosing to celebrate small. No more figuring out who's on your guest list, sending RSVPs and wedding invitations, or the endless DIY projects to prepare for the big day. More and more people have been opting for a smaller wedding versus a big celebration – but just because you have a small gathering or skip a wedding altogether and choose to elope, doesn’t mean you can’t celebrate just as big!
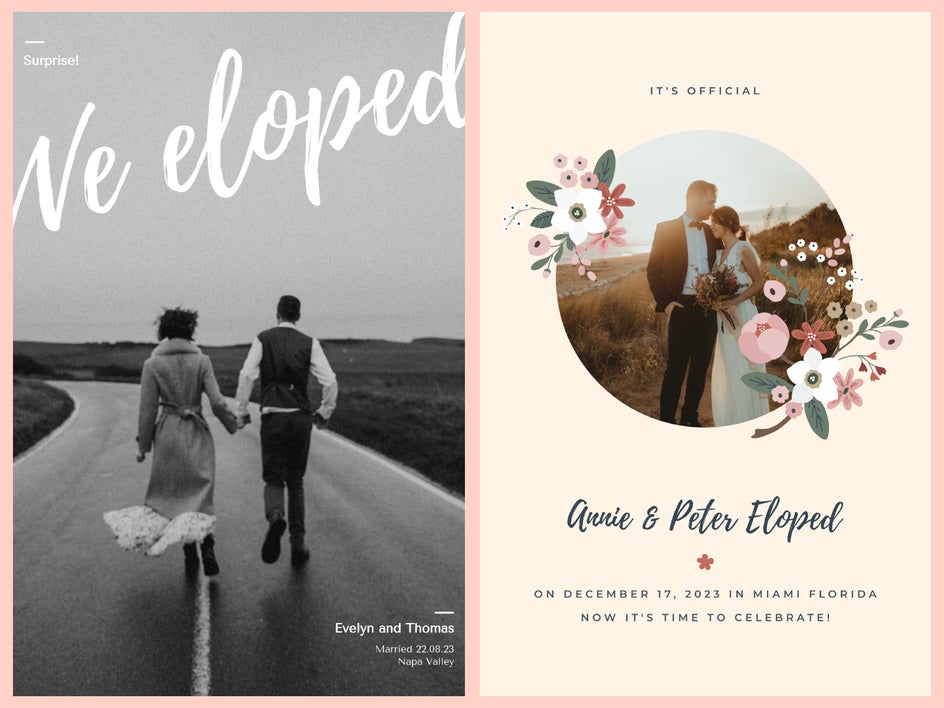
If you’re planning to elope, or recently have, you can still spread the word to your friends and family. BeFunky’s Graphic Designer is home to plenty of Elopement Announcement templates – so you have one less worry about designing your announcement. Even without a wedding, you can still choose a color palette that you can showcase in your announcement, Just add your favorite photo, type in your details, and you can alert your friends and family of the big announcement!
How to Design an Elopement Announcement
To get started designing your own Elopement Announcement, head to BeFunky’s Graphic Designer. Select the Templates tab and then type ‘Elopement’ into the search bar and hit enter.
Click on a template you like and then select Use This Template to begin the editing process.
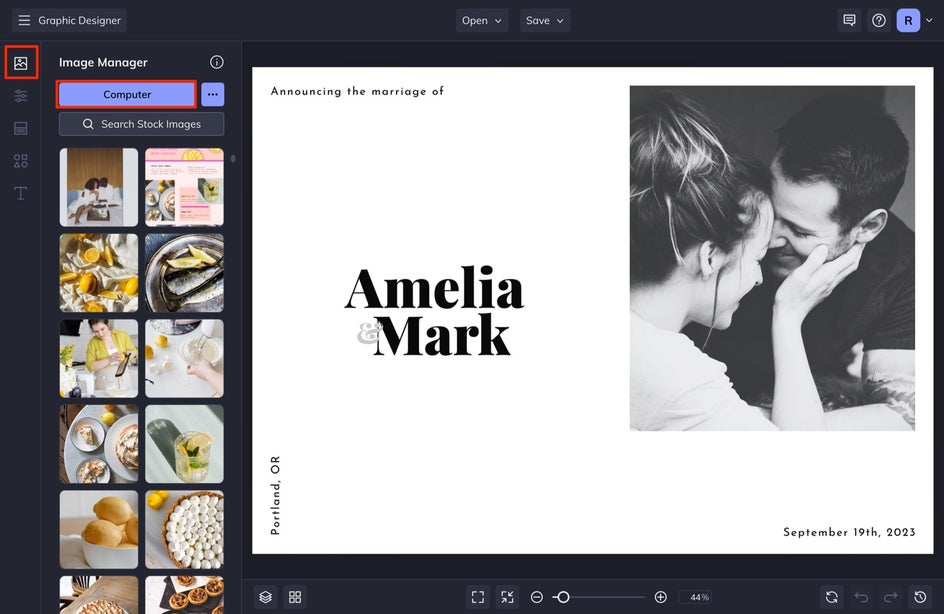
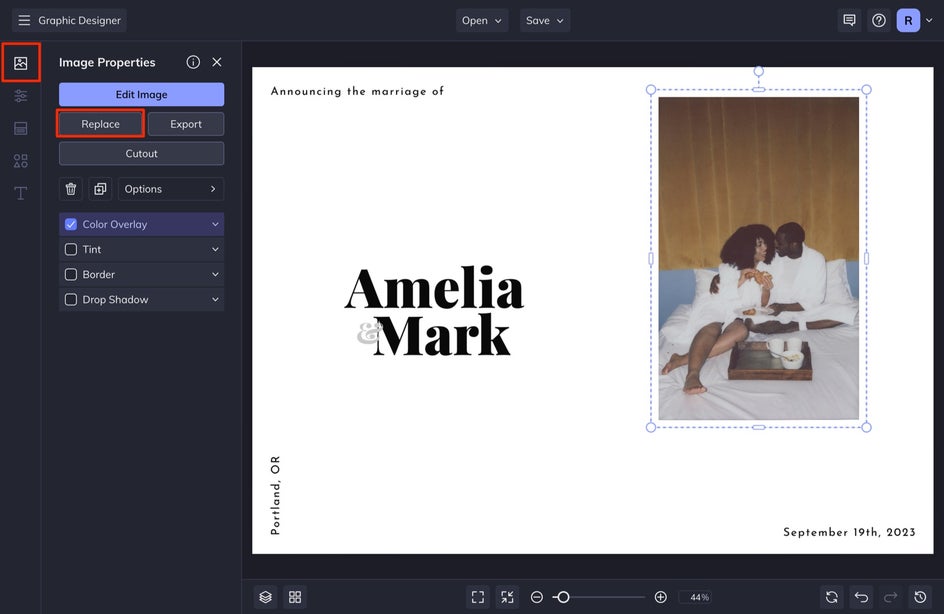
Step 1: Change the Photo
Head to the Image Manager and select Computer to upload a photo of you and your partner. You can either drag and drop this photo over the existing photo or click on the existing photo, then from the Image Properties panel, click Replace. This allows you to open a photo directly from your Computer’s files.
You can adjust the image’s composition by double-clicking on your photo and dragging the corners outward to reposition it.
If you still need to take engagement photos, take a look at this article!
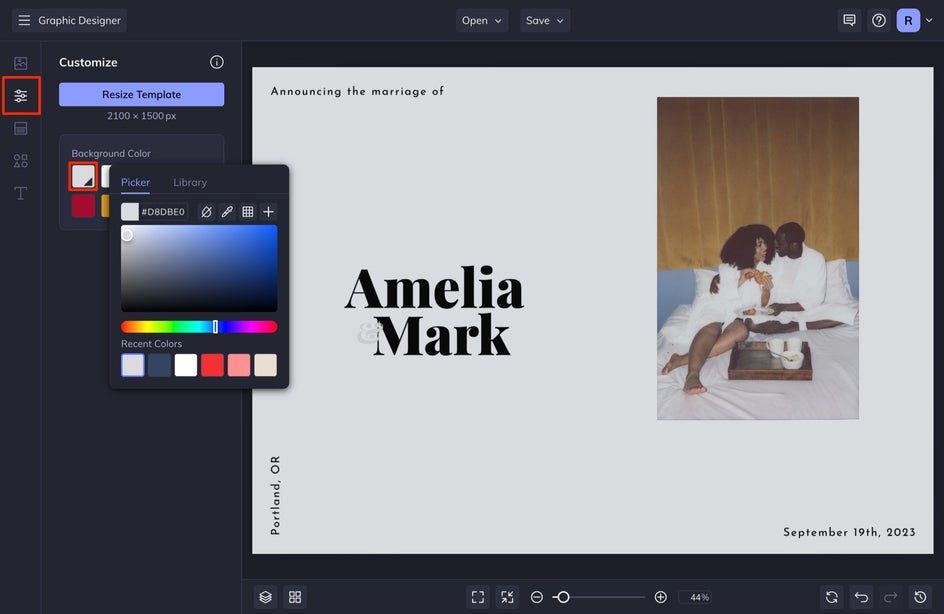
Step 2: Change the Background Color
To change your background photo, head to the Customize tab and select the first swatch. Choose your background color.
Step 3: Change the Text
Next, we’ll change the text. Double-click the text you want to change and then type in your own details.
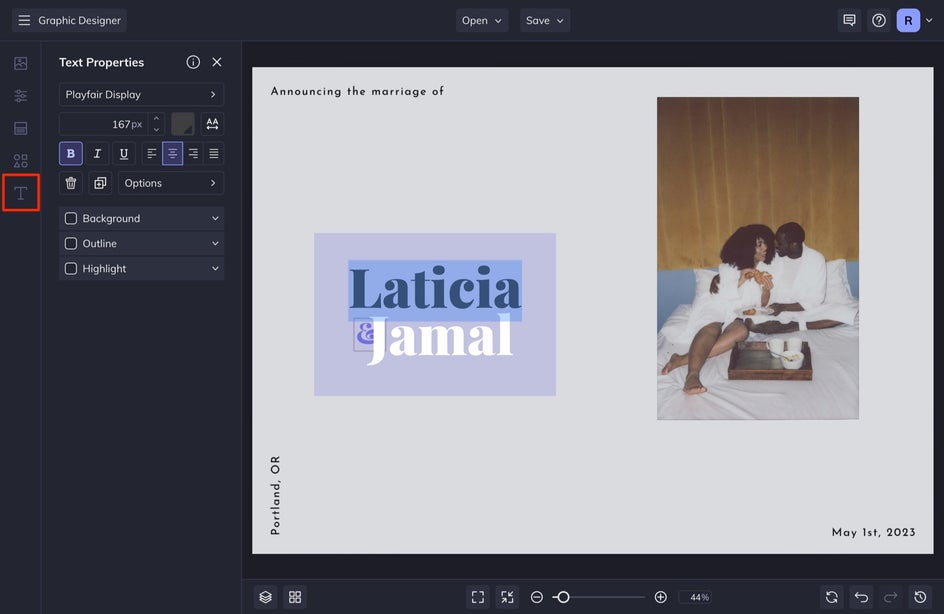
When you click on a text box, a Text Properties panel appears. From here, you can change the Font, Size, Spacing, Color, and more. Select the type you want to change the color of and then select the color swatch and choose the color you want.
Step 4: Change or Add Graphic Elements
Head to the Graphics tab in the left-hand menu. You can search for and add any graphic elements you like by selecting Search Graphics.
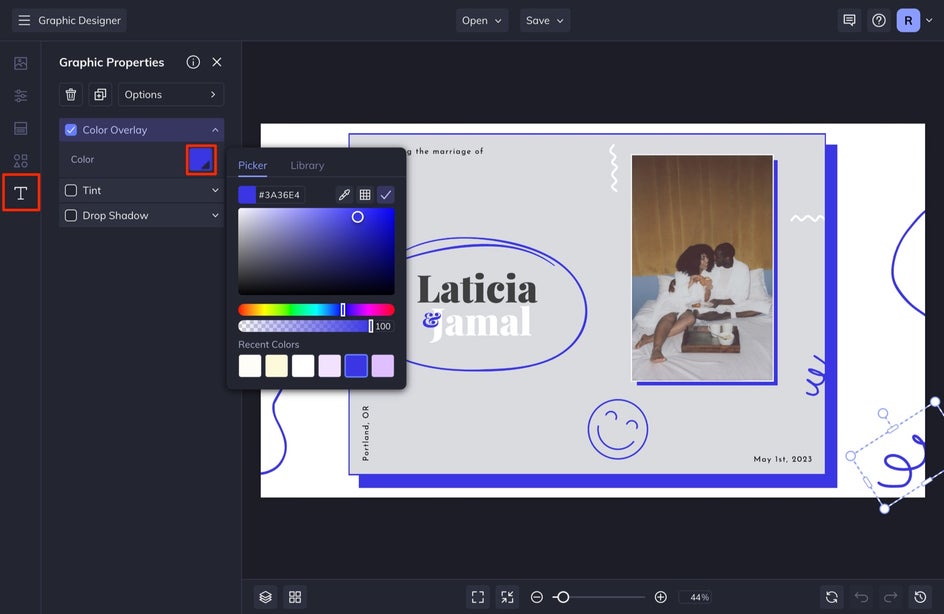
Select the graphics you want and they will be automatically added to Your Graphics. Simply drag and drop them onto your canvas. You can also select any of these graphics and a Graphic Properties menu will appear where you can change the Color Overlay or other Options.
Step 5: Save the Announcement
Once you’re happy with your design, select Save at the top of your screen. Select Computer to save it to your computer. You will want to select the PDF tab and then select Print.
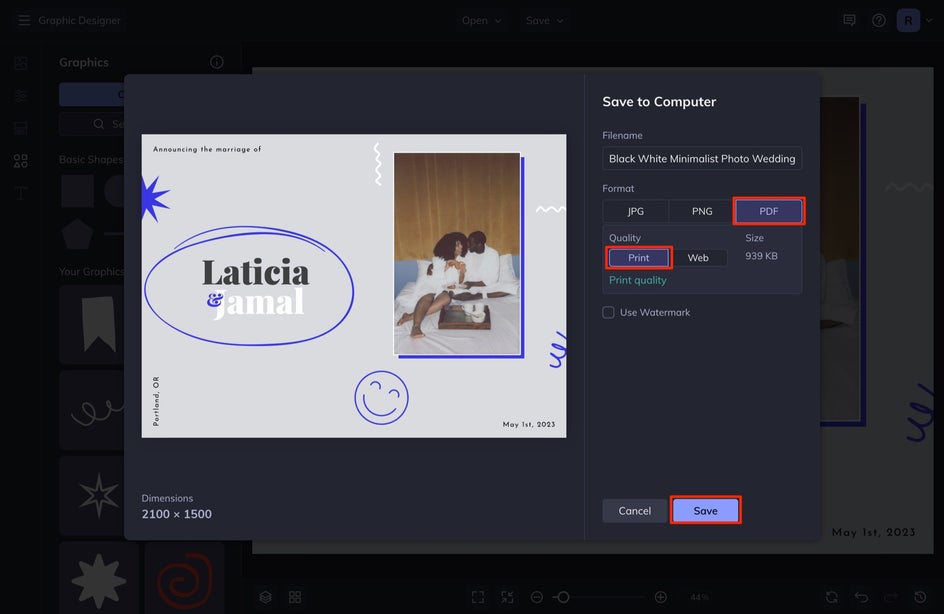
I also select Save as Project so that I can come back to the design later if I need to make any edits.
Keep It Stress-Free. Design an Elopement Announcement!
Thanks to BeFunky’s Elopement templates in our Graphic Designer, spreading the good news just got a whole lot easier! Thinking of foregoing printed announcements? You can also opt to share your exciting announcement via social media, email, or text message using the digital file instead!