


How to Design Your Own Easter Egg Hunt Invitations

From its celebration of rebirth and renewal to devouring more chocolate than you can handle—there’s a lot to love about Easter. One Easter tradition we can all get behind is the Easter egg hunt, whether you’re the hider or the seeker of the eggs.
Although this ritual might seem like a recent one, it actually dates back to the late 16th century. Protestant reformer Martin Luther asked his congregation of men to hide eggs for the women and children to find. The tradition then slowly deviated from its religious roots to incorporate the Easter Hare—or as we know it today, the Easter Bunny.
If you’re thinking of hosting your very own egg hunt this Easter, BeFunky’s Invitation Maker has got you sorted! Our wide range of pre-designed invitation templates can be tweaked in just minutes for the most perfect Easter egg hunt invite yet.
How to Design DIY Easter Egg Hunt Invitations
Ready to make your own Easter egg hunt invitation? Simply head to the Invitation Maker to get started. This will take you directly to the library of invitation templates within our Graphic Designer.
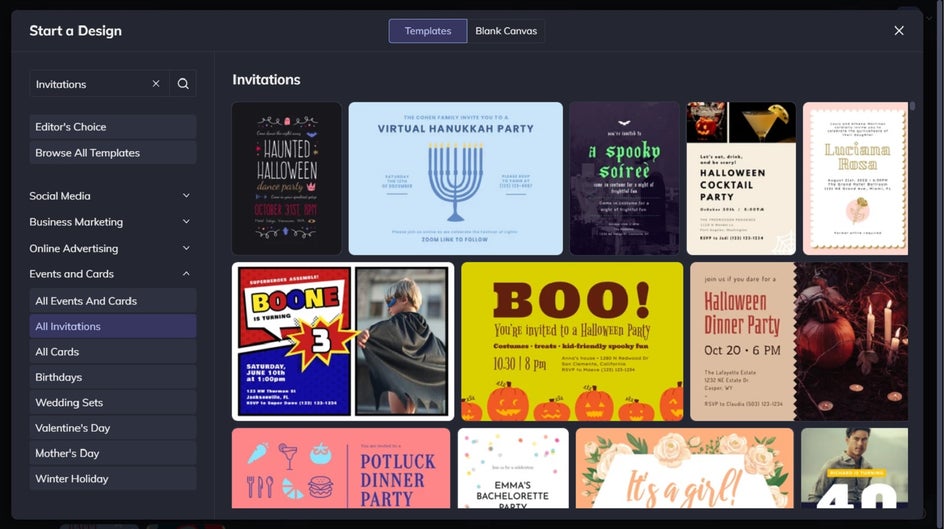
Step 1: Choose Your Invitation Template
Select a pre-designed template that takes your fancy to edit for your Easter egg hunt. Alternatively, you can type “Easter” into the search bar at the top left of the screen to view Easter-specific templates to tweak. Click on the template, then select Use This Template to begin editing.
If you’re feeling extra creative and want to start from scratch, click on Blank Canvas at the top of the screen instead and select your desired invitation size.
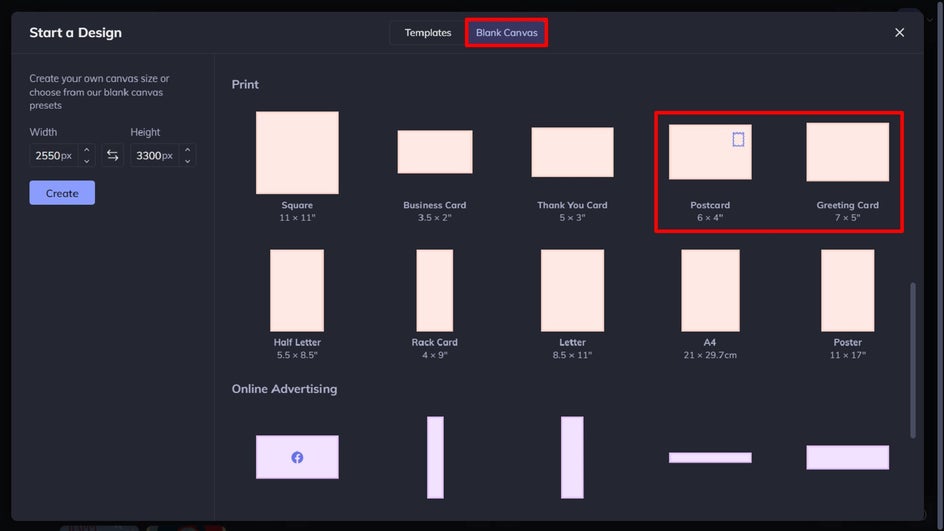
If you’re wondering what Easter egg hunt invitation sizes are the most popular, we’d recommend opting for 7” x 5” (Greeting Card) or 6” x 4” (Postcard). These are common invitation sizes that are both convenient to print and place inside standard-sized envelopes – if you choose to!
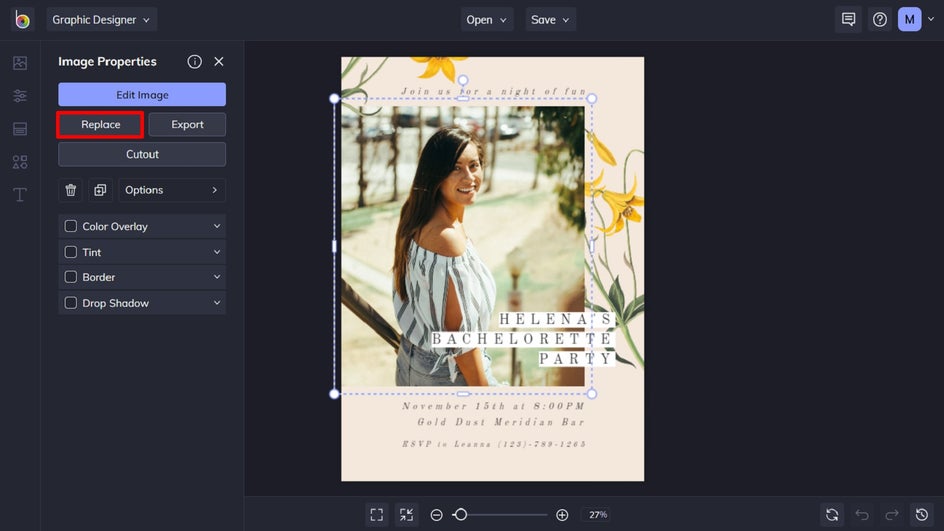
Step 2: Swap Out the Existing Image
Once your template has loaded, it’s time to swap out the existing photo for one of your own. You can do this by clicking on the image and then selecting Replace from the Image Properties toolbar which appears.
Alternatively, you can navigate to Image Manager from the main menu (the first option) and upload your desired image from your computer, Facebook, or BeFunky. Then, simply drag and drop the image thumbnail to replace the existing image on the template.
If you want to use an Easter themed stock photo on your invitation instead, simply click Search Stock Images in the Image Manager, then type “Easter” into the search bar at the top left.
Not all invitation templates have to contain a photo, however, so if you’ve chosen a template only containing text and graphics, you don’t have to do this.
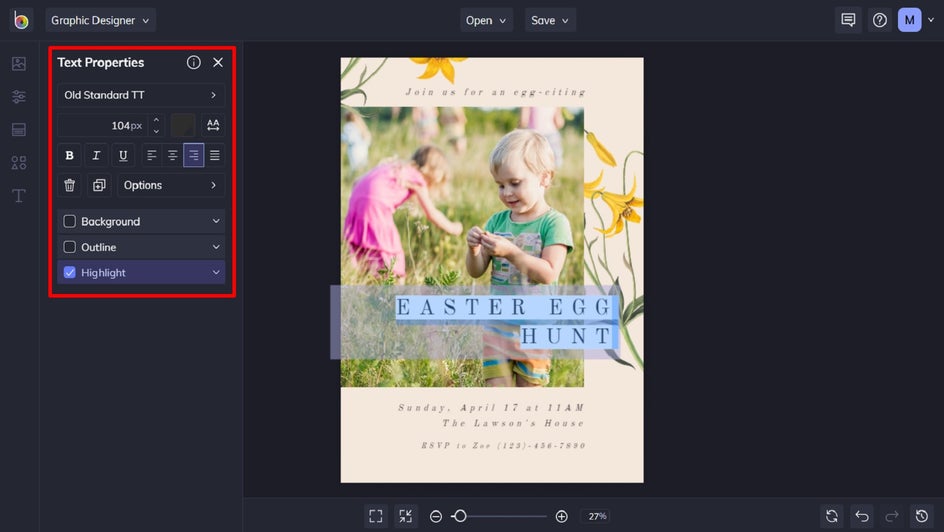
Step 3: Edit the Existing Text
Next, it’s time to personalize the text and change the existing message. To do this, click on any text box on your template twice and type anything you want. When you select a text box, a Text Properties toolbar appears where you can also adjust things such as the Font, Size, Color, Spacing, and more. You can also add a new text box by navigating to the Text tab in the main menu on the left and then clicking Add Text.
Step 4: Change the Background Color
If you fancy changing the background color of your invite, you can do this by selecting Customize in the main menu and choosing one of the colored squares. You can also select a color of your choosing by clicking on the first square with the dropdown symbol on it. Find your desired shade using the Color Chart, type in its HEX Color Code, or use the Eye Dropper Tool to use a hue already present in your design.

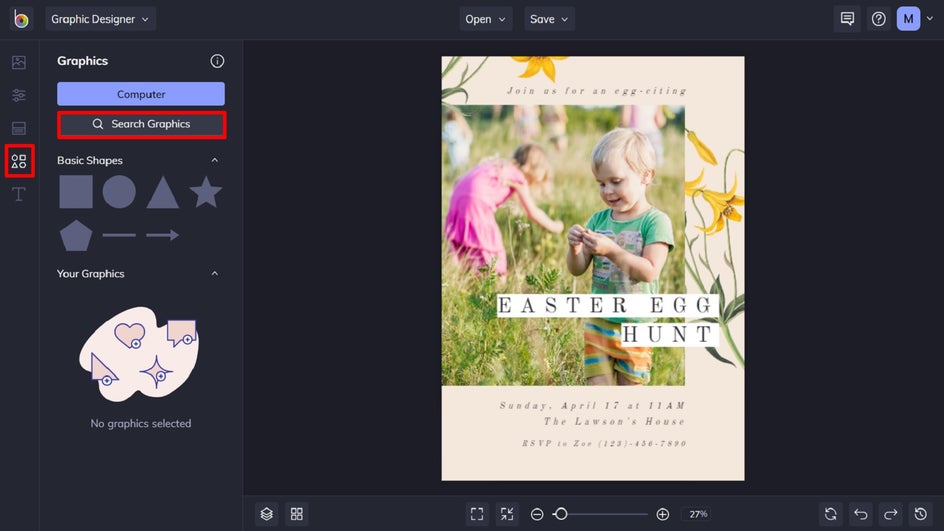
Step 5: Add and Customize Graphics
If you want to add some additional, fun elements to your card, click on the Design Elements in the main menu on the left. You can choose from Basic Shapes or click Search Graphics to access BeFunky’s huge library of clip art, symbols, lines, and more. You can even type “Easter” into the search bar in the top-left of the library to find graphics related to the holiday.
Simply click on the graphics you wish to use, and they will be added to the Your Graphics section. You can then use your mouse to click and drag the graphic onto your invitation design.
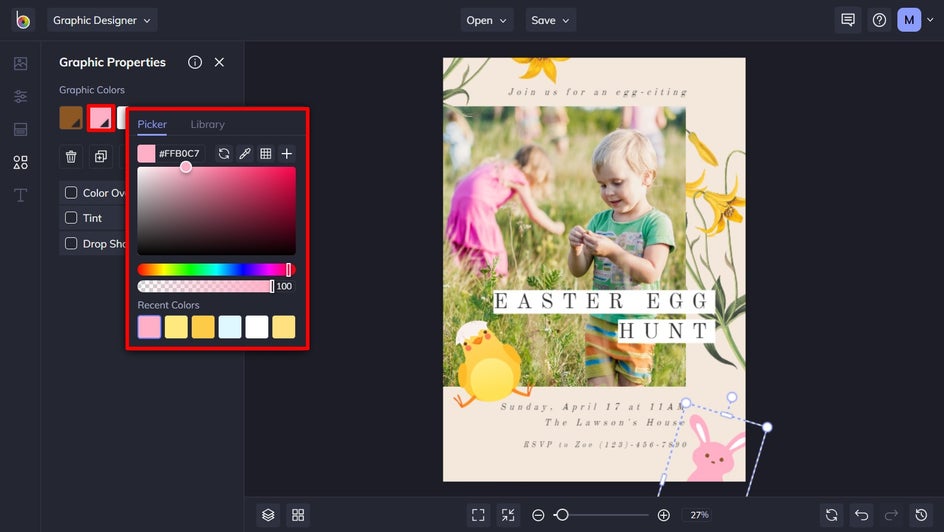
If you want to change the color of a new or existing graphic, this is easy to do. Click on the graphic you wish to alter, and a Graphic Properties panel appears. Simply click the swatches underneath Graphic Colors (or Color Overlay, depending on your image), then select a color from the Color Picker. You can also type in your desired Color HEX Code (if you know it) or use the Eyedropper Tool to select a hue already present in your design.
Step 6: Save Your Easter Egg Hunt Invite
Once you’re happy with your Easter egg hunt invitation design, all that’s left to do is save it so it’s ready to share with your loved ones – either digitally or by printing it out and mailing it to them. Click Save at the top to save your work to your computer, as well as Facebook, Dropbox, and more!
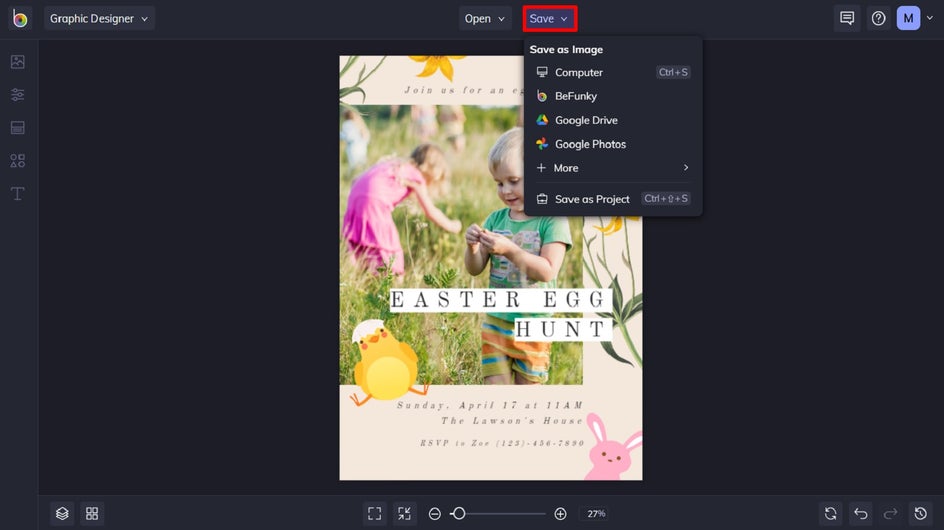
If you want to come back to your project at a later date (i.e., to tweak your design for next year’s egg hunt), then we also recommend the Save as Project option, which lets you save it as an editable BeFunky Project file to your BeFunky account or computer.
Final Results
Wasn’t that easy? With just a few simple tweaks, you can easily create an Easter egg hunt invitation that looks like it was designed by a pro!

Make Easter Easier With Our Invitation Templates
With a DIY egg hunt invite that looks this good, your event might be the most popular in town. Now that you’ve sorted the invitations, all that’s left to do is hide the eggs of course!
Holidays are already busy enough, so save yourself some time this Easter by letting BeFunky do the heavy lifting. Try the Invitation Maker for yourself to see just how easy it is.


