How to Give Yourself a Digital Makeover

It happens to the best of us: You’ve built a Pinterest mood board of bright pink hairstyles, but are unable to commit to actually dyeing your hair. You’re wavering between two different shades of lipstick while online shopping, but you still can’t tell whether you’re a winter or a summer and you end up getting neither. Or maybe you just have the nearly perfect picture of yourself, but there’s a blemish only you can see that’s bothering you to no end.
These three problems might seem unrelated, but they all have the same solution: BeFunky’s Touch Up tools and the AI Portrait Enhancer. You can use these tools together to mess around with a new look, enhance a selfie, edit a professional headshot, and more. No professional photo editing skills needed!
All you need is an Internet connection, a picture of yourself (or someone else), and a few minutes of your day. With these tools at your disposal, you’ll be an expert in digital makeovers in no time.
Transform Your Portraits Like a Pro
Makeovers in real life might be limited by the makeup you own or the stylists you can afford, but a digital makeover has almost no restrictions. Whether you just want to touch up a selfie or completely transform your look, BeFunky’s tools are here to help. In this tutorial, we’ll show you how to smooth and soften unwanted features as well as how to change your makeup, hair color, and eye color for a fun new look.
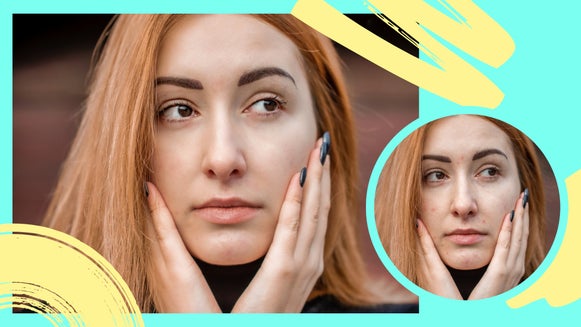
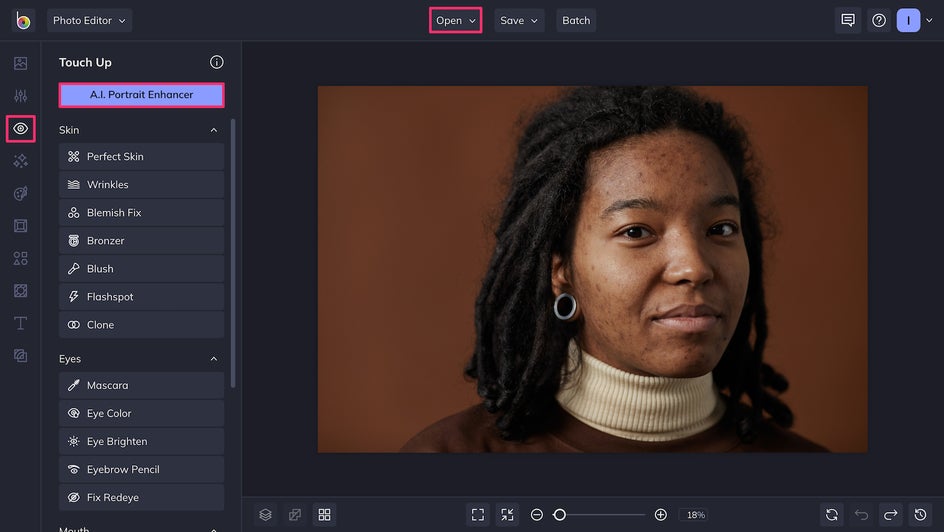
Step 1: Achieve Perfect Skin With the AI Portrait Enhancer
To get started on your digital makeover, head to the Touch Up tab in the Photo Editor and open the portrait you’d like to transform. For a quick fix, all you have to do is click the blue AI Portrait Enhancer button at the top of the screen.
This tool uses artificial intelligence to instantly brighten your image and make you stand out while also softening pores, fine lines, and blemishes. It can even whiten your smile! Don’t worry: It won’t blur your freckles, alter your facial structure, or change your features in any way. After all, we still want you to look like you.
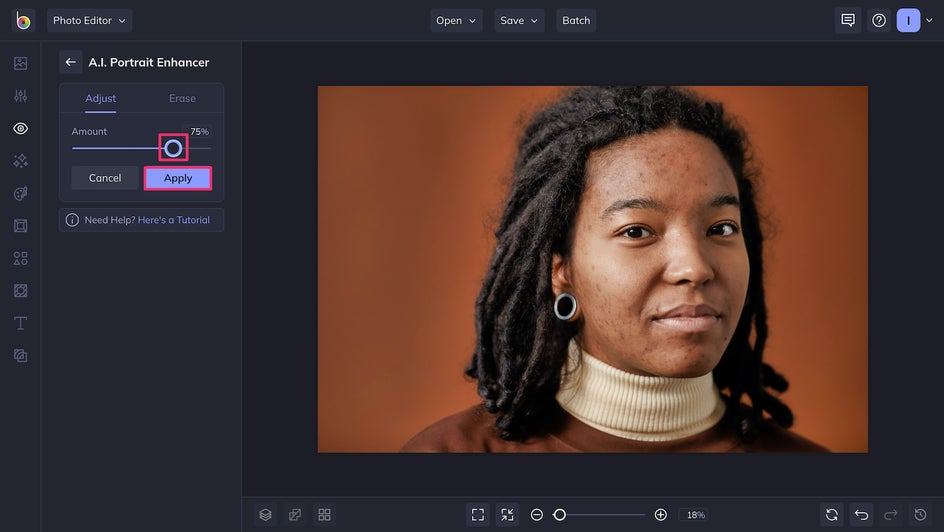
Once you’ve clicked the Enhancer button, you can adjust the Amount slider to change the effect’s intensity. When you’re ready to put your changes into effect, just click Apply.
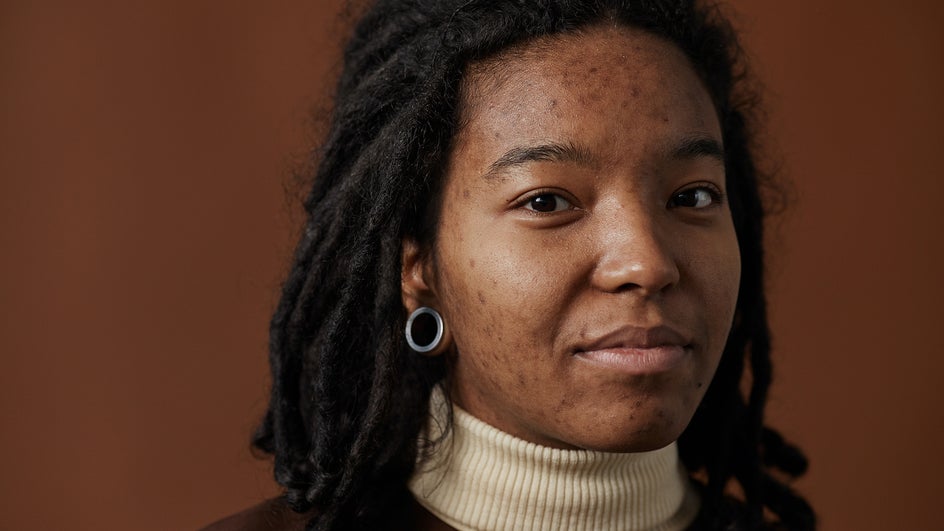
Step 2: Banish Pesky Blemishes
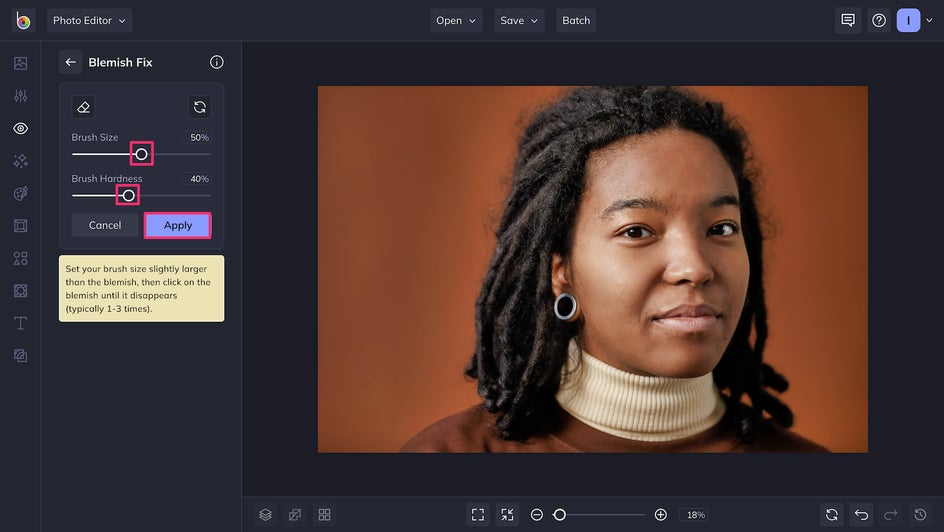
Just like with makeup, it’s best to start with skincare first. Blemish Fix can be used to quickly brush over any stubborn blemishes and dark spots that need more attention.
With the Brush Size slider, you can use a bigger brush for large areas and a smaller one for detailing. Decrease the Brush Hardness slider to give your changes a softer edge. You can change the strength of Blemish Fix at any time to adjust the intensity of the effect.
If you’re going for a purely natural look, you can always stop here. But if you want to learn how to apply makeup without ever having to touch a tube of lipstick, read on!
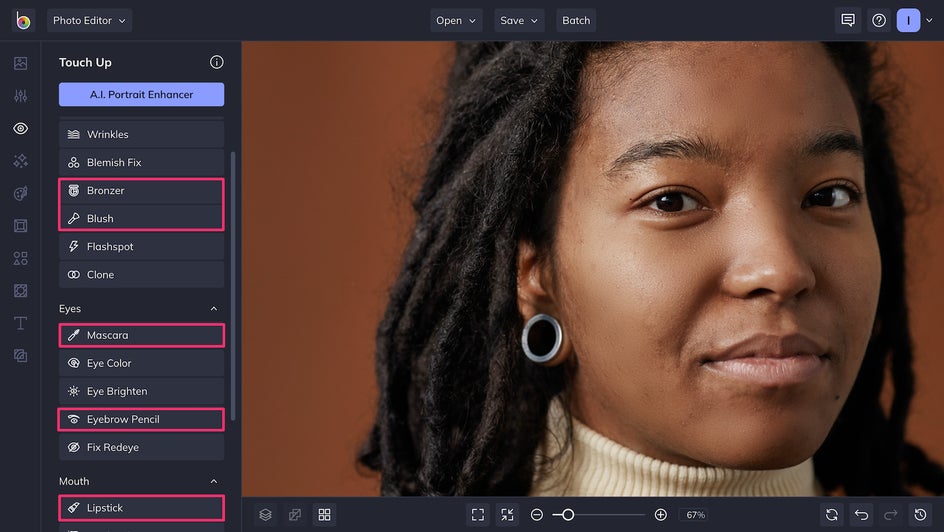
Step 3: Unzip Your Digital Makeup Bag
These makeup effects work similarly to the other Touch Up tools: You have a brush and can adjust the strength, size, and hardness. Of course, you can also pick which colors you want to use! We’ll hone in on the Blush and Lipstick tools, but here are all the makeup effects we ended up using:
The Blush tool allows you to add a flush of color to your subject’s cheeks, imbuing the portrait with more warmth and depth. A soft brush works well here to make the effect look natural - and don’t forget, you can always change the intensity of the color using the Strength slider.
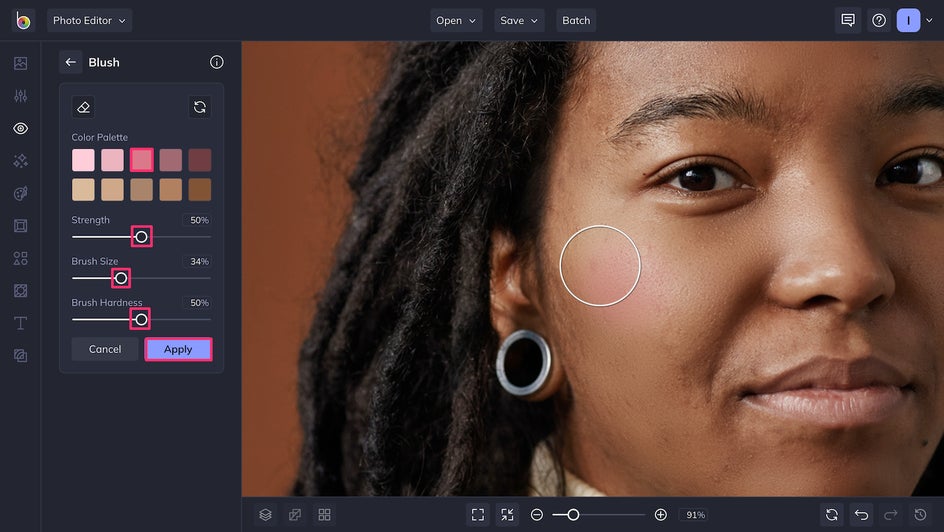
Pro Tip: If your subject’s face is partially in shadow, as is the case here, you can use a brighter blush on the brighter areas and click Apply. Then, use a darker blush on the areas that are in shadow and Apply again to make the changes permanent. This makes it that much harder to tell the digital blush from the real thing!
With the Touch Up tools, lipstick application is a breeze. Just brush the color onto the lips and use the Erase tool if you accidentally go outside the lip line. Unlike in real life, there will be no smudge marks! Don’t forget to Apply to save your changes.

There’s a set palette of colors for you to choose from. But if none of these are satisfactory, just click the leftmost swatch to open the Color Picker for more options.
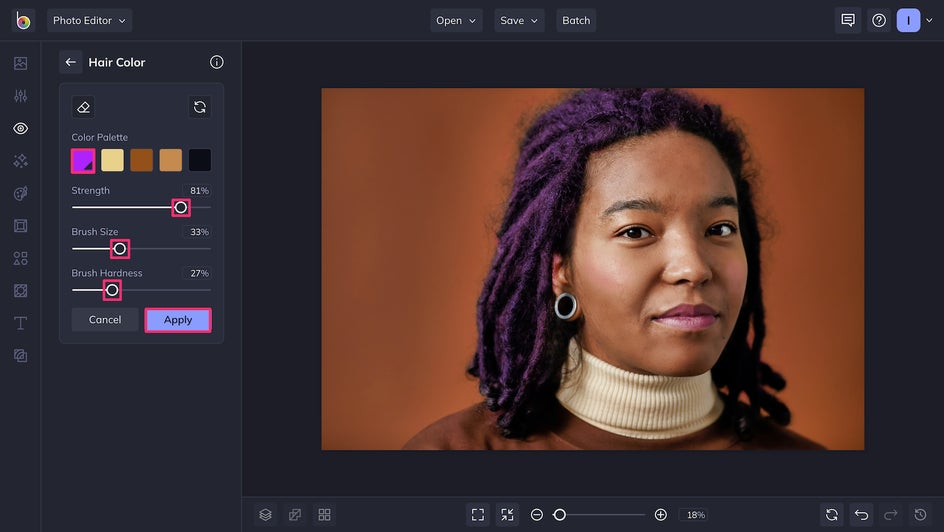
Step 4: Go Bold With Color
Speaking of colors, your opportunities for transformation aren’t limited to makeup. Even your hair and eye color can be changed! This can completely revamp your look for a new profile photo, or you can use it to try out some unique styles without having to permanently commit to them. Here, we changed our subject’s hair to a bold purple by going over it with a few swipes of the Hair Color brush:
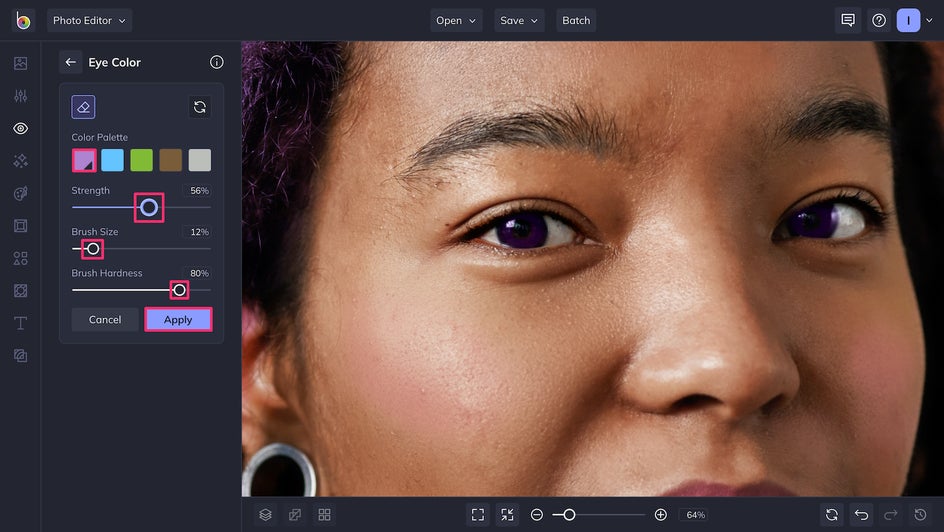
We also changed the eye color to match. This tool can be a little intense, so adjust the color and strength as you see fit!
We also added a few more touch ups here and there: eyebrow fill, some bronzer, and more. But once you’ve learned how to use one, you know how to use them all!
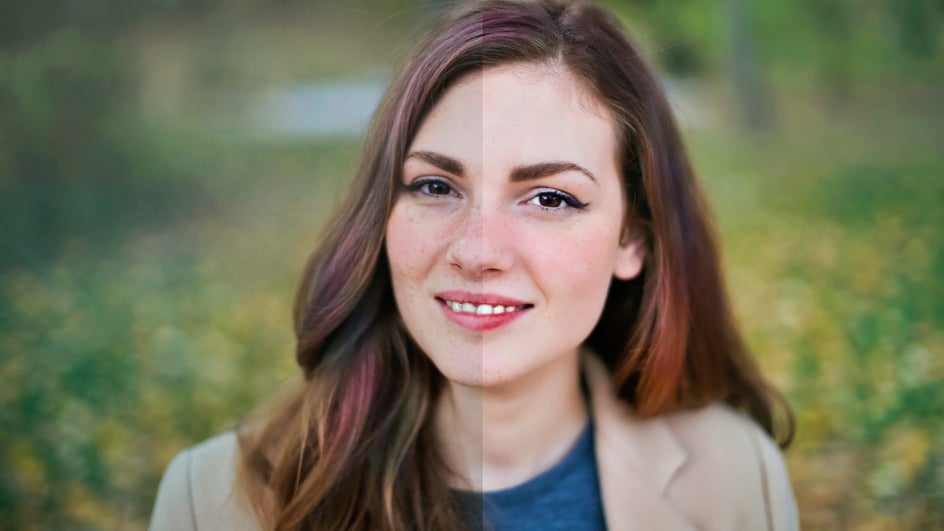
A Few Clicks to a Brand New Look
In just a few steps, we were able to smooth out and spruce up this portrait, bringing out all of our subject’s best features. Afterward, we were able to complete a total makeover, from makeup to hairstyle. Just check out this transformation:

Fairy godmothers might not exist, but these Touch Up tools are the next best thing. Whether you simply want to enhance a portrait or try out a whole new aesthetic, you can transform your look as quickly and as easily as you could wave a magic wand. Just open up the Photo Editor and head to the Touch Up tools tab to start your own digital makeover session!